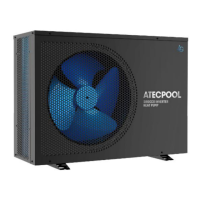
The ATECPOOL SIROCCO Inverter Heat Pump is a full DC inverter swimming pool heat pump designed for efficient heating and cooling of swimming pools. This user manual provides comprehensive information regarding its parameters, specifications, installation, running tests, and Wi-Fi settings.
Function Description
The ATECPOOL SIROCCO Inverter Heat Pump is primarily designed to heat and cool swimming pool water. It utilizes a full DC inverter technology, allowing for variable capacity operation to maintain the desired water temperature efficiently. The unit can operate in various modes, including heating, cooling, silent, smart, and powerful modes, to adapt to different environmental conditions and user preferences. It also features a forced defrosting mode for optimal performance in colder temperatures and an electric heater function for supplementary heating.
The heat pump integrates with a filtration circuit via a by-pass valve, ensuring proper water flow and allowing for maintenance without interrupting the filtration cycle. Condensation water produced during operation is drained from the bottom of the unit. The system can be controlled through a local control panel with a display screen and various buttons for mode selection, temperature adjustment, and timing settings. Additionally, it supports Wi-Fi connectivity, enabling remote control and monitoring via a smartphone application called "Smart Life."
Important Technical Specifications
The ATECPOOL SIROCCO series includes several models: AIHP115, AIHP180, AIHP212, and AIHP253, each with varying capacities and dimensions.
General Specifications (common to all models unless specified):
- Refrigerant: R410A
- Compressor: MITSUBISHI ELECTRIC (DC inverter)
- Air side heat exchanger: Hydrophilic fin exchanger
- Water side heat exchanger: Titanium tube heat exchanger
- Water pipe connection: Inlet/Outlet 50mm
Model-Specific Specifications:
| Model |
Power Supply |
Max. Input Power (kW) |
Max. Current (A) |
Water Flow (m³/h) |
Net Dimension LxWxH (mm) |
Net Weight (kg) |
Noise Level dB(A) |
| AIHP115 |
220-240V~/50-60Hz |
1.9 |
13.7 |
4.7 |
980x399x660 |
44 |
54 |
| AIHP180 |
220-240V~/50-60Hz |
2.3 |
20.9 |
7.7 |
980x399x660 |
52 |
55 |
| AIHP212 |
380-415V/3N~/50-60Hz |
5.4 |
10.5 |
9.1 |
1125x455x765 |
75 |
58 |
| AIHP253 |
380-415V/3N~/50-60Hz |
6.5 |
12.5 |
10.9 |
1125x455x765 |
85 |
59 |
Heating Capacity (kW) and COP (Coefficient of Performance) at various ambient and water temperatures:
- Ambient 27°C/24.3°C (DB/WB), Water Inlet/Outlet 26°C/28°C:
- AIHP115: 2.8~11.5 kW, COP 14.5~6.65
- AIHP180: 4.35~18.0 kW, COP 14.2~6.47
- AIHP212: 4.72~21.2 kW, COP 14.3~5.91
- AIHP253: 4.78~25.3 kW, COP 14.48~5.8
- Ambient 15°C/12°C (DB/WB), Water Inlet 26°C:
- AIHP115: 3.01~8.53 kW, COP 7.65~5.36
- AIHP180: 3.42~10.73 kW, COP 7.55~4.95
- AIHP212: 3.5~14.2 kW, COP 7.45~4.93
- AIHP253: 3.8~17.1 kW, COP 7.76~4.93
- Ambient 43°C/- (DB/WB), Water Inlet/Outlet 30°C/28°C (Cooling Capacity and EER):
- AIHP115: 2.04~5.75 kW, EER 4.25~1.98
- AIHP180: 2.83~8.3 kW, EER 4.08~1.83
- AIHP212: 3.0~9.6 kW, EER 4.01~1.79
- AIHP253: 3.6~10.65 kW, EER 4.09~1.78
Temperature Ranges:
- Heating temperature range: 27°C~34°C
- Cooling temperature range: 26°C~15°C
- Running temperature range: -10°C~48°C
Electrical Connection:
- Cable Diameter and Specification:
- AIHP115/AIHP180: 3x2.5mm², AWG 14
- AIHP212/AIHP253: 5x4.0mm², AWG 12
- Leakage protector with operating current ≤ 30mA is recommended.
Usage Features
Control Panel Operation:
The heat pump features a user-friendly control panel with various symbols and buttons for easy operation:
- On-off: Powers the unit on or off (long press for 3 seconds).
- Set: Enters parameter query mode (long press for 3 seconds).
- Heating Mode or Defrosting: Switches to heating or defrosting mode.
- Cooling Mode: Switches to cooling mode.
- Silent Mode: Activates silent operation.
- Smart Mode: Engages smart operating mode.
- Powerful Mode: Activates powerful operating mode.
- Up/Down (+/-): Adjusts temperature settings, browses parameters, and sets time.
- Key lock: Locks the control panel.
- Fault: Indicates a fault.
- Timer: Sets timing functions.
- Mode (M): Switches between heating and cooling modes (long press for 3 seconds).
- Wi-Fi: Activates Wi-Fi connectivity.
Key Operations:
- Unlock/Lock Screen: Press "+" and "-" keys for 3 seconds.
- Check Running Parameters: Long press "Set" for 3 seconds to enter query mode, use "+/-" to browse, and "Set" to exit.
- Choose Mode: Long press "M" for 3 seconds to switch between heating and cooling.
- Mode Switch: Press "Set" to switch between mute, smart, and strong modes.
- Adjust Temperature: Use "+/-" to adjust the setting temperature for the current mode.
- Adjust Time: Long press "Set" and "+" for 3 seconds to enter clock setting. Use "+/-" to adjust hour and minute, then "Set" to confirm.
- Adjust Timing: Long press "Timer" for 3 seconds to enter timing setting. Use "+/-" to set on/off times.
- Forced Defrosting: Press "M" and "-" keys simultaneously.
- Celsius/Fahrenheit Switch: When off, press "On-off" and "M" for 3 seconds.
- Turn on Electric Heater Manually: Long press "+" for 3 seconds.
Wi-Fi Settings:
The heat pump can be controlled remotely via the "Smart Life" app.
- Activate Wi-Fi: Press and hold "-" and "On-off" keys for 3 seconds. The Wi-Fi icon will flash.
- App Download: Search for "Smart Life" in your app store.
- Registration/Login: Register a new user or log in if you have an existing account.
- Connect to Wi-Fi: Ensure your mobile phone is connected to a 2.4GHz Wi-Fi network.
- Add Device: In the app, click "+" or "Add a device."
- Select Device Type: Navigate to "Smart Heat Pump" under "Electrician."
- Reset Device: Confirm the indicator is blinking slowly.
- Enter Wi-Fi Password: Input your home Wi-Fi password.
- Connect to Device Hotspot: Connect your phone to the "SmartLife_XXXX" hotspot.
- Pairing: The app will proceed with pairing and distribution network processes.
- Control: Once successfully added, the device will appear in the app, allowing remote temperature adjustment, mode selection, and timing settings.
Maintenance Features
Installation Requirements:
- Professional Installation: Installation must be performed by a professional installer in compliance with local laws and regulations.
- Ventilation: The unit requires good ventilation; ensure no obstructions within 50cm behind the main machine.
- Mounting: The frame must be fixed to a solid concrete base or strong, antirust-treated brackets using M10 bolts.
- Water Connection: Use hard pipes for water connections, as soft pipes cannot support the weight of the unions. A by-pass kit with three valves is recommended for flow adjustment and isolation during maintenance.
- Pump: An appended pump (not included) is required for water circulation.
- Condensation Drainage: Connect a pipe to the drainage nozzle to manage condensation water.
- Winterization: If the unit is not running during winter, disconnect power and drain water from the unit. If the ambient temperature is below 0°C and the unit is running, keep the water pump running.
Running Test and Inspection:
Before the first run, perform a thorough inspection:
- Confirm correct unit installation, power supply voltage, and piping.
- Ensure air inlet/outlet ports are unblocked and drainage/venting are clear with no leaks.
- Verify the leakage protector and piping insulation are working, and the ground wire is connected.
- Fill the water tank, empty air from pipes, and then power on the unit.
- During the first run, check for normal current, correct function of all buttons, accurate display screen, absence of leaks, proper condensation drain, and no abnormal sounds or vibrations.
Fault Code and Solution:
The unit displays fault codes to indicate issues. If a fault code appears:
- Turn off the unit.
- Wait 30 seconds.
- Turn the unit on again.
If the fault persists, contact the company for troubleshooting. Common fault codes and their solutions include:
- Er. 03 (Water flow protection): Check/change water flow switch.
- Er. 04 (Winter anti-freezing): Water pump runs automatically for first-grade antifreeze.
- Er. 05 (High pressure Protection): Check EEV step, low pressure, suction temp, inlet/outlet water temp, air in refrigeration system, clean water exchanger/filter.
- Er. 09 (Communication failure between Display and PCB): Check/mend communication wire, check/change PCB or display.
- Er. 10 (Communication failure of frequency conversion module): Change PCB.
- Er. 12 (High exhaust temp protection): Replace/reconnect/clean compressor exhaust temperature sensor, replace controller/PC Board.
- Er. 15 (Water inlet temperature failure): Check/change sensor.
- Er. 16 (External coil temperature failure): Check/change sensor.
- Er. 18 (Exhaust temperature failure): Check/change sensor.
- Er. 19 (DC fan motor failure): Check/change DC fan motor, check output port on PCB, change PCB if no output.
- Er. 20 (Abnormal protection of frequency conversion module): Refer to subsidiary error codes.
- Er. 21 (Ambient temperature failure): Check/change sensor.
- Er. 23 (Low outlet water temp protection when cooling): Check water flow/system, fix/replace if necessary.
- Er. 27 (Water outlet temperature failure): Check/change sensor.
- Er. 28 (Compressor transformer over current protection): Wait 3-5 minutes before restarting, change driver board if compressor transformer is broken.
- Er. 29 (Suction temperature failure): Check/change sensor.
- Er. 32 (High outlet water temperature protection when heating): Check water flow/system, mend if necessary.
- Er. 33 (Outdoor coil high temperature protection): Wait for ambient temperature to drop, then restart.
- Er. 42 (Internal coil temperature failure): (No specific solution provided, implies sensor check/replacement).
Troubleshooting for non-fault code issues:
- Unit not running: Check power, power switch, fuse, and timing settings.
- Unit not running after starting up: Wait for compressor protection time to end or for water temperature to reach the required level.
- Unit running normally but hot water temperature is low: Set proper temperature, wait for water to rise, clear tuyere obstruction.
- Unit running automatically: Shutdown manually or cancel timing if not needed.
The technical specifications are for information purposes only, and ATECPOOL reserves the right to make changes without notice. Noise levels comply with Directives EN ISO 3741 and EN ISO 354.