WWW.ATKBINDINGS.COM | PROUDLY MADE IN ITALY SINCE 2007 39
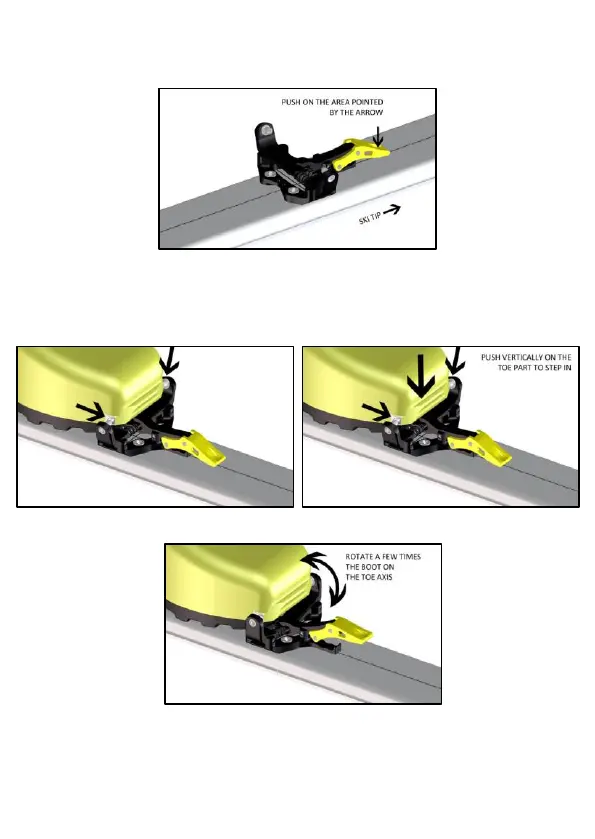
Check that the toe part is in the position shown at PICTURE 19, ready to receive the boot, free from ice,
snow or other debris. If toe is not in the proper position, manually press on the front locking lever in
order to reach the stabilized position shown at PICTURE 19.
Move the boot tip towards the toe part, matching the front TECH insert seats with the toe hooking pins
(PICTURE 20). From this position, vertically push on the toe part to step in. (PICTURE 21/22). Rotate a
few times the boot in order to check the proper boot-binding coupling, as shown at PICTURE 22.
 Loading...