♦
Unscrew the filler plug by two turns, which opens
the venting duct and releases any remaining
compressed air in the lubricator.
♦
Fill the lubricator with oil.
♦
Re-fit and tighten the filler plug. The lubricator is
now ready for use.
Maintenance
Regular maintenance is a basic requirement for the
continued safe and efficient use of the lubricator.
Follow the maintenance instructions carefully.
♦
Before starting maintenance on the lubricator,
clean it in order to avoid exposure to hazardous
substances.
♦
Use only authorised parts. Any damage or
malfunction caused by the use of unauthorised
parts is not covered by warranty or product liability.
♦
When cleaning mechanical parts with solvent,
comply with appropriate health and safety
regulations and ensure there is satisfactory
ventilation.
♦
For major service to the lubricator, contact your
nearest authorised workshop.
Every day
Before undertaking any maintenance on the
lubricator, always switch off the air supply and then
disconnect the air hose from the lubricator.
♦
Clean and inspect the lubricator and its functions
each day before work commences.
♦
Conduct a general inspection for leaks and
damage.
♦
Check that the claw couplings are tightened and
free from damage.
♦
Change damaged parts immediately.
♦
Replace worn components in good time.
♦
Make sure that all the attached and related
equipment, such as hoses are properly
maintained.
Periodic maintenance
Once a year the lubricator must be dismantled and
all parts be cleaned and checked. This work must
be performed by authorised staff, trained for this task.
Assembly instruction
When reassembling the claw couplings on the
lubricator, apply LOCTITE® 577™ (LOCTITE is a
registered trademark of Henkel Corporation. 577 is
a trademark of Henkel Corporation).
Troubleshooting
If the lubricator is not working properly, check the
following points.
♦
Check the oil level.
♦
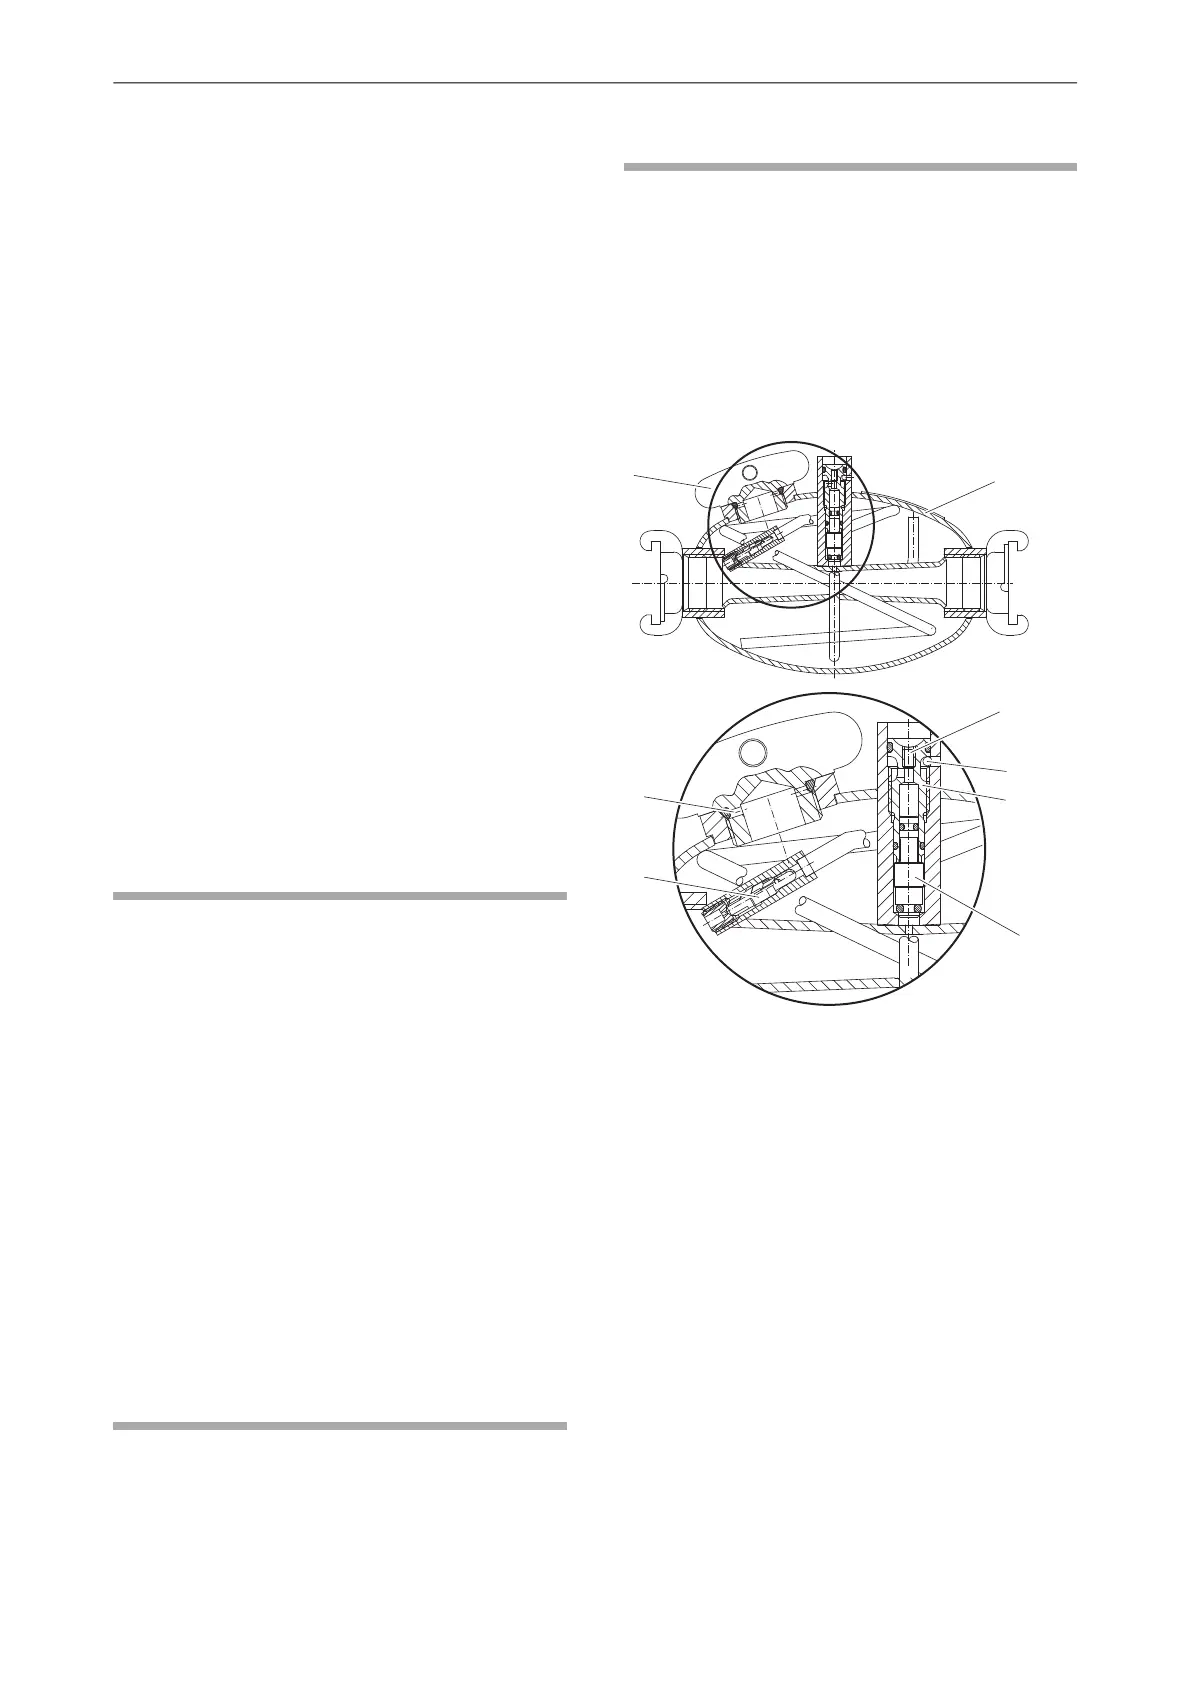
Check the valve cone (A), by first removing the
stop screw (B) and then inserting a pin into the
hole. Switch the air system on and off and feel if
the valve cone (A) is opening and closing correctly.
If the valve cone (A) is not working correctly,
disconnect the lubricator from the compressed air
line and bleed the oil chamber by loosening the
filler plug (F).
♦
Remove the spring pin (C), oil dosage screw (D)
and valve cone (A). Clean the components and if
necessary, change the O-rings. When
reassembling, make sure that the spring pin (C)
is fitted.
♦
Make sure that the check valve (E) is sealing
effectively, if not, clean or replace the check valve
(E).
♦
Check for leakage around the filler plug (F).
© 2015 Construction Tools PC AB | No. 9800 1172 01a | 2015-04-10
Original instructions
10
CLG 10, 10 US, 30, 30 USSafety and operating instructions
 Loading...