2920 1390 02
13
Instruction book
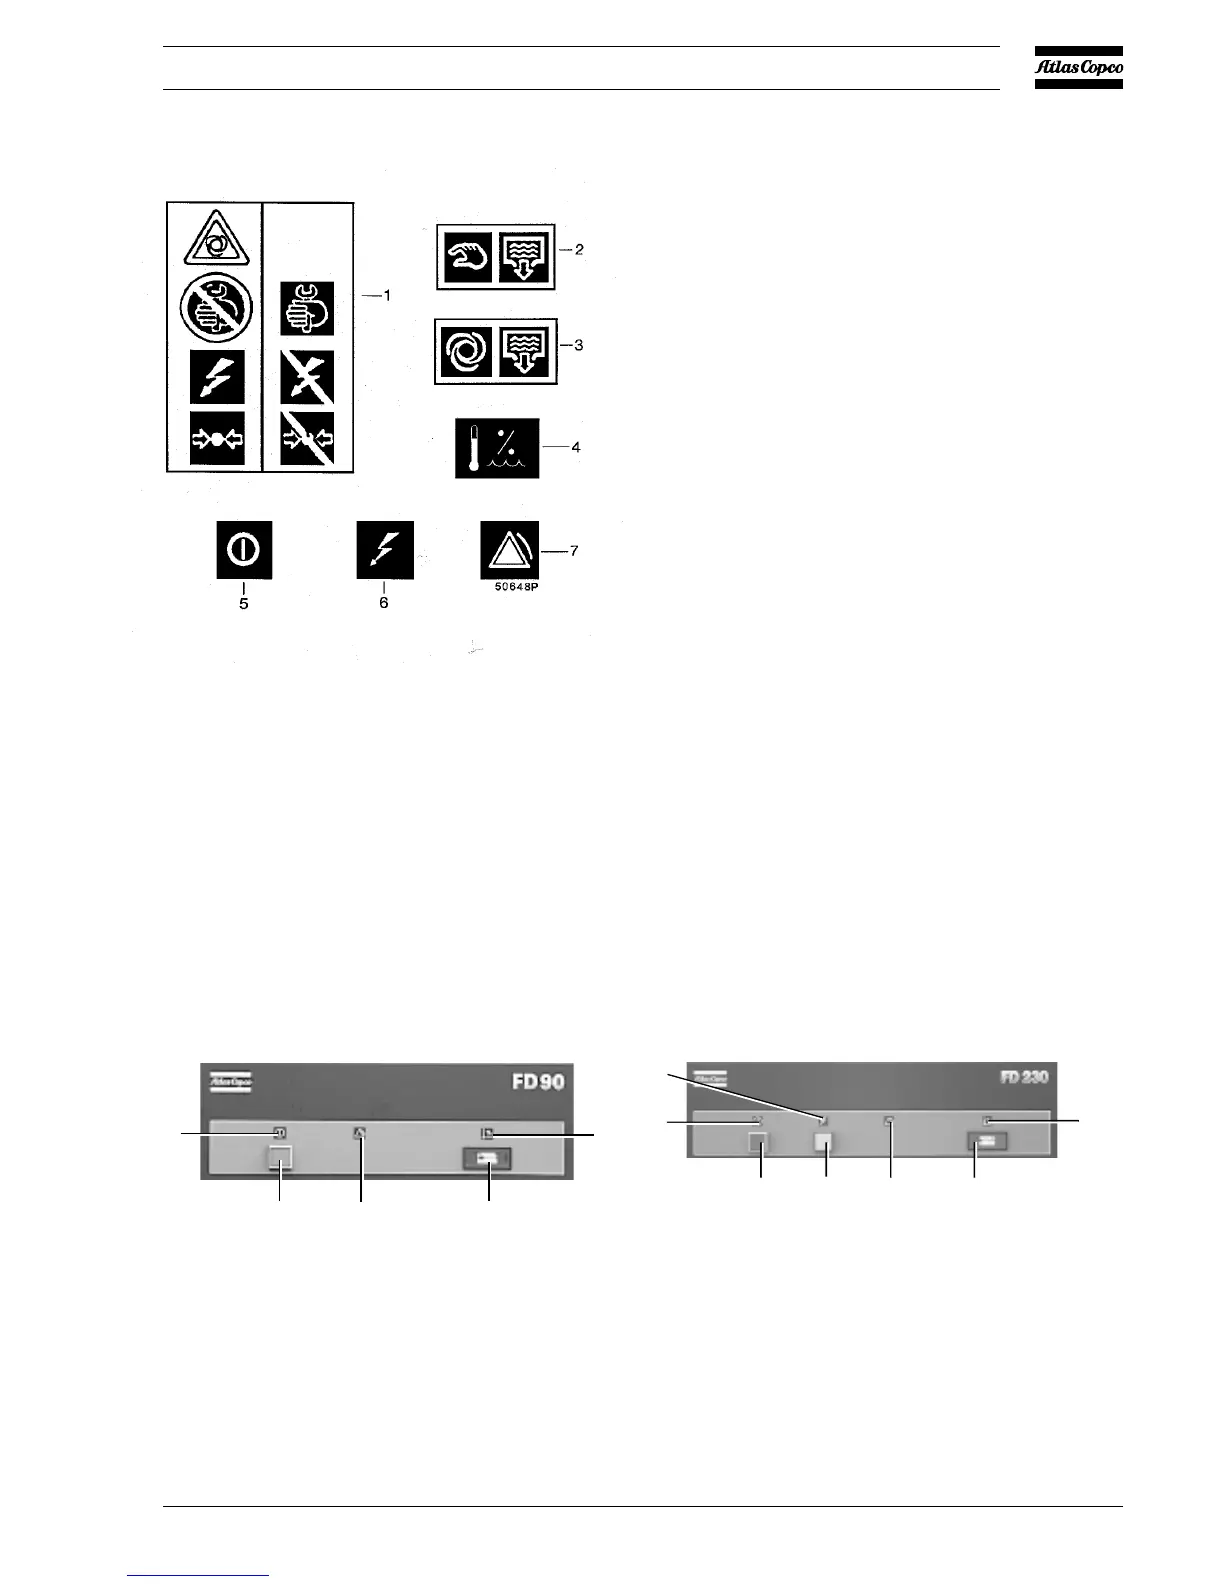
1. Switch off and depressurize the dryer before starting
maintenance or repairs
2. Manual condensate drain
3. Automatic condensate drain
4. Pressure dewpoint
5. Dryer on-off
6. Voltage on
7. Dewpoint alarm
Fig. 2.7 Pictographs
3 OPERATING INSTRUCTIONS
Safety precautions
The operator must apply all relevant safety precautions,
including those mentioned in this book.
Altitude operation
Consult Atlas Copco if operating above 3000 m.
3.1 Initial start
1. At least 4 hours before starting, the mains supply to the
dryer must be switched on to energize the crankcase heater
of the refrigerant compressor.
2. On 3-phase dryers (see section 1.5), press on-off button
(S1-Fig. 3.2). Check that the sense of rotation of fan motor
(M2-Fig. 2.6) is correct. Cooling air must be drawn in
through the condenser and blown over the refrigerant
compressor to outside the dryer. If wrong, switch off the
voltage and reverse two of the three phase connections at
the mains terminals.
3.2 Starting (Figs. 3.1 and 3.2)
1. On FD170 and FD230, switch on the voltage 4 hours before
starting to energize the crankcase heater. Voltage on lamp
(H1) is alight.
2. If installed, close the dryer by-pass valve.
3. Press on-off button (S1).
4. Open the dryer air inlet valve (customer's installation).
5. Approx. 5 minutes later, open the dryer air outlet valve
(customer's installation).
6. Approx. 10 minutes later, the nominal dewpoint will be
reached.
H1. Indicator lamp, VOLTAGE ON
H2. Indicator lamp, DRYER RUN
S1. Button, ON-OFF
1. Pressure dewpoint indicator
2. Pictograph, pressure dewpoint
3. Pictograph, dryer on-off
4. Pictograph, dewpoint alarm
5. Pictograph, voltage on
Figs. 3.1 and 3.2
Fig. 3.1 Control panel of FD90 up to FD130
(typical example)
Fig. 3.2 Control panel of FD170 and
FD230 (typical example)
2.4 Pictographs (Fig. 2.7)
50647F
2
14S1/H1
3
1
2
3
4
S1/H2
H1
5
50642F
 Loading...