2
PAGE
Repair Instructions No.189.03/01
PHE 45 S
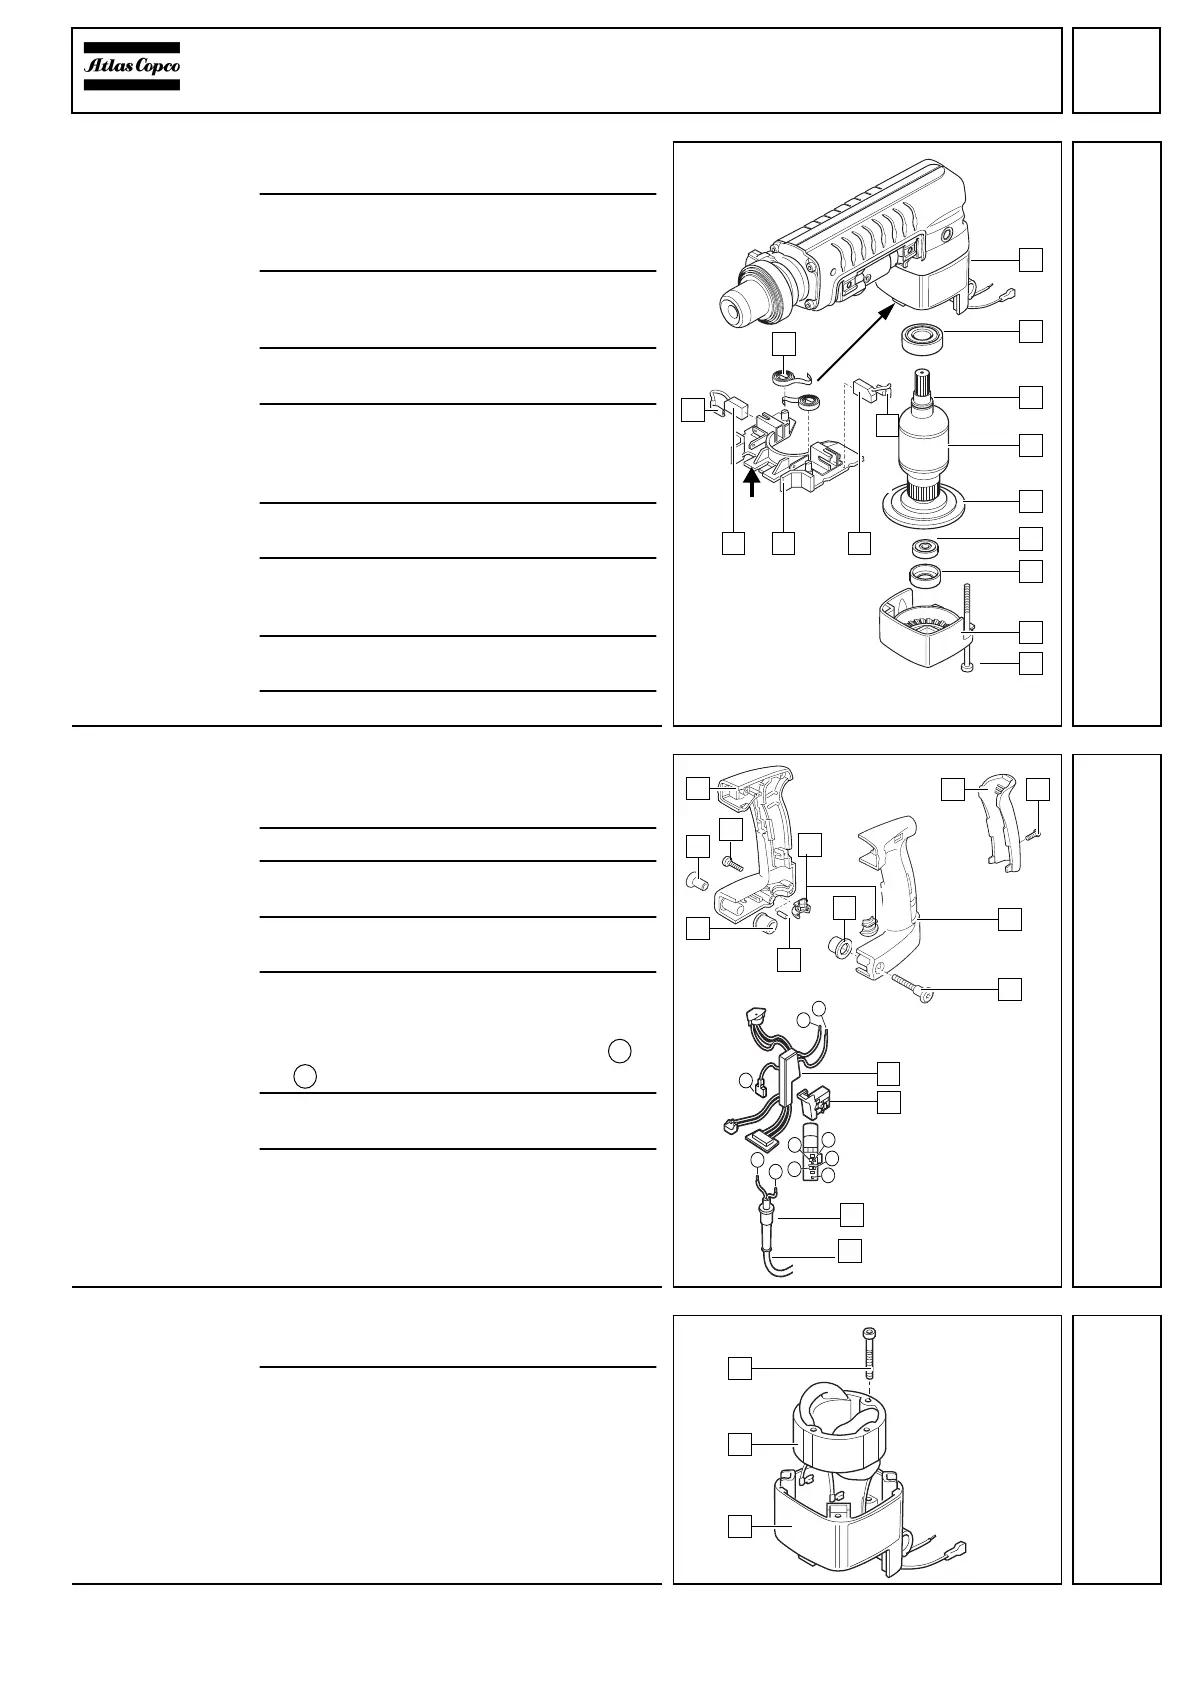
Removing
the armature
1
Loosen the four screws (B) and remove
the motor housing cap (A).
2
Remove the respective brush springs (2)
from the carbon brushes (D) and place them
on the upper edge of the brush holder (E).
3
Pull the cable lugs (1) and (C) from the
carbon brushes (D) and pull out the car-
bon brushes.
4
Slightly lift the brush holder (E), unlatch
them (see arrow) and take them out.
5
Remove the armature (6) completely with
the fan (7) from the motor housing (3) by
turning it. If necessary, use a plastic ham-
mer for support.
6
Remove the bearing bush (9) from the ball
bearing (8).
7
Press the ball bearing (8) as well as the
ball bearing (4) from the armature with aid
of the forcing disks (service tool).
8
If necessary, press the fan (7) from the ar-
mature (6).
9
Remove the plug (5) from the armature (6).
Removing the
electric
components
1
Remove the handle screw (B) steadying
the knurled nut (5) at the same time. Re-
move the knurled nut (5).
2
Loosen the screw (2).
3
Loosen the screw (9) and lever off the soft
grip (8).
4
Remove the handle shell (6) with the hold-
ing-down device (3).
5
Loosen the cable clamp (7) and lay bare
the connection cable (E) with the protec-
tion cover (D).
Pull off the switch connection wires -
.
6
Remove the switch (C) with handle
shell (6).
7
Remove the sleeves (4) and the handle
shell (A).
Detaching
the field
1
Remove the motor housing (1) with the
field (2) from the crankcase.
2
Loosen the two screws (3) and remove the
field (2) from the motor housing. If neces-
sary, use a plastic hammer for support.
1
6
5
4
3
2
7
8
9
A
B
C
DED
a
f
a
e
f
d
d
f
b
c
a
b
6
5
4
3
2
7
8 9
A
B
E
D
C
4
1
1
2
3
 Loading...