Power options
AC power operation
Connect the appropriate AC power cord for your region to the AC
connector on the Ronin rear panel. Ensure that the power source is
correct for this use. Power requirements are listed in the Ronin manual.
DC power operation
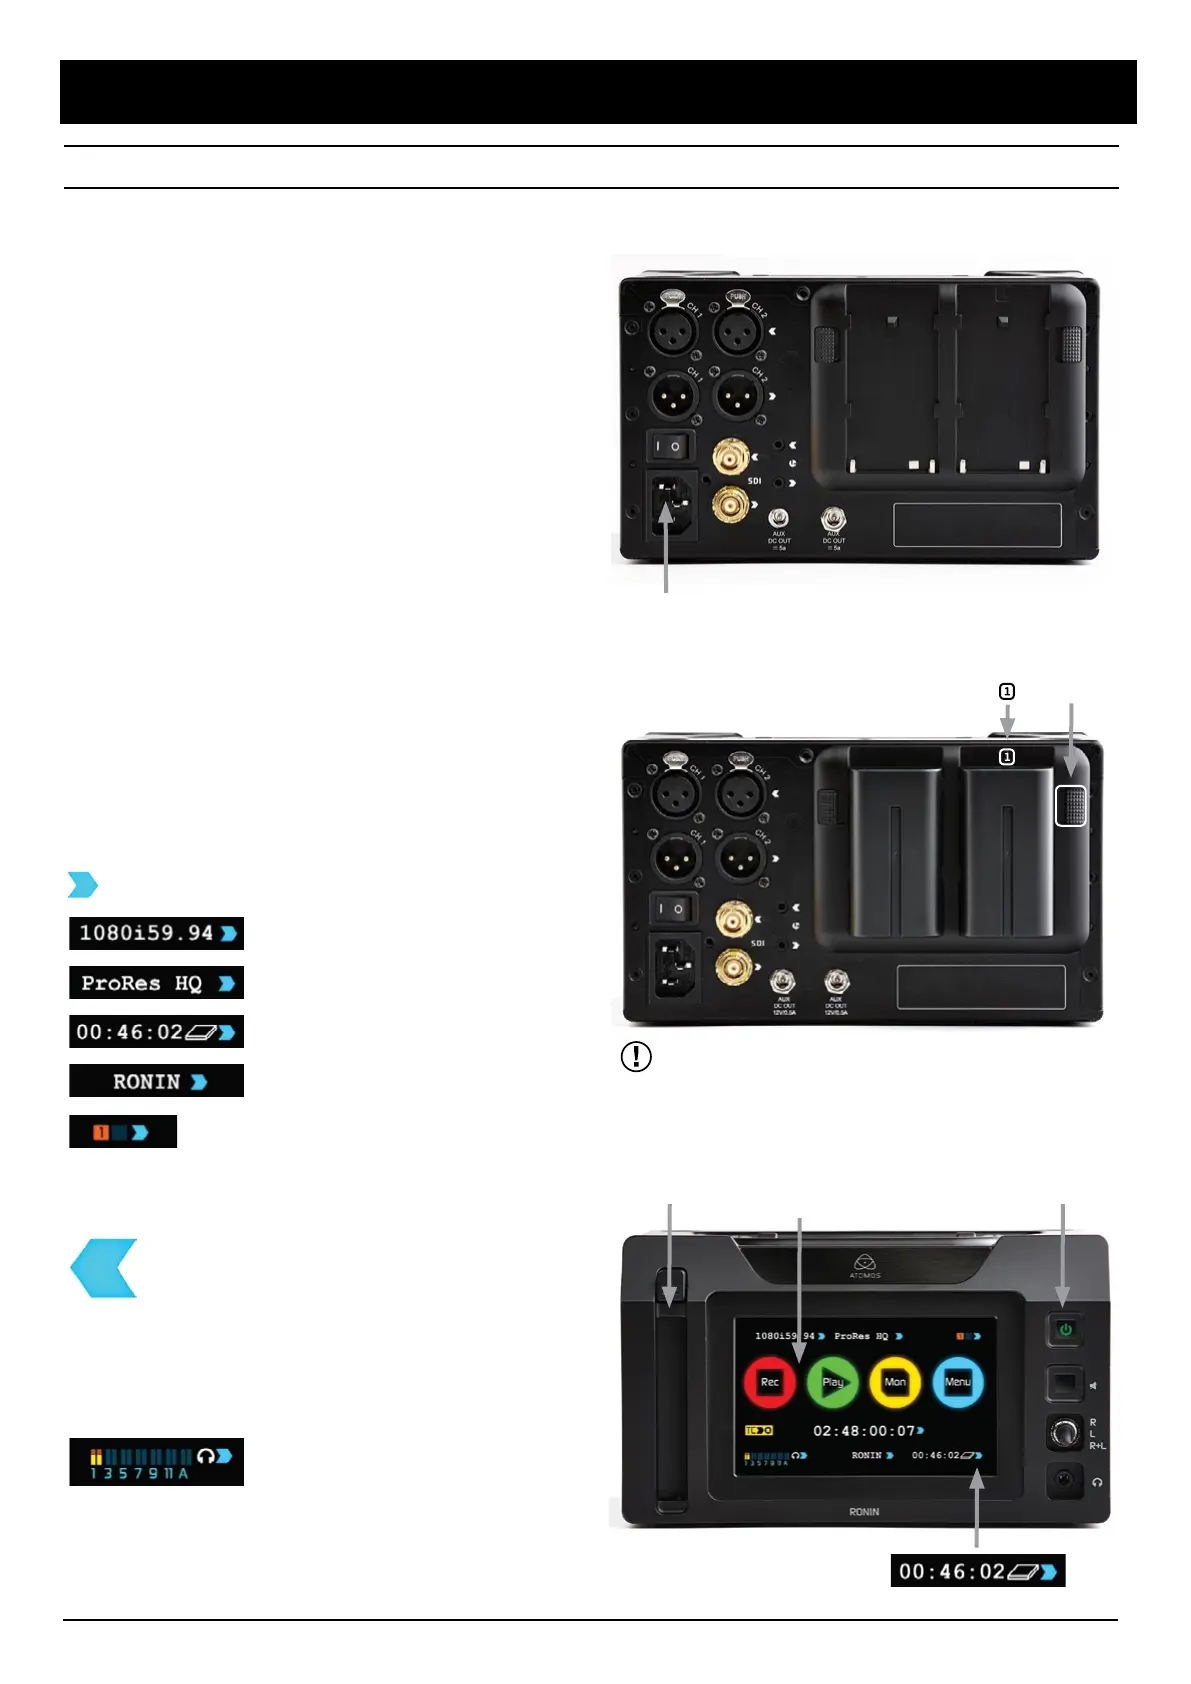
Connect one or both batteries to the Ronin.
Use the battery connector marked with a ‘1’ for the first battery.
The Ronin utilises only one battery at a time. This allows a battery to
be removed, charged and replaced during DC power operation. Refer
to the User Manual for more information.
Power up
On the rear panel, press the AC power switch, next to the AC connector,
to the ON position. On the front panel, the push-button power switch
should be lit up Red. This indicates the internal power supply is on.
Press the front panel power switch momentarily and the Ronin will turn
on and the home screen will appear within a few seconds.
Basic operation
The Ronin is controlled by an intuitive touchscreen interface. Most functions
are accessed by pressing a icon ‘button’, or on-screen display area.
The following page shows brief descriptions of the main controls seen
when the Ronin is first powered up and ready for operation.
Pay special attention to any items on screen which are marked by
a small blue arrow. Touch these items to access or cycle through
options.
A larger blue arrow in the top right corner of the screen will return you
from other menus to the main controls. Refer to the User Manual for
more details.
Audio and Video setup
The Ronin uses standard XLR, balanced, line level analog audio input
and output connectors. Connect the appropriate audio connections
for your use. You will be able to adjust analog audio levels in the Ronin
Audio menu.
Standard size BNC connections are used for HD/SD-SDI input and
output connections. The Ronin also supports 12 tracks of digital
embedded audio as part of the HD/SD-SDI signal. Embedded audio
tracks can be selected and monitored using the Audio menu.
access
return
Recording format
Video Input format and Pulldown status
Time remaining / Format disk
Unit Name
Battery Indicator
You should consider this your primary battery and the other battery
marked with the number 2 as a secondary/back-up battery.
Attach Battery number 1: Gently slide down into battery
slot/s and lock into position. Push latch to release battery.
AC Power
DC Power
The ‘home’ screen
AC Power connector and switch
Latch
Power OnCaddy Slot Ronin Touchscreen. Refer to the
User manual for more information
When getting started, press this blue
arrow to FORMAT your HDD/SSD
Atomos Ronin ~ QuickStart Guide
 Loading...

