Do you have a question about the Atosa ATCO-513B-1 and is the answer not in the manual?
Thank you for purchasing our products. Read instructions carefully to avoid trouble during use.
Appliance designed for commercial use. Procedures for smelling gas and general safety warnings for users.
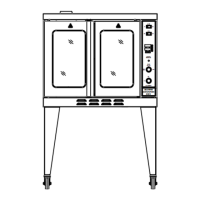
Technical specifications for the ATCO-513B single oven model, including dimensions and gas inlet.
Technical specifications for the ATCO-513B double-stacked oven model, including dimensions and gas inlets.
Table summarizing gas pressures (inlet, manifold, burner, oven) and electrical parameters (volts, amps, Hz).
Instructions for qualified electrical installation, wiring, and proper grounding.
Steps for testing the gas supply system pressure, ensuring safety during the process.
Guidelines for installing ovens with casters, using compliant connectors and limiting movement.
Specifies ideal installation locations and environmental requirements for the oven.
Mandatory requirements for ventilation and adherence to national fire protection codes for installation.
Procedure for attaching supporting legs or castors to the oven baseplate using specified hardware.
Details minimum clearances for right, left, rear, and floor based on surface type.
Emphasizes the critical importance of the three-prong grounding plug for preventing electric shock.
Prohibits open flame testing for leaks and advises on checking gas supply pressure.
Advises against storing flammable materials near the oven and maintaining a clean environment.
Immediate actions required if a gas leak is detected, including shutting off gas and calling emergency services.
Precautions for handling hot surfaces, maintenance, using accessories, and avoiding outdoor use.
Information on user-serviceable parts, authorized repairs, and consequences of unauthorized alterations.
Keep body parts and clothing away from heat sources; wait for the unit to cool before cleaning.
Warning that the oven requires electricity for ignition and fan; do not operate during power outages.
Details the purpose of each button, display, and switch on the control panel for operation.
Distinguishes between Cook Mode (continuous fan) and Hold Mode (fan operation based on burners).
Initial steps for programming the Cook Mode, starting with powering on the unit.
Guidance on setting the fan mode (Cook/COOL) and selecting fan speed (HI/LOW) for cooking.
How to set and adjust the desired holding temperature using the HOLD button and associated arrow keys.
How to turn on the interior oven light by pressing and holding the LIGHTS button.
Procedure to abort the current cooking cycle by pressing the START/STOP button.
Oven indicates completion, maintains temperature if doors shut, or cools by opening doors.
Oven signals Hold mode completion and can return to COOK mode via START/STOP button.
Instructions to turn off the oven using the Power ON/OFF button after cooking is finished.
Importance of preheating the oven to the target temperature before adding food for optimal results.
Recommendation to use lower temperatures than standard recipes and suggests experimentation for best outcomes.
Information on the oven's sheet pan capacity and factors influencing rack placement.
Caution against blocking airflow by placing items on the oven bottom, which can cause uneven cooking.
Method for roasting meats to minimize shrinkage by using a water pan on the bottom rack.
Ensuring equal weight distribution across pans for consistent cooking rates when using multiple pans.
A technique for baking delicate items by allowing them to set before full heat application.
Recommended procedure for cooking products directly from a frozen state, including preheating adjustments.
Tip to extend oven light bulb life by turning them off when not actively viewing the product.
Prohibits abrasive, flammable, or corrosive cleaning agents and methods like pressure washing.
Methods for cleaning porcelain interiors, including using degreasers and commercial cleaners carefully.
Procedure for removing and soaking oven components like the blower wheel in an ammonia-water solution.
Crucial warning to disconnect power supply before cleaning or removing the blower wheel.
Requirement for annual comprehensive equipment checks by authorized and licensed technicians.
Guidance on proper metal product disposal according to local codes and regular cleaning agent use.
Action to take if a fault occurs: stop use, contact technicians, turn off power and gas supply.
Warning that caster restraints must be reconnected after servicing to ensure original installed position.
Qualifications for service personnel include experience, precaution knowledge, and adherence to state/local requirements.
Steps to loosen jam nuts, adjust turnbuckles simultaneously, and retighten for proper door operation.
Procedure to adjust the cam and setscrew for correct door switch contact when doors are closed.
Warning about potential burns from heated zones when adjusting door components like turnbuckles and switches.
Key areas for inspection: blockages, flue guard installation, canopy, motors, and belts.
| Model | ATCO-513B-1 |
|---|---|
| Type | Convection Oven |
| Phase | 1 |
| Material | Stainless steel |
| Temperature Range | 150°F - 500°F |
| Voltage | 208V |
| Controls | Manual |
| Timer | 120 min |