Preparation:
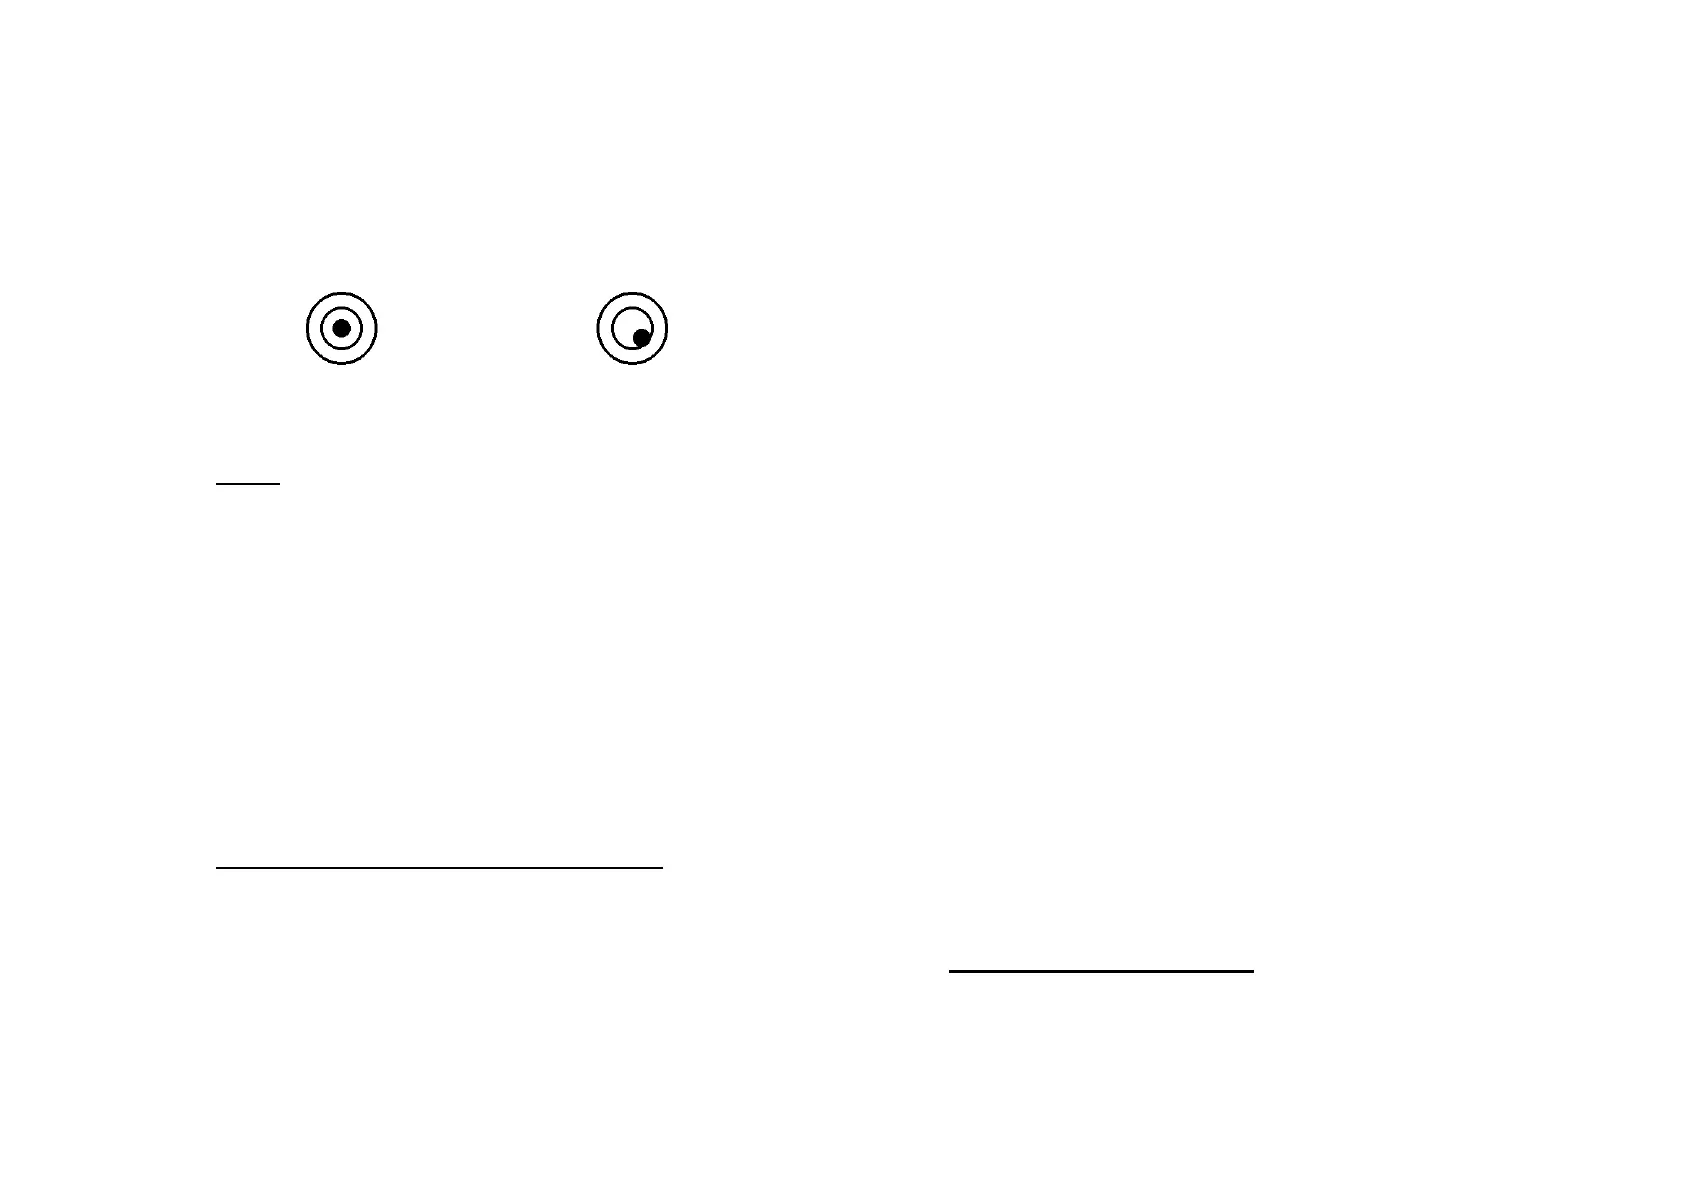
Place the scale on a flat, stable, draught-free surface. Adjust
the feet to keep the bubble inside the middle of the bubble
level.
Correct Incorrect
OPERATION:
1. TARE
a. Tare weight:
Place the empty container on the weighing pan. Press the
[TARE] key, the tare indicator arrow is displayed and
the WEIGHT display will show 0.
When the container is removed from the weighing pan,
the WEIGHT display will
show a minus value.
b. Clearing the previous tare value:
Remove the empty container from the weighing pan then
press the [TARE] key, so the Tare indicator arrow
disappears and WEIGHT display returns to 0.
2. SAMPLE SETTING (for parts counting):
There are two sample setting methods:
a. Number setting: (when using an unknown weight)
Place a certain number of sample pieces on the weighing
pan, the total weight is displayed next to WEIGHT at
the top of the display.
Enter the quantity of sample pieces that are on the
weighing pan (using the numerical keypad). The quantity
entered should appear on the middle of the display next
to the UNIT WEIGHT.
Press the [SAMPLE/UNIT] key.
The UNIT WEIGHT display will change to show the
average weight per piece.
The TOTAL display shows the amount of pieces on the
weighing pan.
You can now remove or add parts and the values on
each section of the display will change respectively.
b. Unit weight setting: (where the unit weight is already
known)
Enter the unit weight (in grams) using the numeric
keypad, the numbers are displayed in the UNIT WEIGHT
display. Press [UNIT WEIGHT] to save the weight you
have entered. The scale is now ready to count.
If the scale is set correctly the TOTAL (PCS) display
should count up by 1 each time a part is added to the
pan, increasing the WEIGHT display as well.
c. FREE sample function:
The scale will automatically adjust and calculate a new
average unit weight (the sample pieces must be added
slowly).
The FREE SAMPLE FUNCTION will not work if the displayed
numbers exceed 1,000,000 pieces.
Press the [CE/SET] key to cancel unit weight and sample
settings.
3. CHARGING THE BATTERY:
The scale will need charging as soon as the RED
charge light appears.
 Loading...