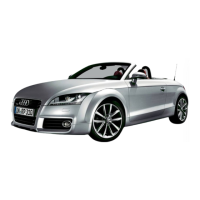
The 2011 Audi TT • TTS Roadster is a sophisticated vehicle offering a blend of performance, comfort, and advanced technology. This quick reference guide provides an overview of its key features and functionalities.
Cockpit and Controls
The cockpit is designed for intuitive control, with various buttons and switches strategically placed for easy access.
- Release Buttons: Located on the driver's side, these buttons control the rear lid and the fuel filler flap.
- Power Windows: The vehicle features power windows. A safety warning advises caution when closing them to prevent personal injury.
- Exterior Mirrors: The exterior mirrors can be adjusted using a knob. Pushing the knob in different directions moves the mirror glass. The knob also includes a setting for heating the exterior mirrors.
- Hood Release: A dedicated lever is provided for releasing the hood.
- Data Link Connector (OBD II): This connector is used for On-Board Diagnostics, allowing for vehicle system checks.
- Door Handle and Central Locking Switch: The door handle integrates a central locking switch, allowing the user to lock and unlock the doors.
- Light Switch: Controls the vehicle's lighting system.
- Instrument Lighting: Adjusts the brightness of the instrument cluster.
- Cruise Control: Activates and manages the cruise control system.
- Multifunction Steering Wheel Controls: These controls allow the driver to interact with various vehicle systems without taking their hands off the wheel.
- Turn Signal and High Beam Lever: Standard lever for turn signals and high beam activation.
- Instruments and Indicator Lights: The instrument cluster displays vital vehicle information and indicator lights.
- Ignition Lock: Where the key is inserted to start the vehicle.
- Navigation System or Radio System: The central display unit for infotainment and navigation.
- Passenger Airbag Indicator Light: Indicates the status of the passenger airbag.
- Climate Control System: Manages the vehicle's interior temperature and airflow.
- Seat Heating: Separate controls for the passenger's and driver's seat heating.
- Selector Lever: For automatic transmission, used to select drive modes (P, R, N, D, S).
- Ashtray with Cigarette Lighter: A convenience feature.
- Audi Magnetic Ride or Sport Mode: Buttons to activate Audi magnetic ride or engage sport mode, altering suspension and performance characteristics.
- Electronic Stabilization Program (ESP): A button to switch the ESP system on or off.
- Emergency Flashers: Activates the hazard lights.
- Rear Spoiler: A button to manually control the rear spoiler.
- Convertible Top: Controls for opening and closing the convertible top.
- Wind Deflector: Controls for deploying the wind deflector.
- Parking Brake: Engages and disengages the parking brake.
Seating Adjustments
The seats offer multiple adjustment options for optimal comfort and safety.
- Lumbar Support: Adjusted by pressing the respective area on the switch.
- Seat Height and Forward/Back Position: Controls for moving the front and back of the seat cushion up/down, and the entire seat up/down or forward/back.
- Backrest: Adjusts the backrest forward/back.
- Headrests: Can be adjusted by holding the sides and sliding them. The upper edge should be as even as possible with the top of the head. A minimum distance of 10 inches (25 cm) between the chest and the steering wheel/instrument panel is recommended for airbag safety.
- Safety Warnings: Emphasizes the importance of fastening safety belts, proper restraint use, and adjusting seats only when the vehicle is at a complete standstill. It also warns against reclining the seatback in a moving vehicle and installing rearward-facing child safety seats on the front passenger seat unless the PASSENGER AIR BAG OFF light is on.
Starting the Engine and S tronic Transmission
- Ignition: Insert the key into the ignition lock. Turn the key to position 2 to switch on the ignition.
- Starting the Engine: Place the selector lever in P (Park) or N (Neutral), press the brake, and turn the key to position 3 until the engine starts.
- Stopping the Engine: Turn the key to position 1.
- S tronic Selector Lever Positions: P (Park), R (Reverse), N (Neutral/Idle), D (Drive), S (Sport).
- Engaging a Gear: Switch on the ignition, press the brake pedal, and press the lock button on the selector lever. Move the lever to D or S to drive forward.
- tiptronic: To shift manually, move the selector lever to the right from the D position. The driver information system will display the gears. Shifting up/down is done by pressing the selector lever forward/back.
Climate Control
The climate control system offers precise temperature and airflow management.
- Left Rotary Switch: Temperature selection.
- Center Rotary Switch: Switches the climate control system on/off and regulates fan speed.
- Right Rotary Switch: Air distribution control.
- Automatic Mode (AUTO): Sets the desired temperature automatically.
- Recirculation Mode: Circulates and filters the air inside the passenger compartment.
- AC Button: Switches the air conditioning system on/off.
- Defrost Buttons: Separate buttons for defrosting the windshield/side windows and the rear window.
Audi Magnetic Ride
This feature offers two suspension systems in one vehicle.
- Standard Driving Mode: Emphasizes comfort.
- Sport Driving Mode: Provides a sporty suspension setting.
- Activation: Press the S or button to activate/deactivate.
Rear Spoiler
The rear spoiler enhances driving stability by increasing downward force at the rear axle when extended.
- Automatic Mode: Extends at speeds above approximately 75 mph (120 km/h) and retracts under 50 mph (80 km/h).
- Manual Mode:
- Press the button briefly to extend the spoiler.
- Press the button again at speeds between 10 mph (20 km/h) and 75 mph (120 km/h) to retract it.
- Press and hold the button at speeds below 10 mph (20 km/h) to retract the spoiler.
- Warning: Never drive at speeds higher than 85 mph (140 km/h) if the spoiler is not deployed.
Automatic Convertible Top
- Opening: Switch on the ignition. Pull and hold the switch until the convertible top opens and the covers close completely.
- Closing: Switch on the ignition. Press and hold the switch until the top has closed completely.
Cruise Control
- Indicator Light: The CRUISE/ indicator light appears in the instrument cluster when activated.
- Switching On/Off: Pull/press the lever.
- Storing Speed: Press the button.
- Changing Stored Speed: Press the lever up (faster) or down (slower).
- Warning: Improper use can cause collisions; always refer to the Owner's Manual.
Hill Descent Assist
Available in vehicles with automatic transmission, this feature aids in driving down declines.
- Activating: Move the selector lever to D or S and press the brake pedal. The current speed is maintained within physical and technical limits.
- Deactivating: Press the accelerator pedal.
Fuel and Maintenance
- Fuel Filler Flap: The label inside indicates the correct fuel type. Open by pulling the button in the driver's door; close by pressing until it latches.
- Engine Oil: Refer to the Owner's Manual for applicable oil specifications.
- Tire Pressures: The label with correct tire pressures is on the driver's door pillar.
Navigation System and Infotainment
- Components:
- Driver Information System: Displays navigation and other vehicle data.
- Multifunction Steering Wheel:
- Left thumbwheel: Marks menu items in the driver information system; press to confirm.
- MODE button: Switches between radio, navigation, and telephone.
- Right thumbwheel: Controls volume; press to repeat the last navigation announcement.
- Operation (General):
- Display: The central screen for infotainment.
- Function Buttons: Press buttons (e.g., FM/AM) to activate modes.
- On/Off Knob: Press briefly to switch on, rotate for volume, tap to mute, press and hold to switch off.
- Control Buttons: Located in the four corners of the display, these correspond to functions shown on the screen.
- Control Knob: Rotate to mark menu items, press to confirm selections.
- Calling Up Menus: Press corresponding buttons in the display corners.
- Marking: Rotate the knob.
- Confirming: Press the knob.
- Warning: Distraction causes accidents; never enter data while driving, obey traffic laws, and refer to the Owner's Manual.
Storing a Radio Station
- Press the FM/AM function button.
- Rotate the control knob and mark the desired station.
- Press the control knob to confirm.
- Press the "Presets" control button.
- Rotate the control knob and mark "Store station ".
- Press the control knob. The next free memory preset is marked.
- Rotate the control knob and mark the desired preset.
- Press the control knob to confirm.
Starting Navigation
- Press the NAV function button.
- Rotate the control knob and mark "City/ZIP".
- Press the control knob to confirm.
- Rotate the control knob to mark the first letter of the destination.
- Press the control knob to confirm.
- Enter remaining letters using the same procedure until the desired location is displayed.
- Once entered, rotate the control knob and mark "OK".
- Press the control knob to confirm.
- Mark "Start route guidance".
- Press the control knob to confirm. The route will be calculated.
Functions: Bluetooth™ Cell Phone Connection
- Switch on the ignition, navigation system, and cell phone.
- On the cell phone, select the menu to search for Bluetooth™ devices (e.g., "Audi UHV").
- Confirm the selection.
- Enter the PIN "1234" on the cell phone.
- Confirm the connection on your cell phone if requested.
Functions: Memory Cards
- Loading:
- Press the button to open the display.
- Guide the memory card into the card reader slot as shown and press until it clicks into place.
- Removing:
- Press the button to open the display.
- Press on the memory card to release it, then remove it from the slot.
Indicator Lights
The vehicle features a comprehensive set of indicator lights for various systems, including:
- Audi magnetic ride
- High beam
- Safety belt
- Check engine oil level
- Defective light bulb
- Tire pressure too low
- Rear spoiler
- Parking brake (USA/CAN)
- Engine oil sensor malfunction
- Defective brake light (USA/CAN)
- Electronic power control (EPC)
- Turn signals/Emergency flasher
- Worn brake pads
- Light/rain sensor defective
- Convertible top
- Cruise control activated (USA/CAN)
- Anti-lock brake system (ABS) (USA/CAN)
- Speed warning (USA/CAN)
- Adaptive Light defective
- Electronic Stabilization Program (ESP) (on/off)
- Safety systems (USA/CAN)
- Electro-mechanical power assist
- Dynamic headlight range control defective
- Brake malfunction (USA/CAN)
- Malfunction Indicator Lamp (USA/CAN)
- Generator
- Low fuel level
- Engine speed limitation
- Windshield washer fluid level low
- Cooling system malfunction
- Battery voltage too high or too low
- Engine oil pressure too low
For detailed information on these indicator lights, refer to the vehicle's Owner's Manual.