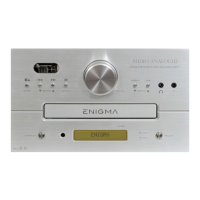
Note su LINE IN1 e FRONT IN
Gli ingressi LINE IN1 e FRONT IN sono multiplexati con FRONT IN a priorità più elevata. Questo vuol dire che se si seleziona la
sorgente LINE IN1 e al FRONT IN non è connesso niente, allora si ascolterà la sorgente collegata al connettore RCA LINE IN1 nel
pannello posteriore e iI display mostrerà la scritta “LINE IN1”. Se invece si è collegato un jack all’ingresso FRONT IN sul display
verrà mostrata la scritta “FRONT IN” e si andrà ad ascoltare la sorgente collegata all’ingresso FRONT IN. Quando viene selezionata
LINE IN1 e si connette un jack all’ingresso sul frontale il display lo segnala presentando la scritta “Front IN” sul display e
l’apparecchio seleziona automaticamente il FRONT IN come sorgente.
Note on Headphones output
When a jack is inserted in the front headphone connector the power stages are muted so there is no sound coming from them. If the
Headphones are removed the power stages are driven out from mute mode and the music is reproduced by the loudspeakers again.
The headphone stage gain has been chosen to give about the same sound level of the loudspeakers for an equal volume level, but it
depends of course on the sensitivity of the loudspeakers and headphones used.
Nota sull’uscita cuffie
Quando viene inserito un jack nel connettore cuffie i finali di potenza vengono messi in mute per cui non si ha più suono dalle casse.
Quando il jack cuffie viene rimosso i finali di potenza escono dal mute e i diffusori tornano a riprodurre la musica. Il guadagno dello
stadio di uscita cuffie è stato scelto in modo da avere circa lo stesso livello sonoro che si ha con le casse a parità di volume,
ovviamente tutto dipende dalla sensibilità delle casse e della cuffia usate.
SETUP MENU
The Enigma REV2.0 has a lot of very useful functions which can be enabled in to the setup menu, to enter these simply push the
AMP SETUP button on the remote. Use the switches: “2”, “4”, “8”, “6” on the remote to navigate through the menu and the switch: ”5”
to enter and memorize a value or setting. In the picture below the navigation switches are highlighted with their function.
MENU DI SETUP
L’Enigma REV2.0 ha ulteriori funzioni molto utili che possono essere abilitate nel menu setup accessibile premendo il tasto “AMP
SETUP” sul telecomando. Si usano i tasti: “2”, “4”, “8”, “6” del telecomando per muoversi tra le varie voci mentre per convalidare un
valore di settaggio si usa il tasto “5”. Nell’ immagine seguente sono evidenziati i tasti per navigare nel menu e le relative funzioni.
2: UP 2: Su
8: DOWN 8: Giù
4: LEFT 4: Sinistra
6: RIGHT 6: Destra
5: OK: To enter a value 5: OK: per confermare un settaggio
AMP SETUP: to enter the set
up menu
AMP SETUP: per entrare nel menu
di setup
• You can scroll through the Setup menu options with the UP [2] and DOWN [8] buttons. In the picture below there is the
menu map:
o Le voci del menu di setup si possono scorrere con I tasti: UP [2] e DOWN [8]. Nella immagine sotto è riportata la mappa
del menu:

 Loading...