9
Rev.2.10
Pairing registration of the microphone to a receiver
When pairing a new microphone to a receiver, follow this procedure.
(Only the Alert Notification Button operates without first pairing the microphone)
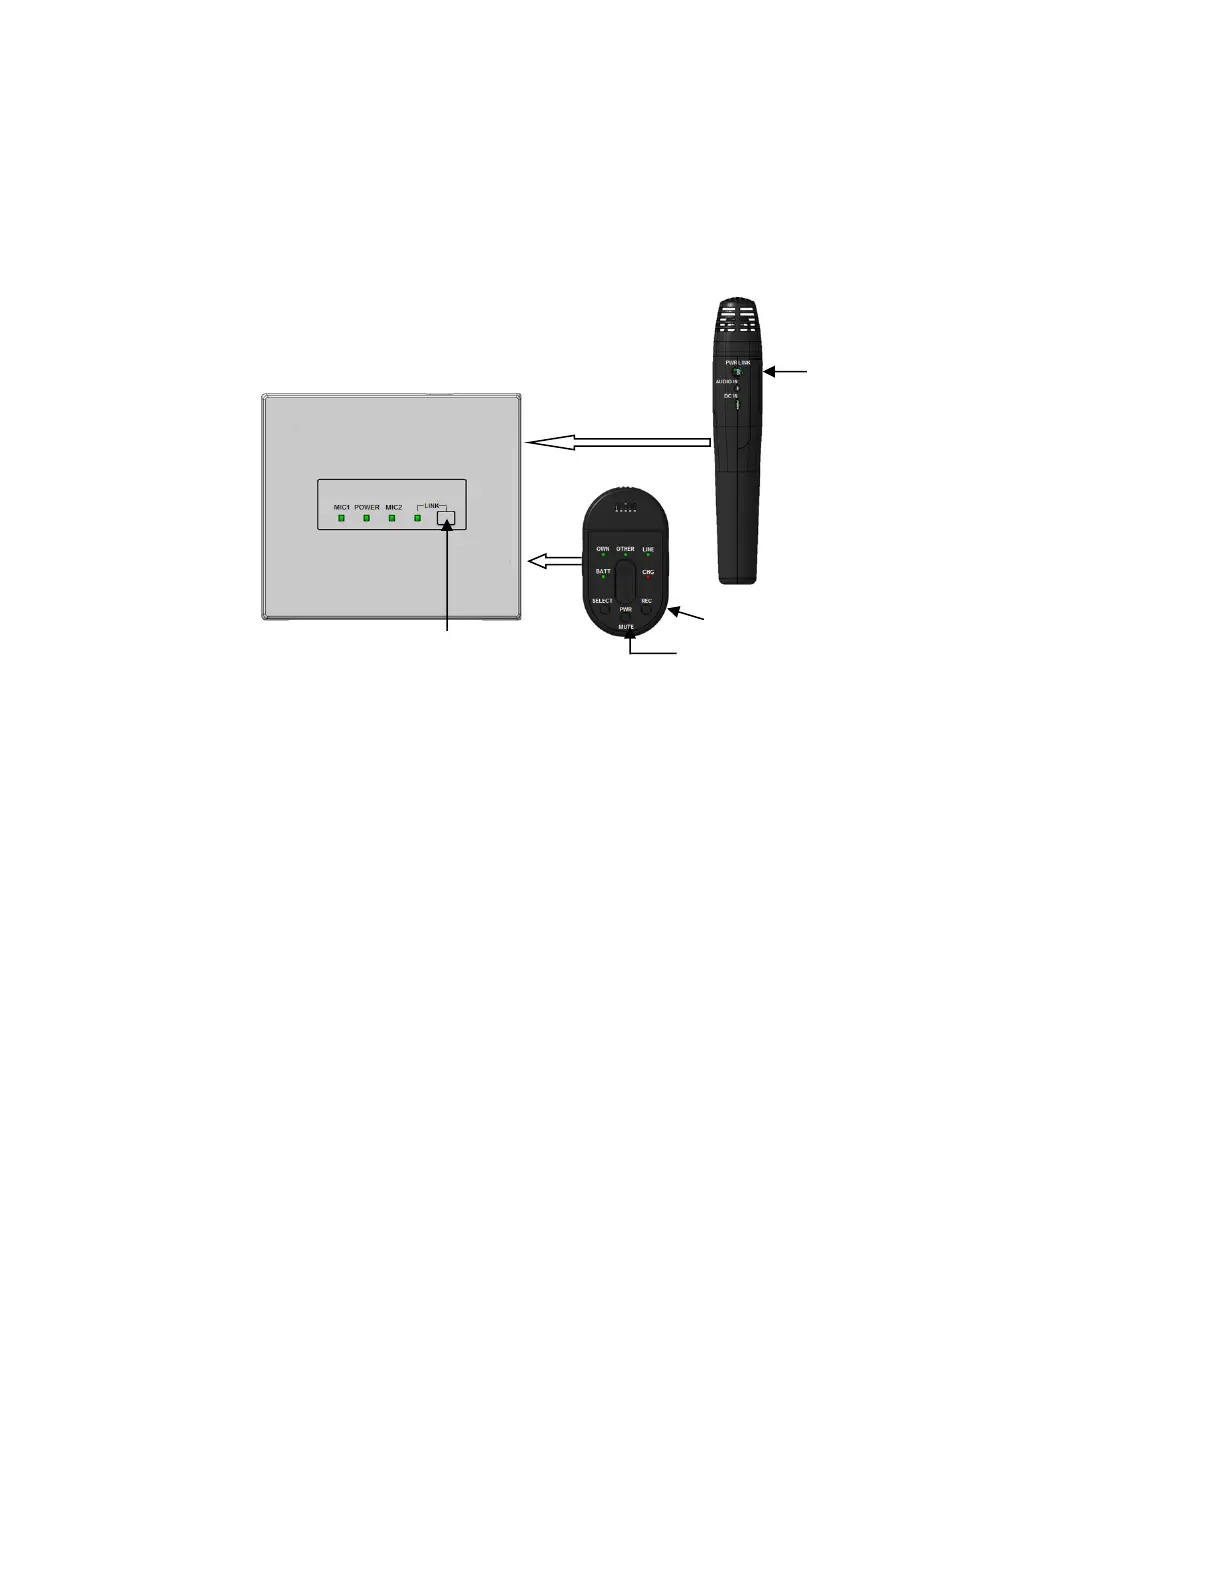
1. Press a receiver's [LINK] button, and the receiver is put into registration mode.
When a LINK button is pressed, the LINK LED blinks yellow for 20 seconds (pairing registration mode)
During this time, please use the following instructions to pair your microphones.
2. (a) Tea ch er M ic ro ph on e (K-STD14):
Press the [PWR/MUTE] button and [REC] button for one second to register with the receiver.
Teacher Microphone [BATT] indicator lights green and an audible beep will sound through the speakers.
(b) Student Microphone (K-SHH14):
(Please read the operating instructions of the Student Microphone (K-SHH14).
Press the [LINK] button and [TALK] button simultaneously for one second or more to register with the receiver.
Student Microphone [BATT] indicator lights green and an audible beep will sound through the speakers.
(c) Media Channel Microphone:
Repeat directions above to pair a third microphone. This option is only available after two microphones are already paired
to the receiver. [LINK] indicator lights green and an audible beep will sound through the speakers.
[LINK] button