Copyright © 2006 Audio Note (UK) Limited
Website
www.audionote.co.uk
E-Mail
info@audionote.co.uk
Telephone +44 (0) 1273 731498
Page 6
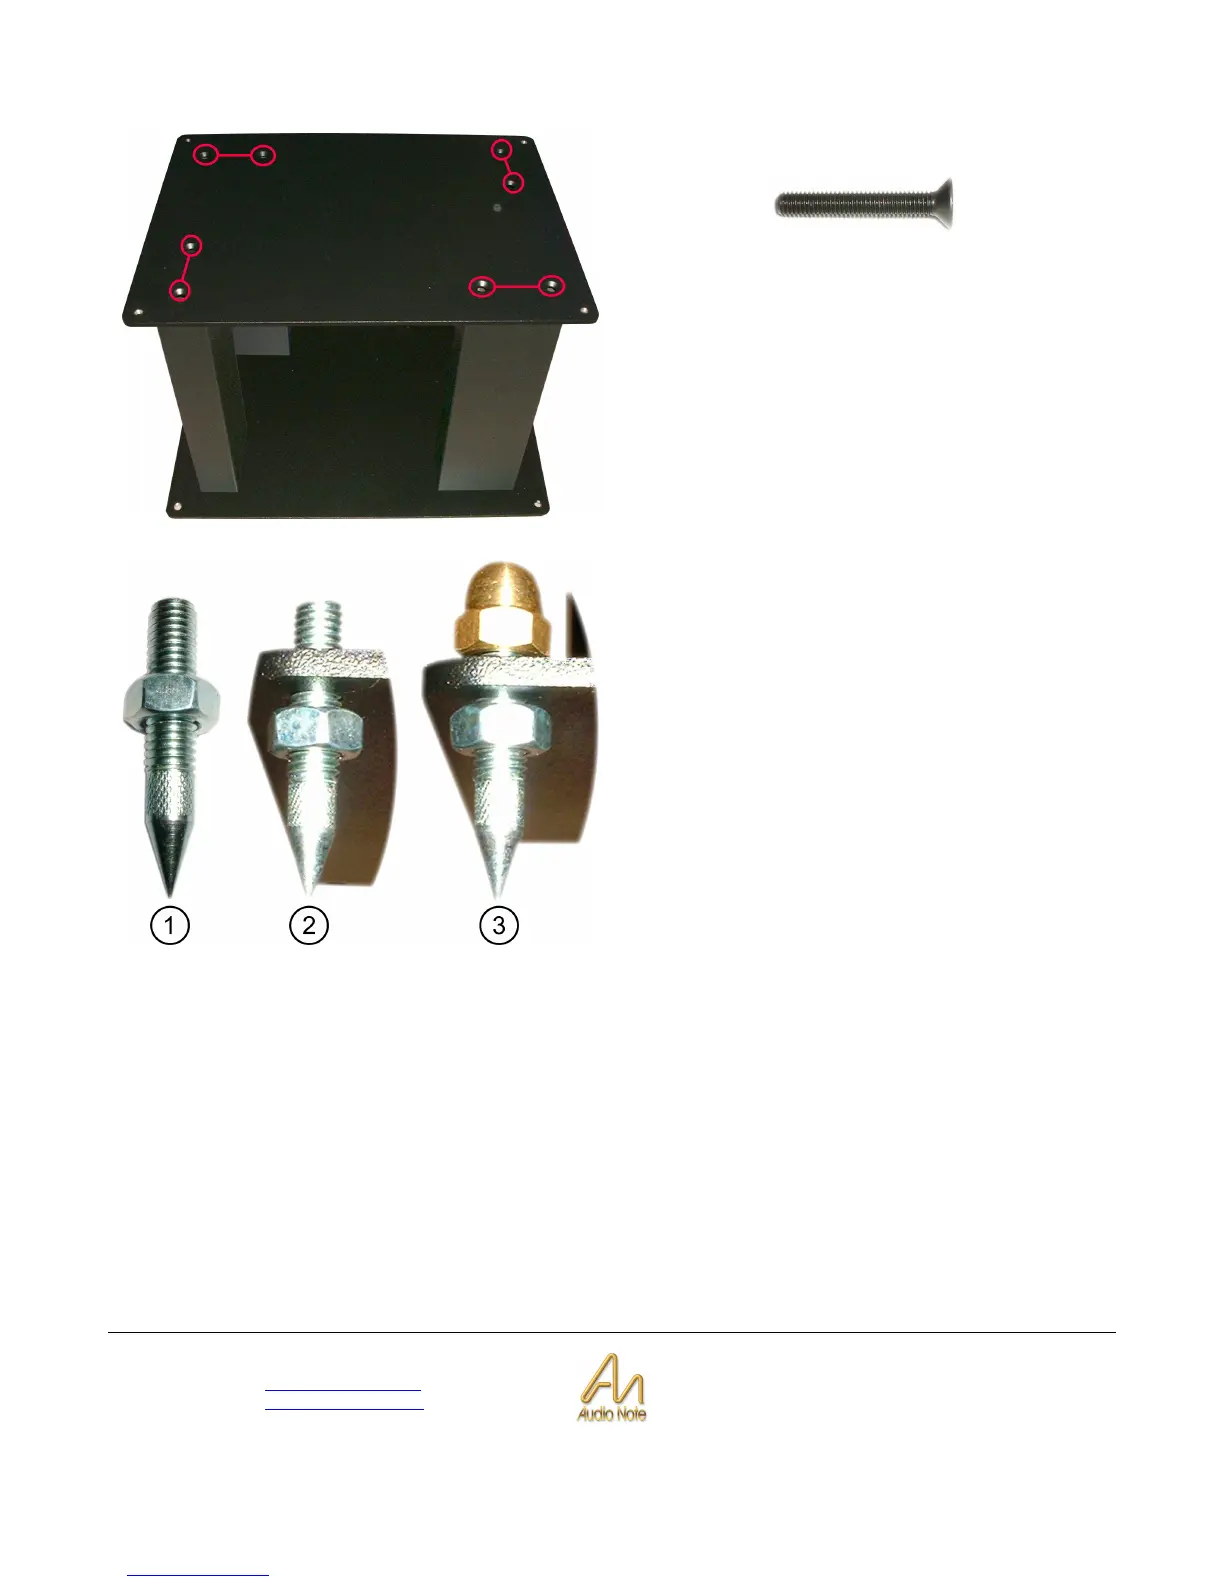
The top plate can now be secured to the columns using the
countersunk-head screws.
The picture of the top plate opposite highlights the position
of these screws.
Begin by locating two screws at opposing corners. Once
done, the rest should be easier to locate.
Once again, you should make sure that these are well
tightened and secure. It is best to locate all of the screws in
their holes first before fully tightening them so that the top
plate can be moved a little while positioning them.
To fit the spikes onto the base plate, take a spike and add a
lock nut (see item 1 opposite).
Next, screw the spike into the base plate from the bottom
(see item 2).
Now the brass header nut can be attached to the top of the
spike (see item 3). Screw this all the way onto the spike.
Finally, the spike should be adjusted to the required height
before tightening all the nuts. The nut on the bottom is the
main locking nut for the spike.
It is advisable to use two spanners (wrenches) to do this.
The one holding the header nut should remain stationary
and the lock nut should be the one being tightened.
If the use of spikes is not required (perhaps because of
expensive wooden flooring etc.) then you may invert this
assembly so that the header nuts become the feet - thus
facing the spikes upward. However, if you intend to do this
then please bear in mind that the spike could pose a
danger in that configuration and should therefore be
covered in some way to prevent potential accidents from
occurring. Audio Note cannot accept responsibility for any
accidents that occur from bare spikes.