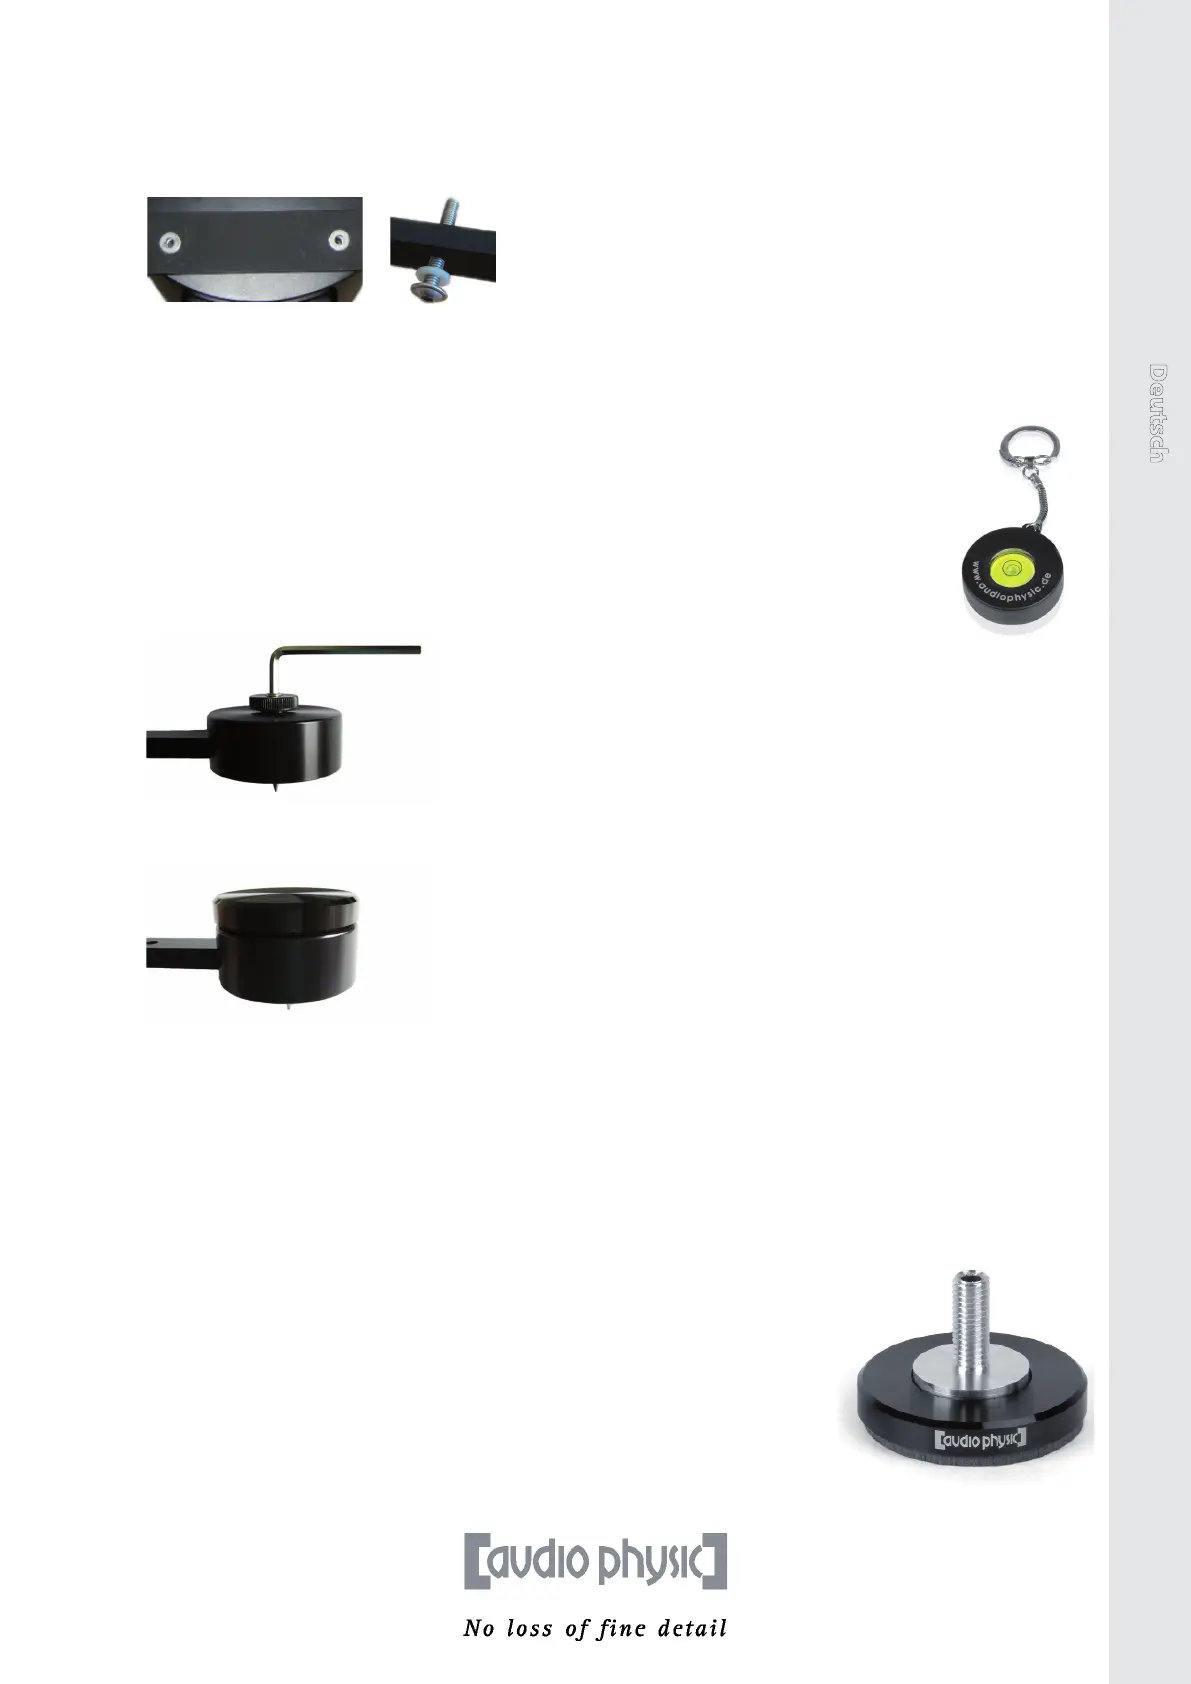
8. Place the plasc washers included in the delivery onto the bore holes of the stands from
above and insert the provided ange bolts into the holes. Tighten the ange bolts rmly.
The bolts need about nine turns to lock unto the stands and about four more turns to
ensure opmum grip.
9. Now turn over the loudspeakers so that the metal feet are in stable contact with the oor.
Two people should also carry out this step where possible. Make sure that you do not hurt
yourself on the ps of the spikes.
10. Place the loudspeakers in their intended posions and nely adjust the spikes so
that the loudspeakers do not wobble. If you do not place the loudspeakers in a
secure and stable posion and they therefore wobble, this will have a major eect
on the sound. When the boxes are standing level and upright, you have set them up
perfectly. The enclosed spirit level will help you to nely adjust the loudspeakers
(they are level when the bubble remains in the inner circle). Use the lock nuts to
again ghten the spikes. Roughly hand-ghtening the nuts is sucient.
11. Aach the foot end caps to the knurled screw of the feet. Simply li up the foot end caps to
remove them.
You can now start to opmally align your new TEMPO plus to the listening posion. You can nd
ps regarding this process in the following chapter on “Setup” and can access parcularly detailed
informaon on the AUDIO PHYSIC website.
AUDIO PHYSIC`s Sound Advice
If you want to increase the sound quality even more in terms of precision and bass
response, try out our high-quality VC feet (for example VCF II M 8 in the image
on the right) on your loudspeakers. The “Vibraon Control“ feet are not only an
alternave to spikes for high-quality ooring, but also reduce the transmission of
vibraons between the loudspeakers and the oor. This results in an audible
improvement to the level of detail and realisc sound reproducon. For more
informaon and advice, please contact your dealer.
TEMPO plus English
15