Configurations
Shown here are examples
of
some common
W3
wireless
configurations and setup instructions
for
each:
0 Computer
USB
Audio
to
Powered Speakers
[jJ
~~
Sender
Receiver
Note:
If
using Audioengine
S+
(AS+) powered speakers the
AS+
USB
power port
can
be used
to
power the
W3
Receiver.
1)
Connect
the
W3
Sender
to
your computer's
USB
port.
2)
For
PC
wait for the
USB
audio connection
to
be detected.
For
Mac
OS,
open System Preferences/Sound, select
Output, then select "Audioengine
W3".
3)
Connect
the
W3
Receiver
to
the
included power
adapter and plug
the
adapter
into
an
AC
power outlet.
4)
Connect a mini-jack
or
RCA
audio cable from
the
W3
Receiver
to
your powered speaker's audio input.
S)
The status indicators on
the
Sender and Receiver will
blink briefly and then
go
solid, indicating
that
they
are linked.
6)
Play your music!
Note:
If
using
W3
for
USB
computer audio there
is
no need
to
connect an audio cable from
the
W3
Sender
to
your
computer's headphone
output.
Doing
so
may create a
ground loop resulting in unwanted noise.
fJ
Computer
to
any
Audio System
Sender
1 ) Follow
steps
1 thru 3 above.
2)
Connect
the
included
RCA
"Y" adapter interface
cabletotheW3 Receiver audio
output.
3)
Connect
an
RCA
cable
(not
included)
from your
stereo receiver's
RCA
inputs
to
the
RCA
"Y" adapter.
4)
The status indicators on
the
Sender and Receiver will
blink
briefly and then
go
solid, indicating
that
they
are linked.
S)
Play your music!
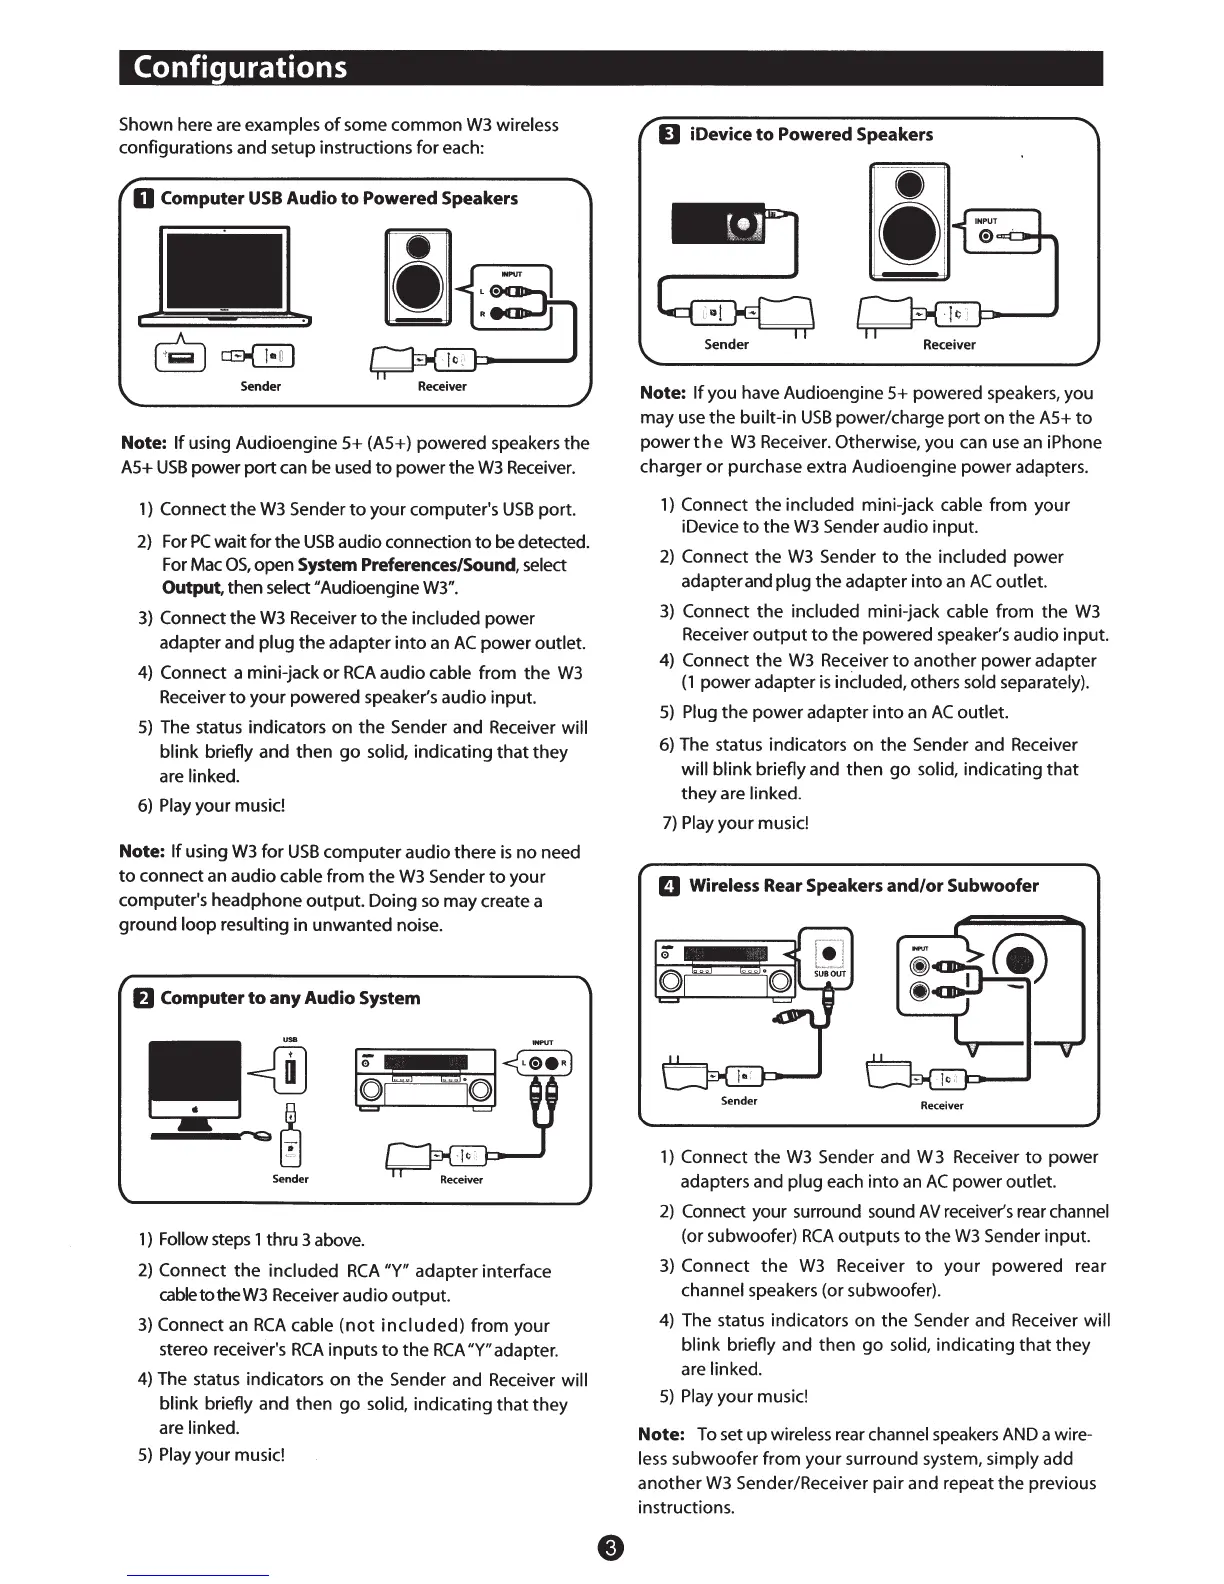
D iDevice
to
Powered Speakers
Receiver
Note:
If
you have Audioengine
S+
powered speakers, you
may use
the
built-in
USB
power/charge port on the
AS+
to
power
the
W3
Receiver. Otherwise, you can
use
an iPhone
charger
or
purchase extra Audioengine power adapters.
1)
Connect
the
included mini-jack cable from your
iDevice
to
the
W3
Sender audio input.
2)
Connect
the
W3
Sender
to
the
included power
adapter
and
plug
the
adapter
into
an
AC
outlet.
3)
Connect
the
included mini-jack cable from the
W3
Receiver
output
to
the powered speaker's audio input.
4)
Connect
the
W3
Receiver
to
another power adapter
(1
power adapter
is
included, others sold separately).
S)
Plug
the
power
adapter
into
an
AC
outlet.
6)
The status indicators on the Sender and Receiver
will blink briefly and then
go
solid, indicating
that
they
are linked.
7)
Play
your music!
D Wireless Rear Speakers
and/or
Subwoofer
Sender
Receiver
1)
Connect
the
W3
Sender and W 3 Receiver
to
power
adapters and plug
each
into
an
AC
power outlet.
2)
Connect your surround sound
AV
receiver's rear channel
(or subwoofer)
RCA
outputs
to
the
W3
Sender input.
3)
Connect
the
W3
Receiver
to
your powered rear
channel speakers (or subwoofer).
4)
The status indicators on
the
Sender and Receiver will
blink briefly and then
go
solid, indicating
that
they
are linked.
S)
Play
your music!
Note:
To
set up wireless rear channel
speakers
AND
a wire-
less
subwoofer from your surround system, simply add
another
W3
Sender/Receiver pair and repeat the previous
instructions.
 Loading...