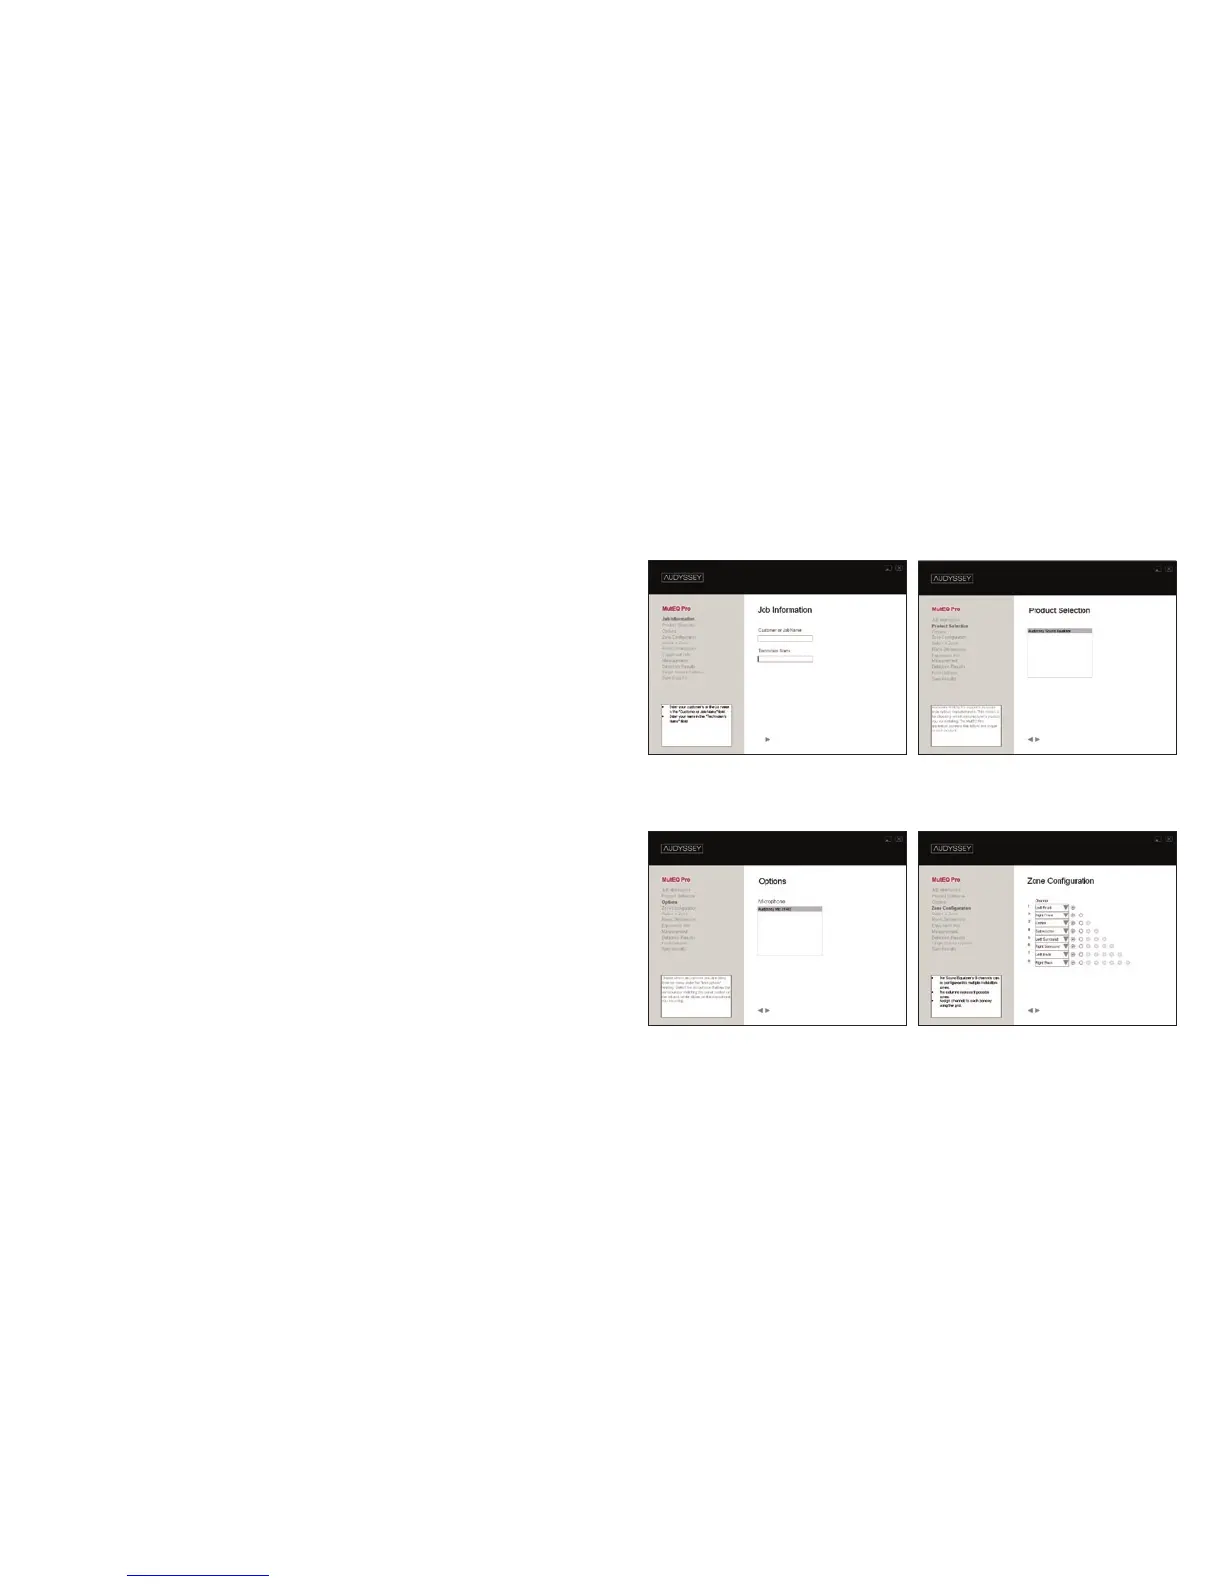
STEP 4
Turn the amplifier and the Sound Equalizer on. Open the
MultEQ Pro application on your laptop, read the Welcome
Page and complete the first 4 screens.
1 Job Information
Enter an identifying name for your installation job.
2 Product Selection
Choose which Audyssey-enabled product you are installing
(choose Audyssey Sound Equalizer).
3 Options
Select which Audyssey Calibrated Microphone you are using for
your installation. Microphones are listed by serial number.
4 Zone Configuration
Configure your multiroom installation by assigning the Sound
Equalizer’s available channels to designated zones. Use the drop-
down menu to assign speaker types to each Sound Equalizer
channel. Each column of buttons represents a possible zone.
Note: Channels 1–4 on the Sound Equalizer contain higher-
resolution filters for satellite speakers than channels 5–8. It is
highly-recommended that for surround systems you assign the
left front, center and right front speakers to any of channels 1–4.
Screen 1 Screen 2
Screen
3 Screen 4