Do you have a question about the August Smart Lock Pro 3rd Gen and is the answer not in the manual?
Use the supplied adhesive strip to secure the keyed side of the lock.
Select the correct adapter from the compatibility chart or by testing.
Slide lock over tailpiece, ensure flush fit, and clamp wing latches securely.
Download the app and follow on-screen instructions to set up your lock.
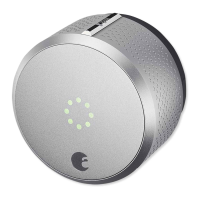
The August Smart Lock Pro is a smart home device designed to upgrade your existing deadbolt into a smart lock, offering enhanced security, convenience, and control over your home access. This installation guide walks you through the process of setting up your new smart lock, from preparing your existing deadbolt to completing the setup with the August Home app.
The primary function of the August Smart Lock Pro is to allow you to lock and unlock your door using your smartphone, grant virtual keys to guests, and monitor who comes and goes, all without replacing your existing deadbolt's exterior hardware. This means your traditional keys will still work, providing a familiar backup while integrating smart capabilities. The device is designed to be installed on the inside of your door, preserving the aesthetic of your home's exterior.
Installation begins with preparing your existing deadbolt. You'll use an adhesive strip to secure the keyed side of your deadbolt in place, ensuring it doesn't move during the installation process. This step is crucial for maintaining the alignment of your existing lock. Following this, you will remove your existing thumbturn, which is the interior part of your deadbolt that you typically use to manually lock and unlock the door. This involves unscrewing and removing the screws from the thumbturn and any additional back plates. It's important to unlock your deadbolt before removing the thumbturn entirely to avoid any issues during the subsequent steps.
Next, you'll prepare the mounting plate, which is a key component for attaching the August Smart Lock Pro to your door. The mounting plate features two adjustable screw-holes, allowing for flexibility to align with your deadbolt's existing screw holes. You'll take the screws you removed from your old thumbturn and insert them into the front of the mounting plate. Once the screws are in place, you'll attach the mounting plate to your door, tightening the screws by hand until it is securely fastened against the door. This ensures a stable foundation for the smart lock.
A critical step in the installation is choosing the correct adapter. The August Smart Lock Pro comes with a variety of adapters to ensure compatibility with different deadbolt brands. A compatibility chart is provided to help you identify the correct adapter for your specific deadbolt. If your lock brand isn't listed, you can slide each adapter onto the tailpiece (the metal bar extending from your deadbolt) to find the one that fits best. The correct adapter will have a small nub pointing upwards. It's important to note that adapters can sometimes be placed backward, so if the shape seems correct but feels off, try flipping it around. Once the correct adapter is identified, you'll place it onto the tailpiece with the small nub pointing up, ensuring a proper fit for the smart lock.
With the adapter in place, you're ready to attach the August Smart Lock Pro itself. Before doing so, you'll need to open the two side wing latches on the smart lock. These latches are designed to secure the lock to the mounting plate. You'll then slide the August Smart Lock Pro over the tailpiece and attach it to the mounting plate, making sure the back of the lock is flush with the door. Once properly positioned, you'll clamp down both side wing latches completely to secure the smart lock firmly to the mounting plate.
After the main unit is attached, the next steps involve preparing the device for operation. You'll remove the faceplate of the August Smart Lock Pro by pressing down on the August logo at the bottom and then grabbing the top to pull it off. This reveals the battery compartment. Inside, you'll find a plastic battery isolation tab. While holding the batteries in place, you'll remove this tab. It's important to ensure that the batteries are properly seated in their compartments after removing the tab to ensure power to the device. Finally, you'll replace the faceplate, aligning the August logo at the bottom, to complete the physical installation.
Beyond the core locking and unlocking functions, the August Smart Lock Pro offers additional usage features through its integration with DoorSense™. DoorSense™ is a technology that enables your lock to detect whether your door is open or closed, providing an extra layer of security and awareness. Instructions for installing DoorSense™ are provided separately, typically through a link to the August support website, as it involves a small sensor that needs to be installed on your door frame.
The final step in setting up your August Smart Lock Pro is to complete the process using the August Home app. You'll need to download and install the August Home app on your smartphone. Once installed, you'll select "Get Started" from the home screen or, if you're already logged into the app, choose "Set Up a Lock" from the main menu. The app will then guide you through the digital setup, which typically involves pairing the lock with your phone via Bluetooth, calibrating the lock, and configuring various settings such as auto-lock and notifications. This app-based setup is crucial for enabling all the smart features of the lock, including remote access (with an August Connect Wi-Fi Bridge, sold separately), guest access management, and activity logs.
For maintenance and support, the manual provides contact information for customer service, including a phone number and a support website. This ensures that users can easily get help if they encounter any issues during installation or operation. The design of the August Smart Lock Pro, which installs over your existing deadbolt, means that maintenance primarily involves ensuring the batteries are charged and occasionally checking the physical fit of the lock on the door. The app will typically notify you when battery levels are low, prompting you to replace them. The robust design and clear installation steps aim to make the August Smart Lock Pro a user-friendly and reliable addition to any smart home.
| Lock Type | Deadbolt |
|---|---|
| DoorSense | Yes |
| Battery | 4 AA batteries |
| Battery Life | 3-6 months |
| Auto-Lock | Yes |
| Auto-Unlock | Yes |
| Guest Access | Yes |
| Activity Log | Yes |
| Model | Smart Lock Pro (3rd Gen) |
| Compatibility | Most standard single-cylinder deadbolts |
| Connectivity | Bluetooth, Wi-Fi |
| Finish | Silver, Dark Gray |
| Material | Metal |
| Remote Access | Yes |
| Installation | Replaces existing deadbolt interior |
| Color | Silver, Dark Gray |