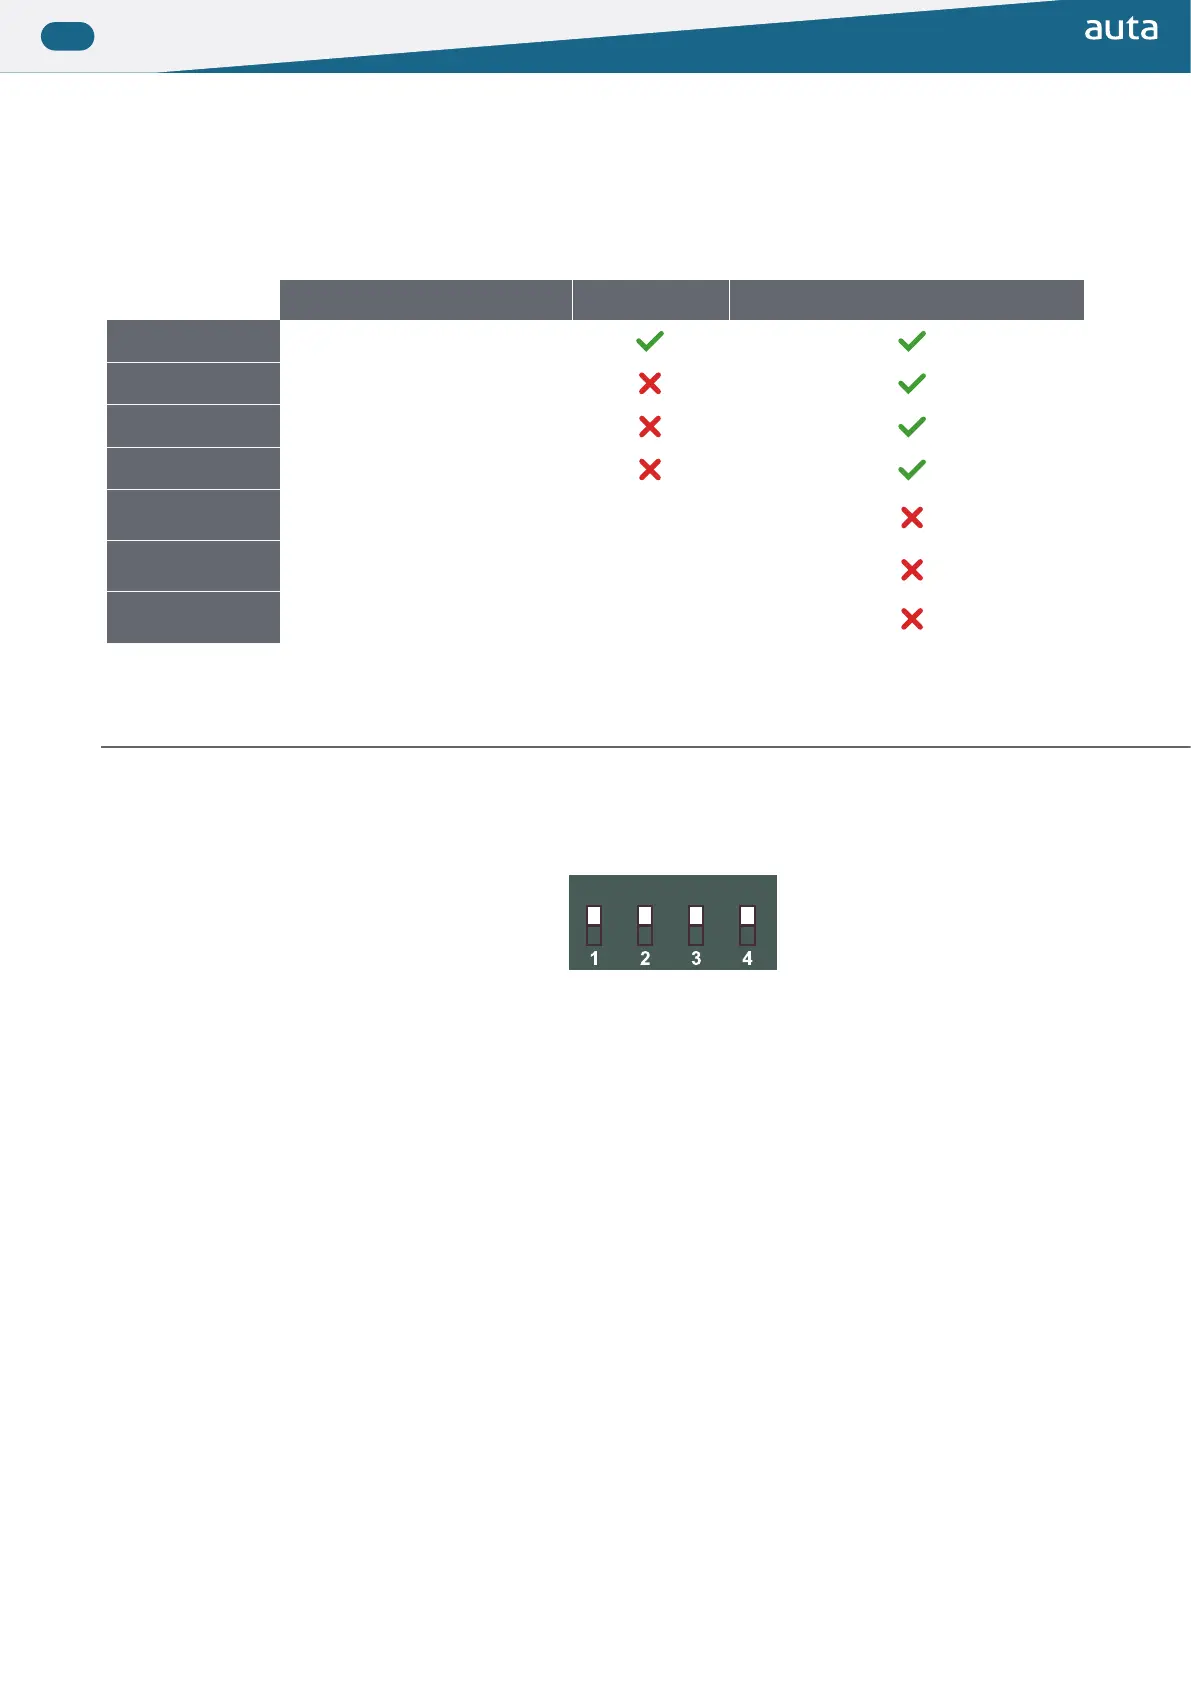
Conguración Conguration
Ajustes predeinidos desde fábrica. Algunos de ellos pueden ser modiicados de forma directa y otros necesitan ser
modiicados conectando una placa teclado o un teclado MINI (730165).
Factory default settings. Some of them can be modiied directly and others need to be modiied by connecting a keyboard
panel or a MINI keyboard (730165).
Función Function Fábrica Factory Modificación directa Direct modification
AUTO
Auto-encendido
Self-starting
CCI
Llamada a conserjería
Call to switchboard
P66
Pulsador 66 llama a conserje
Push-button 66 calls to concierge
67_132
Códigos de pulsador desde 66 a 132
Push-buttons codes from 67 to 132
TIEMPO APERT. 1
OPENING TIME 1
Tiempo de apertura desde vivienda
Opening time from lat
2 segundos
2 seconds
TIEMPO APERT. 2
OPENING TIME 2
Tiempo de apertura desde pulsador B+
Opening time from push-button B+
5 segundos
5 seconds
MODO
MODE
Modo de funcionamiento
Functioning mode
INTERIOR
INTERNAL
PLACA DE PULSADORES PUSH-BUTTON PANEL
Para modiicar algunos de los ajustes superiores, sin necesidad de conectar un teclado+display, deberemos
realizar el siguiente procedimiento.
To modify any of the settings above, without connecting a keypad+display, we’ll follow the next steps.
AUTO CCI P66 67-132
1. Anotar la coniguración del módulo de control
Annotate the coniguration of the module of control
2. Desconectar el positivo del módulo de control
Disconnect positive of the module of control
3. Realizar un puente, con un trozo de cable, entre B+ y B-
Do a bridge, with a piece of wire, between B+ and B-
4. Colocar hacia abajo las funciones que deseamos activar y dejar arriba las que deseamos que
permanezcan desactivadas
Set down the functions we want to activate and leave up the functions we want to leave disabled
5. Conectar el positivo del módulo de control. El módulo comenzará a emitir pitidos
Connect positive of the module of control. The module will start to emit beeps
6. Validar las funciones seleccionadas pulsando el pulsador 1 (Fila 1 - Columna 1)
Validate the selected functions by pressing the push-button 1 (File 1 - Row 1)
7. El modulo de control dejará de pitar
The module of control will stops emitting beeps
8. Desconectar el positivo del módulo de control y deshacer el puente realizado en el paso 3
Disconnect the positive of the module of control and undo the bridge done in the step 3
9. Conigurar de nuevo el código anotado en el paso 1
Set again the code annotated in the step 1
10. Conectar el positivo del módulo de control
Connect positive of the module of control
 Loading...