ELECTRICAL SERVICES
EC970 power control system
The system has a number of key components that you will need to be familiar with before attempting to use the system, these
are:
• The EC700 Power Supply Unit (PSU): A combined mains consumer unit and 12V controller located in the bed box or
upper locker.
• The EC970 Control Panel (CP): A remotely located user control panel used to turn circuits on and o and to display
battery, water tank and other system information. This panel uses a graphical touchscreen with straightforward controls and
reliable data communication to the PSU.
• The PX300 Intelligent Battery charger 300W: A separate, air cooled 300W multi-stage power converter unit that charges
the batteries and provides 12V DC power.
• The EM40/EM41 Vehicle Interface Unit: This small unit is located at floor level behind the drivers’ seat. The unit houses
fuses for the fridge, vehicle battery, radio and other systems. It also provides connections for the optional tow bar harness.
13 TOGETHER WE’RE GOING PLACES For more information visit www.auto-trail.co.uk 14
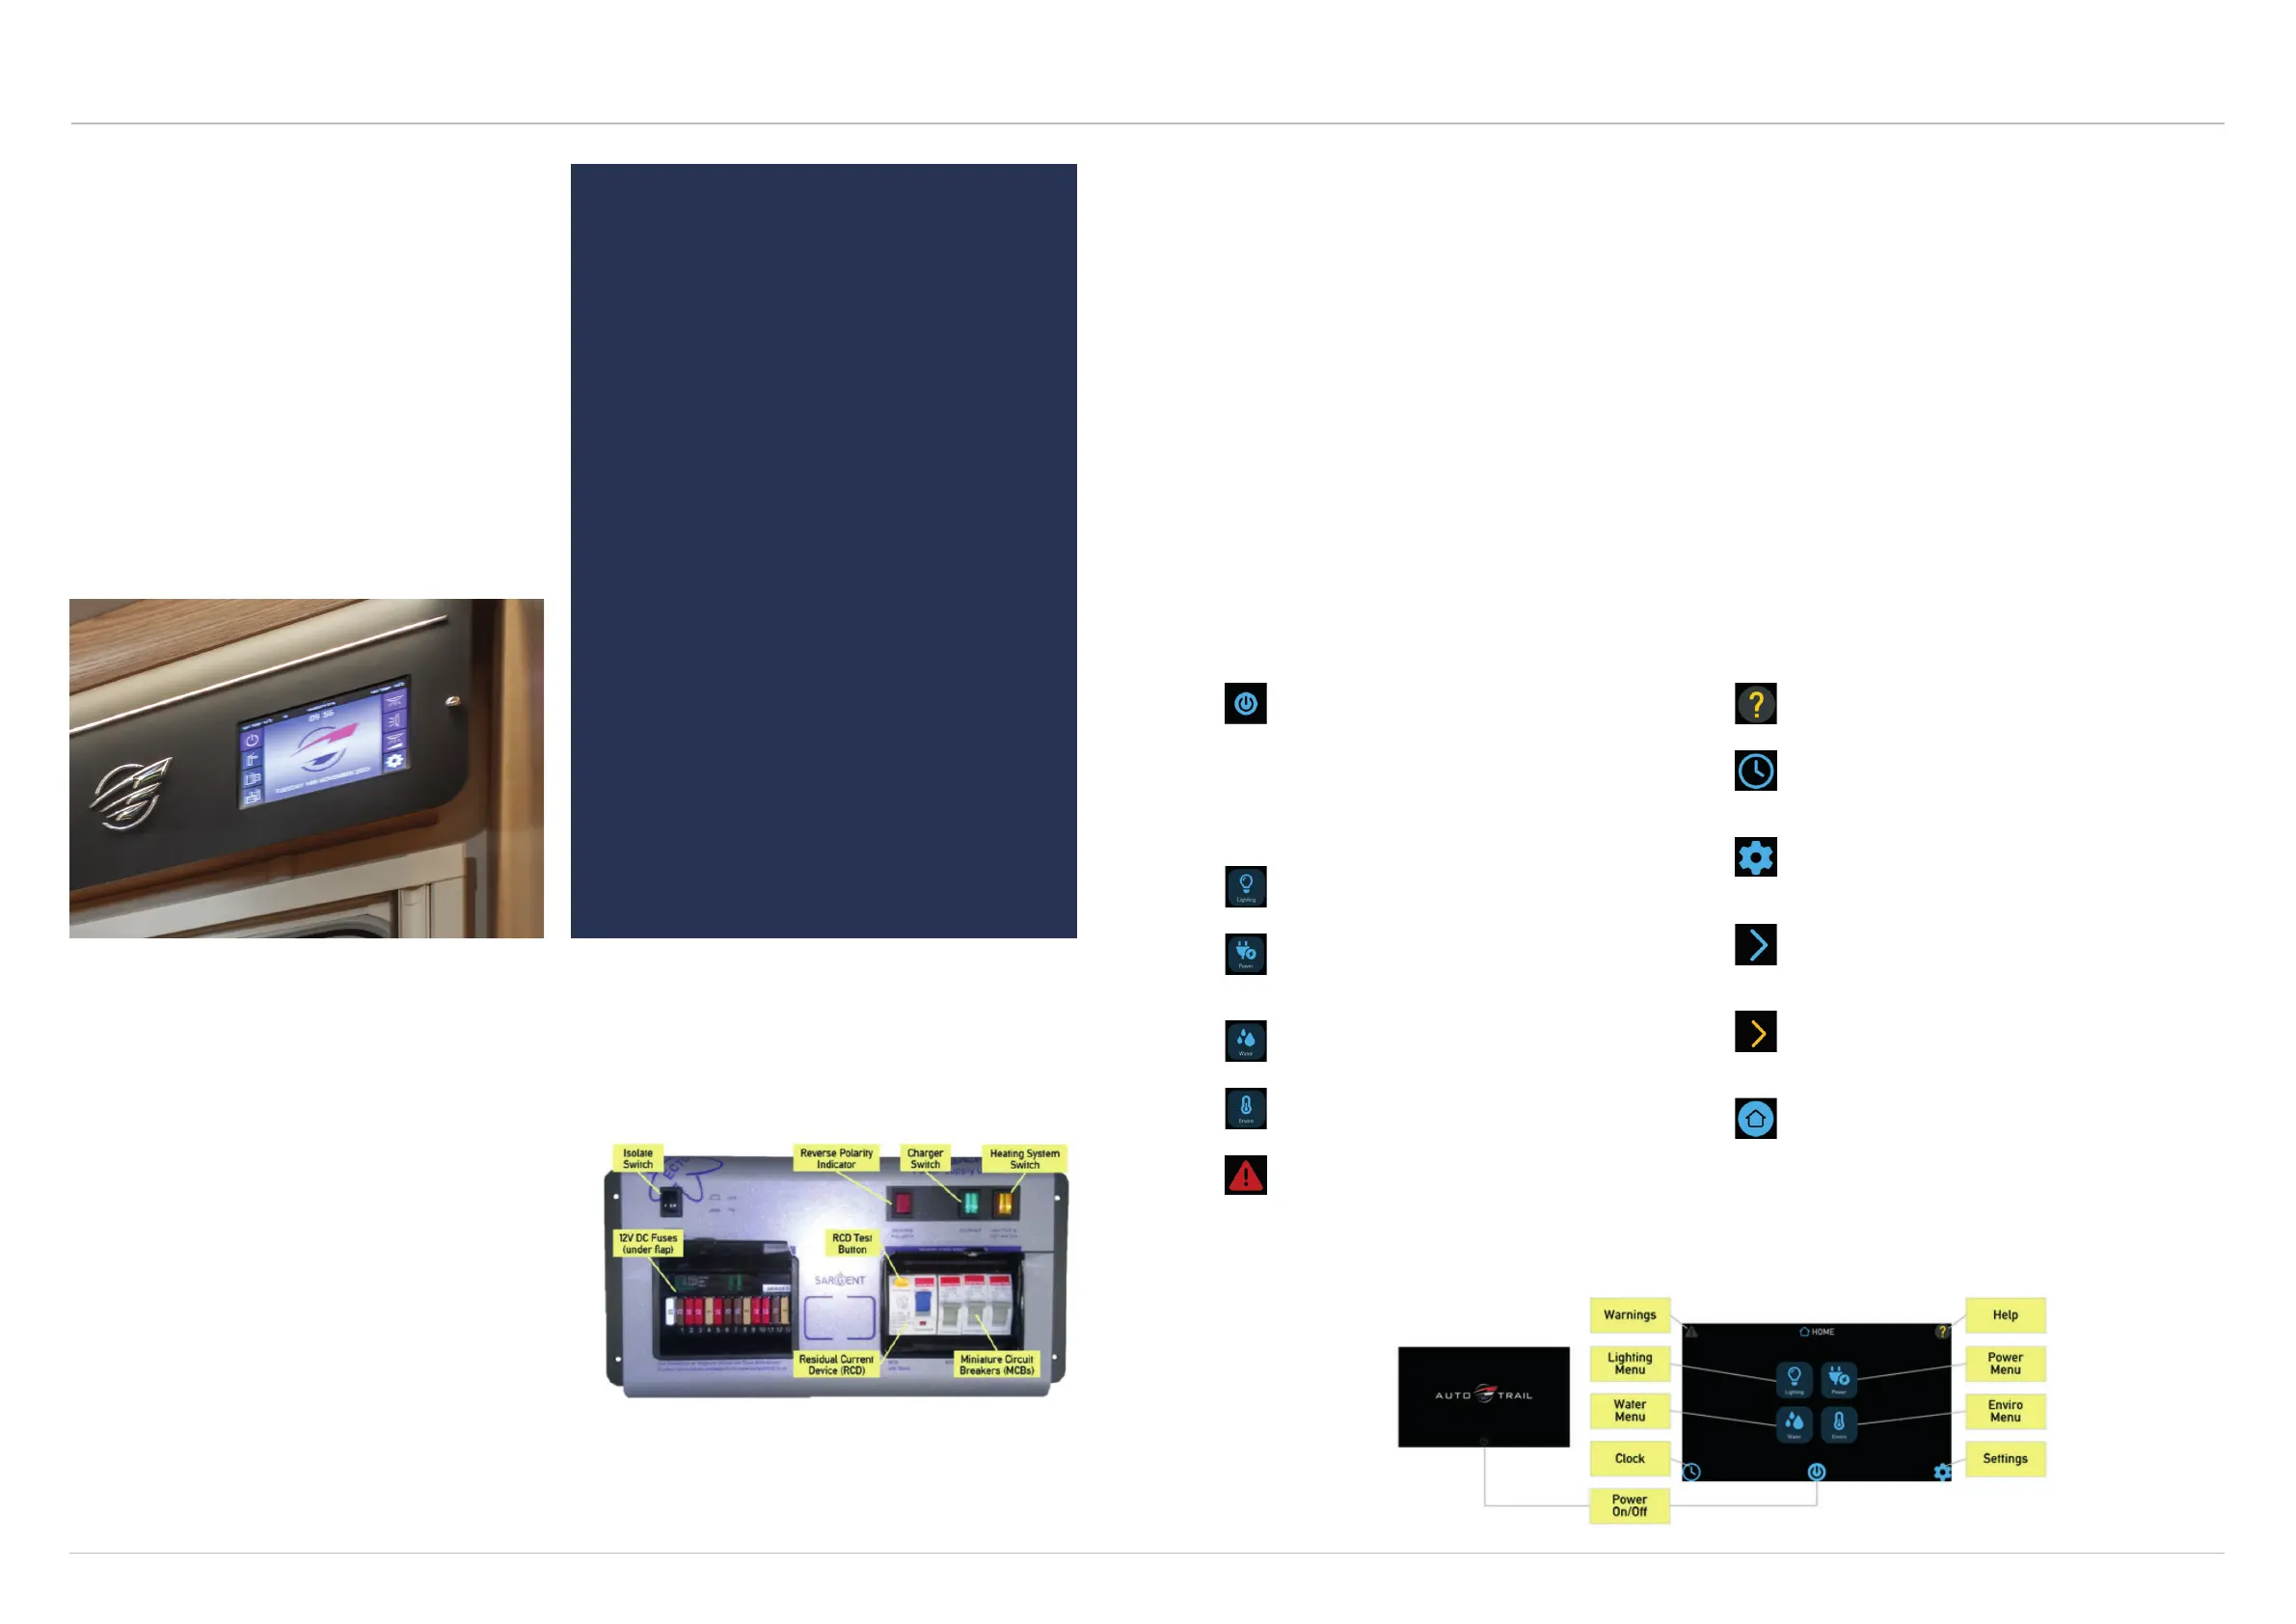
EC970 control panel
Your control panel will have an appearance as below, but depending on your vehicle specifications, the control
panel features will vary. Not all features are present in all vehicles.
Power On/O Button: After activating the PSU by
pressing the system shutdown button, the display will
beep twice and show the Auto-Trail start-up logo. To
activate power to all circuits, press the power on/o
button, the panel will beep once. To turn the power
o and enter standby mode, press the power button
again. If the display has been inactive for some time,
the backlight will be switched o to save power; simply
tap the screen to restore normal brightness.
Lighting Menu: Press the lighting button to show the
lighting control screen. Here you can turn on/o or
adjust the dimmable lighting levels.
Power Menu: Press the power button to show the
power information and control screen. Here you can
view leisure/vehicle battery condition, and check
battery charger and solar charger currents.
Water Menu: Press the water button to show the
water tank information and control screen. Here you
can view tank levels and control related features.
Environmental Menu: Press the enviro button to
show the internal and external temperature in degrees
celsius. Also shown is the internal relative humidity.
Warnings Button: The system incorporates a number
of warnings, for example if the battery becomes low.
When a warning is active, a warning box will appear
along with an audible beeping sound. Until the warning
has been fully cleared, the warning indicator will
remain red. Press the indicator to view any active
warnings.
Help Button: Press the help button to display the
context sensitive help screens. These will provide more
detail about how to use the currently selected screen.
Clock Button: Press the clock button to display the
current time in 24 hour format. This screen also
provides a quick summary of the leisure battery and
fresh water tank status.
Settings Button: Press the settings button to show the
general settings screen. Here you can set the date and
time, screen brightness, screen on-time, key beep etc.
Press the home button to return to the main screen.
Advance button: Pressing this button will advance to
the next main section, for example to move between
lighting, power, water and enviro screens.
Next Button: Pressing this button moves to the next
screen within a section, for example to move between
leisure and vehicle battery screens.
Home: Pressing this button will go back to the Main
Menu screen.
Leisure battery
Your vehicle is equipped with a rechargeable leisure
battery that is located in a dedicated battery
compartment within your vehicle. Locations of
leisure batteries vary from model to model, so please
familiarise yourself with your battery location before
using your vehicle for the first time.
The battery is charged via the on-board charging unit
when the vehicle is plugged into a mains supply, or
via the vehicle alternator whilst your vehicle is being
driven. If you vehicle is fitted with a solar panel, this
will allow the battery to be charged when light levels
permit.
CONNECTING AND
DISCONNECTING THE
LEISURE BATTERY
Please ensure that all cigarettes are
extinguished before working in the auxiliary
battery compartment. Switch o all appliances
and lamps before disconnecting the battery.
• Release the securing bolts or straps from
the leisure battery.
• Carefully remove the battery from the
battery compartment, taking care to
support its weight.
• Release the battery terminals using a
suitable zed spanner.
To refit the battery, simply reverse the above
procedure.
Please ensure the battery is located safely and
securely before driving your motorhome. Any
replacement auxiliary battery should be of the
same type and specification originally fitted by
the manufacturer.
Power supply unit (EC700)
The EC700 system has a shutdown feature that can
be used when the vehicle is in storage. This allows the
leisure electronics to be turned o when not required to
save battery power. When in the o state the alarm and
tracking system supplies are still active, all other supplies
are turned o. Before using the system, please ensure
the system shutdown switch is in the on position (button
in) the system is now active.
Generators
If a generator is fitted, the vehicle must be regularly serviced to achieve the optimum performance. Engine speed
is used to govern the output and frequency of the unit in KW and Hz, and if this is allowed to vary beyond a safe
level, permanent damage could be caused to certain pieces of electronic equipment, such as 12v chargers.
Replacement fuses
When replacing a fuse, please ensure it is the same rated current as the original one fitted to the unit.
 Loading...