The A320 Multifunctional Robotic Vacuum Cleaner is a new generation device designed for domestic home use, offering a comprehensive solution for various floor types including short-haired and low-pile carpets, wood floors, hard floors, and ceramic tiles. This intelligent robot is equipped with a rechargeable battery and controlled by advanced programming, providing a range of automated functions and user-friendly features.
Function Description
The A320 performs several key functions:
- Automatic Vacuum Cleaning: The primary function of the device is to autonomously vacuum clean various floor surfaces.
- Mopping: In addition to vacuuming, the robot can also mop floors, providing a more thorough cleaning experience.
- Sterilizing: The cleaner incorporates a UV sterilizing lamp, which can be activated during operation to sterilize surfaces.
- Timed Cleaning: Users can schedule cleaning times, allowing the robot to operate automatically at predetermined intervals.
- "Full Go" Cleaning: This mode enables the cleaner to perform a complete cleaning cycle, suitable for larger houses where a single charge might not cover all rooms. The robot will start cleaning automatically once fully charged (after 4-5 hours).
- Wireless Remote Control: The device can be conveniently controlled remotely, offering flexibility in operation.
- Speed Selection: Users can choose between fast and slow cleaning speeds to suit their preferences or the cleaning task at hand. The selected speed is automatically memorized.
Usage Features
The A320 is designed for ease of use and offers multiple ways to initiate and manage cleaning tasks:
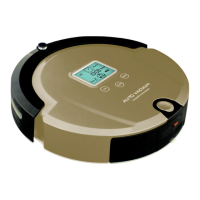
- Control Panel on Main Body: The cleaner features a display interface with touch keys for direct control. The LCD directive sign provides visual feedback on various settings and statuses, including date/week, wheel rotation/speed, UV lamp status, auto cleaning, spot cleaning, current week, malfunction errors, charging/power status, and time/timing cleaning settings.
- UV Lamp Key: Activates or deactivates the UV lamp for sterilization.
- Auto Cleaning Key: Initiates or stops the automatic cleaning mode.
- Spot Cleaning Key: Initiates or stops the spot cleaning mode, focusing on a specific area.
- Remote Control: A wireless remote control provides comprehensive command over the robot.
- Turn Off/Cancel/Stop Key: Turns the cleaner on/off, stops the running mode, or deletes settings. Holding for more than 5 seconds resets all settings to initial status.
- OK Key: Confirms and saves any settings made.
- Auto/FRI Key: Activates automatic cleaning mode or sets Friday for timed cleaning.
- Spot/SAT Key: Activates spot cleaning mode or sets Saturday for timed cleaning.
- Charge/MON Key: Initiates automatic recharging or sets Monday for timed cleaning.
- Schedule/TUE Key: Sets timed cleaning or sets Tuesday for timed cleaning.
- Clock/WED Key: Sets the current time or sets Wednesday for timed cleaning.
- UV/THU Key: Controls the UV sterilizing lamp or sets Thursday for timed cleaning.
- Speed/SUN Key: Selects cleaning speed (fast or slow) or sets Sunday for timed cleaning.
- Full Go Key: Activates the "full go" cleaning function.
- Direction Keys (Forward, Back, Turn Left, Turn Right): Manually navigates the robot.
- Automatic Recharging: The cleaner can automatically search for and return to its docking station for charging when the battery is low during cleaning. The docking station should be placed on flat ground against a vertical wall, with no obstacles within 3m in front and 0.5m to the right and left.
- Manual Charging: The cleaner can also be charged directly using the adaptor or by manually placing it on the docking station. For first-time use, a 12-hour charge is recommended for optimal battery performance, followed by 4-5 hours for subsequent full charges.
- Space Isolator: An accessory that emits an infrared signal to prevent the cleaner from entering specific areas. It has a toggle switch to adjust the signal distance (Low for 3m, High for 6m) and a near-infrared transmitting head to keep the cleaner outside a 50-100cm scope. The Space Isolator should be placed near the entrance of the area to be blocked, at the same level as the ground, and at least 3m away from the docking station to avoid interference. It requires 2 "D" batteries.
Maintenance Features
Regular maintenance ensures the optimal performance and longevity of the A320:
- Dustbin and Blower Cleaning:
- The dustbin can be easily extracted by pressing a key.
- The blower pops up automatically for cleaning of the air inlet/outlet with a dust brush. Important: Do not clean the blower in water.
- After removing the filter, the dustbin itself can be cleaned with water.
- The filter should be cleaned with a hairdryer or dust brush.
- All parts should be reassembled firmly after cleaning.
- Main Brush, Floor Brush, and Side Brush Cleaning:
- The mid-cleaning brush and floor brush can be accessed by forcing the locking bar forward and raising the cover.
- Remove the main brush and floor brush for cleaning.
- Regularly clear hair and large dust particles from these brushes to maintain cleaning performance. Clean the air intake and remove any twisted objects with scissors or by hand.
- The side brush can be removed by releasing a screw for cleaning or replacement.
- Left/Right Wheel and Front Wheel Cleaning:
- The left/right wheels can be removed by releasing a screw and cleaned with a brush. Important: Do not wash them in water.
- The front wheel can be pulled out with fingers or tools for cleaning.
- Ensure wheels are placed back in their original positions and screws are tightened.
- Sensor and Infrared Transparent Window Cleaning:
- Clean the sensor and infrared transparent window with a cotton swab or soft cloth.
- The wall detection sensor is at the front, while ground detection sensors and the infrared transparent window are at the bottom. Keeping these clean is crucial for the robot's navigation and performance.
- Battery Replacement:
- The battery is accessed by releasing a screw and opening the base plate.
- Ensure positive and negative electrodes are aligned correctly when replacing the battery.
- When not in use, setting the cleaner to charging mode helps ensure longer battery life.
- Safety Precautions for Battery: Always turn off the power switch before removing the battery. Do not place the battery in high-temperature environments (above 45°C) or water. Avoid external force or dropping the battery. Recycle or dispose of the battery safely; do not discard it freely or throw it into fire. If the battery leaks, avoid contact with skin and clothes.
- If the battery is low while heating, the robot will return to the docking station for recharging. If the robot cannot work for more than 50 minutes after recharging for low battery electricity, power off the robot for more than 2 hours to cool the battery.
- If the machine is not used for a long time, charge it at least every three months to prevent battery damage. The battery warranty period is 6 months.
Troubleshooting
The manual provides a troubleshooting guide for common issues, including the cleaner not working or cleaning poorly, remote control malfunction, automatic charging failure, increased noise, sudden stops, continuous backing off, falling from stairs, and the cleaner stopping without an error code. For issues not resolved by the guide, contact customer service. Disassembling or maintaining the device yourself will void the warranty.