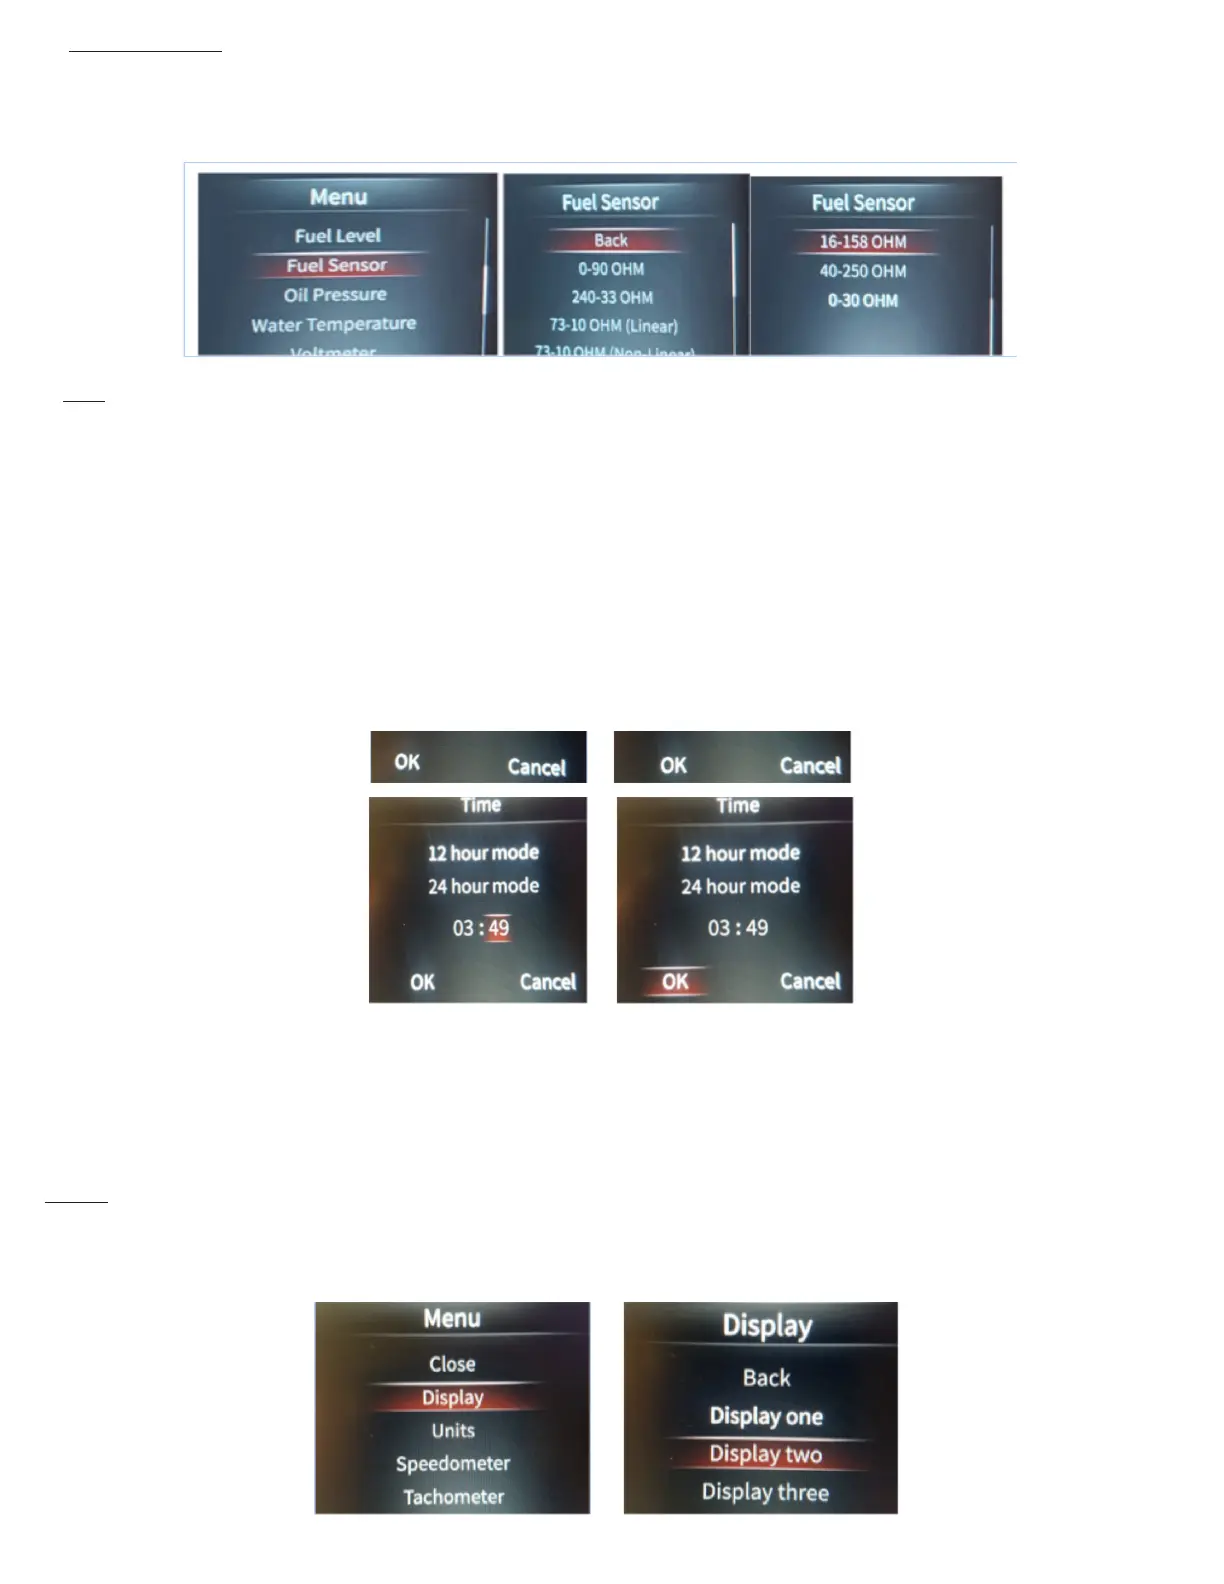
Time You may set the time as a standard 12 hour clock, or a 24 hour clock.
To adjust the time, enter into the Main Menu, then scroll to Time, and press Enter. Here you can scroll to 12, or 24 hour mode, and click
Enter, but you can also adjust the time here. Once you have “Entered” on 12 hour, or 24 hour mode, you can then scroll to the hours (left)
segments and click Enter. You then scroll the numbers up or down by turning the Selector knob left or right. Press Enter, then scroll to the
right to highlight the minutes (right) segments. You then scroll the numbers up or down by turning the Selector knob left or right. Press
Enter. Once you are nished, scroll to “OK” and press Enter. This returns you to the main menu.
Fuel gauge set up If you are running a 0-90 fuel sender, there is no further set up required regarding the fuel gauge. This step can then be
skipped.
You have 7 different fuel sensor ranges to select from, select the one that matches your vehicles fuel sender and press enter. Once you
have chosen the correct sensor range, scroll up to Back, and press Enter. Once you are back at the Main Menu, scroll to Close and press
Enter.
Display You have 3 different display types to choose from. To choose the display style, enter into the Main Menu, scroll to Display, and
press Enter. Then scroll to which number display you want, and press Enter.
 Loading...