Do you have a question about the Autonomous SmartDesk Home Edition and is the answer not in the manual?
Identify Motor Leg, Driveshaft, and Non-Motor Leg for proper driveshaft insertion.
Ensure Driveshaft and Center Rod are in good condition. Identify Left Nut, Right Nut, and Center Rod.
Slightly loosen the Right Nut by turning it once around. Do not remove it.
Pull the Center Rod out and insert it into the Non-Motor Leg, maintaining a 0.2in gap.
Push the Center Rod all the way in, leaving a 0.2in gap for smooth rotation.
Turn the Left Nut clockwise to remove it. Ensure the Plastic Grommet is correctly oriented.
Insert the Left Nut and Plastic Grommet into the Rod on the Motor Leg, ensuring correct orientation.
Insert the Driveshaft into the Rod on the Motor Leg and push it all the way in.
Leave a 0.2in gap between Left Nut and Motor Leg. Turn Left Nut counterclockwise to lock Driveshaft.
Turn the Right Nut to lock the Driveshaft. Ensure it does not touch the Frame.
Hand tighten or use the Wrench to tighten both Left Nut and Right Nut.
Press Up/Down buttons to raise and lower the SmartDesk several times to check functionality.
Verify a 0.2in gap between Left Nut and Motor Leg. Adjust Left Nut Location if needed.
Verify a 0.2in gap between Center Rod and Non-Motor Leg. Adjust Right Nut/Center Rod if necessary.
Ensure a gap exists between the Right Nut and the Non-Motor Leg. Adjust Right Nut if needed.
Use the 'Up' or 'Down' buttons to adjust the desk height.
Set desk height, press 'M' until LED flashes, then press desired number to save.
Unplug/replug cables. Press Up/Down simultaneously until beep, then press Down for exact height.
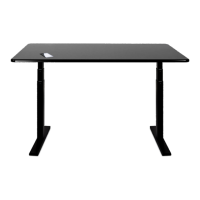
| Desktop Size | 53" x 29" |
|---|---|
| Weight Capacity | 265 lbs |
| Frame Material | Steel |
| Control Type | Digital Keypad |
| Memory Presets | 4 |
| Motor | Single motor |
| Warranty | 5 years |
| Noise Level | 50 dB |