Do you have a question about the Avago LSI SAS 9200-8e and is the answer not in the manual?
Unpack the HBA in a static-free environment and inspect for damage. Back up data before configuration.
Turn off the computer and disconnect power and network cables to prevent damage or shock.
Remove the computer chassis cover to access internal components for HBA installation.
Replace the full-height bracket with a low-profile one using a Phillips screwdriver and specific torque.
Align and firmly press the HBA into an available PCIe slot, securing it with the bracket panel screw.
Secure the HBA bracket to the system's chassis using the bracket screw or retention mechanism.
Replace the computer chassis cover after the HBA has been installed.
Connect SAS cables between the HBA's external mini-SAS connectors and SAS enclosure devices.
Reconnect power cords and network cables, then power on the system to complete hardware installation.
Find all driver installation instructions at http://go.lsi.com/hbas, selecting the appropriate product.
Contact LSI Technical Support for assistance with installation, configuration, or operation via email or website.
Warranty does not cover parts damaged by bracket changes or ESD damage to the HBA.
The LSI SAS 9200-8e PCI Express to 6Gb/s SAS Host Bus Adapter (HBA) is a crucial component for expanding storage capabilities in computer systems. This quick installation guide provides a comprehensive overview of how to set up and maintain the device, ensuring optimal performance and longevity.
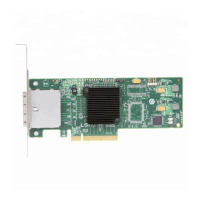
The LSI SAS 9200-8e HBA serves as an interface between a computer's PCI Express bus and external SAS (Serial Attached SCSI) or SATA (Serial ATA) storage devices. It enables high-speed data transfer at 6Gb/s, facilitating efficient communication with disk drive enclosures. The HBA features two external x4 mini-SAS connectors, each supporting four 6Gb/s SAS ports, allowing for connection to multiple storage devices. This expandability makes it ideal for servers, workstations, and other systems requiring robust storage solutions. By integrating this HBA, users can enhance their system's storage capacity and performance, making it suitable for data-intensive applications, backups, and large-scale data management. The device is designed to be compatible with various operating systems, with specific drivers available for download to ensure seamless integration and functionality.
The installation process for the LSI SAS 9200-8e HBA is straightforward, beginning with careful unpacking and inspection for any damage. It is critical to perform all installation work in an electrostatic discharge (ESD)-safe environment to prevent damage to the sensitive electronic components. Before making any changes to the system configuration, users are advised to back up their data to prevent potential loss.
The physical installation involves preparing the computer by turning it off and disconnecting the power cord. The chassis cover must be removed to access the internal components. Depending on the system, the HBA may require a change of mounting bracket from full-height to low-profile. This involves carefully unscrewing two Phillips screws, removing the existing bracket, positioning the HBA on the new bracket, and re-securing it with the screws. It is crucial to use an ESD-safe #1 Phillips screwdriver and adhere to a maximum torque of 4.8 ± 0.5 inch-pounds when tightening the screws to avoid damaging the board, connectors, or screws, which could void the warranty.
Once the bracket is properly attached, the HBA is inserted into an available PCIe x8 slot. Users should locate an empty slot, remove the corresponding blank bracket panel from the back of the computer, and then gently but firmly press the HBA into the slot until it is correctly seated. After the HBA is in place, the bracket is secured to the system's chassis using a bracket screw or by engaging the system retention mechanism.
With the HBA physically installed, the chassis cover is replaced. The next step involves connecting SAS cables between the HBA and the SAS enclosure containing the SATA or SAS devices. The LSI SAS 9200-8e HBA's two external x4 mini-SAS connectors require an external cable with a standard mini-SAS connector (SFF-8088) on both ends for connection to disk drive enclosures. Finally, all power cords and network cables are reconnected, and the system is powered on.
After the hardware installation is complete, the appropriate operating system drivers must be installed. These drivers are essential for the HBA to function correctly and communicate with the operating system. Instructions for driver installation are available on the manufacturer's website, where users can select their specific product and access the software downloads section.
Maintaining the LSI SAS 9200-8e HBA primarily involves careful handling during installation and adherence to best practices to prevent damage. The guide emphasizes the importance of working in an ESD-safe environment, which is a critical maintenance aspect for any electronic component. ESD damage can severely impair the HBA's functionality and is not covered under warranty. Therefore, users should take precautions such as using antistatic mats, wrist straps, and ensuring proper grounding.
The guide explicitly warns against damaging the screws during bracket replacement, as this can void the warranty. This highlights the need for precision and the use of appropriate tools, such as a torque screwdriver, to prevent over-tightening. Similarly, exceeding the specified torque can damage the board, connectors, or screws, also voiding the warranty. This underscores the importance of following the installation instructions meticulously.
In terms of ongoing maintenance, the HBA itself is designed for reliability and typically does not require routine physical maintenance once installed. The primary maintenance tasks revolve around ensuring that the latest drivers are installed, which can be found on the manufacturer's website. Keeping drivers updated helps maintain optimal performance, compatibility, and security.
For technical support, users can contact LSI Technical Support via email or visit their website. The warranty notice clarifies that damage caused by changing the bracket or ESD damage is not covered. Furthermore, HBAs returned without a bracket mounted on the board will not be processed for return merchandise authorization (RMA). This policy reinforces the need for careful handling and proper reassembly if the bracket is changed. By adhering to these guidelines, users can ensure the longevity and reliable operation of their LSI SAS 9200-8e HBA.
| SAS Controller | LSI SAS2008 |
|---|---|
| Max Devices Supported | 256 |
| Interface | PCIe 2.0 x8 |
| Data Transfer Rate | 6 Gb/s per port |
| RAID Levels | None (Host Based RAID) |
| Operating System Support | Windows, Linux, VMware |
| Form Factor | Low-profile |
| Device Type | Host Bus Adapter (HBA) |