PLACEMENT
Proper placement is essential for getting the ideal, intended response and
imaging from any studio monitor. Of course, not every room and setup is
the same, but these simple steps will ensure that your source material is
being heard as accurately as possible.
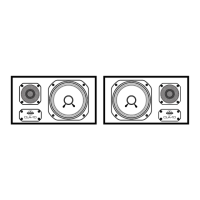
1. Left and right: Ensure that the left speaker is placed on the left side, and
the right speaker is placed on the right side. This is important for correct
phase and imaging. The CLA-10 Active can be used vertically but be aware
that the left speaker and right speaker should be swapped in this case,
retaining the tweeters on the outside orientation.
2. Room considerations: Place your monitors away from walls and cor-
ners. Ideally, they should be centered in your room. Because this isn’t al-
ways possible, a good rule of thumb is to keep at least 12 inches of space
between the monitors and the back wall, maintaining a symmetrical dis-
tance from the side walls.
3. Height: Posit your monitors at ear-height from your most comfortable
mixing/listening position to make sure you’re in the proper sweet spot at
all times.
4. Distance and width: From your most comfortable listening position,
create an equilateral triangle from your ears to the monitors, and the
monitors to each other as shown below. Measure the distance between
the tweeter of each speaker, and ensure that your listening position is that
same distance — directly in the center. Finish by rotating each monitor
inward towards your listening position. It’s best to ensure that each mon-
itor has been rotated by the same amount. This may be an old-school
method, but it’s a method of proven science to help any listener hear the
intended stereo image.
ADVANCED ADJUSTMENT
Calibration: A decibel meter (or even a decibel meter app on your phone)
is very helpful while adjusting monitor gain. This is strongly recommended
to ensure that your stereo image between a pair of monitors is accurate.
Note that each monitor needs to be individually calibrated.
1. Set your meter to C-weighted monitoring with slow response.
2. Place the decibel meter at your listening position — right where
your ears go.
3. Turn the monitor gain to 0 on both monitors and power them on.
4. Set your source hardware to Unity.
5. Set your pink noise generator to -20dB.
6. Slowly bring up the left monitor gain until the decibel meter
reads 80dB.
7. Power the left monitor off.
8. Slowly bring up the right monitor gain until the decibel meter
reads 80dB.
9. Power the left monitor back on. You’re done!
NOTE: If you are calibrating multiple pairs, then repeat the
same process for each speaker.
SPECIFICATIONS
Ġ
System Type: 400 W Total full-range two-way
stereo pair / 200 W per speaker
Ġ
Frequency Response: 60 Hz-20,000 Hz (Accessible musical
range)
Ġ
Sensitivity: 90 dB SPL (1 W, 1 m on axis)
Ġ
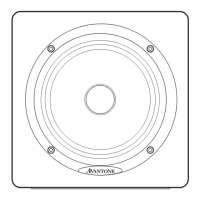
LF Driver: AV10-MLF 18 cm cone
Ġ
HF Driver: AV10-MHF 3.5 cm soft dome
Ġ
Cabinet: Sealed cabinet design, hybrid medi-
um-density fiberboard with real wood
veneer
Ġ
Cabinet Dimensions: 381.5 mm x 215 mm x197.5 mm (15” x
8 ½” x 7- ¾ ” )
Ġ
Cabinet Weight: 8 kg / 17.6 Lbs (each)
Revised 03-26-24
©2024 Avantone Pro. All rights reserved.
www.avantonepro.com
Designed in USA. Made in China.
RAD Distribution | 180 Carpenter Ave. Middletown, NY 10940
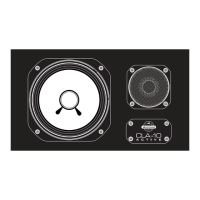
CLA-10 ACTIVE
ACTIVE STUDIO MONITOR
Horizontal Orientation Vertical Orientation