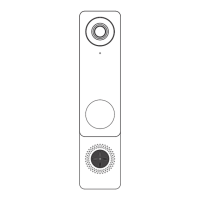
Video Intercom Reader Pro
(OP-VID-PRO-INT)
Some hardware may show the Openpath logo. QuickStartGuide-OP-VID-PRO-INT-Rev2
Contents
1 x Video Intercom Reader
1 x Cradle bracket
1 x Mullion mounting plate
1 x Standard mounting plate
1 x Pin for Admin button
2 x Machine screws
2 x Wall mount screws and anchors
2 x Cradle mount screws
1 x Security screw
1 x Waterproof Ethernet coupling
1 - Mounting
The Video Intercom Reader Pro can be installed using a mullion mount or
standard mount.
Mullionmount
1. Use the provided machine screws
(a) in threaded holes, or the wall
mount screws and anchors (not
shown) for drywall, to attach the
mullion mounting plate (b) to the
wall.
2. Place the cradle bracket (c) on the
mounting plate, angled as desired,
and secure with the provided
screws (d).
3. Strip and connect the wires, and
provision the device (see 4 -
Provisioning).
4. Snap in the reader (e), and secure
with the security set screw (f).
Note: Do not use adhesive.
Standardmount
1. Install a recessed single gang
box into the wall.
2. Use the provided machine
screws (a) to attach the
standard mounting plate (b) to
the wall.
3. Place the cradle bracket (c) on
the mounting plate, angle as
desired, and secure with the
provided screws (d).
4. Strip and connect the wires,
and provision the device (see 4
- Provisioning).
5. Snap in the reader (e) and
secure with the security set
screw.
Note: Do not use adhesive.
2 - Wiring
Note: The Video Intercom Reader Pro does not require the Avigilon
Access Control Unit (ACU).
Connector type Description
Ethernet RJ-45 connector
Connection to Avigilon cloud
Pigtail color Short name Full name
Black GND Wiegand RTN
Green WD0 Wiegand Data 0
White WD1 Wiegand Data 1
Connections to third-party controller (optional)