Do you have a question about the Awron F8xDGA and is the answer not in the manual?
Introduces the AWRON Display F8 DGA and its compatibility with BMW M3/M4 models.
Details the F8xDGA Display module and the power cord set included in the delivery.
Lists necessary tools: mounting wedge, TORX T25, 10mm socket, 2mm flat screwdriver.
Shows the 150cm cable harness, including its USB connection.
Visual representation of electrical connections, pinouts, and wire colors.
Procedure for removing the air vent using a plastic wedge.
Instructions for unscrewing the passenger side panel under the glove box using an 8mm hex wrench.
Guide on how to pull the disassembled panel downwards.
Instructions for removing electrical connectors from the panel.
How to remove door sill finishers using a plastic wedge.
Steps for removing connectors and threading cables behind the trim.
Instructions for removing the side panel using a plastic wedge.
Procedure for unscrewing a cover using a TORX T25 screwdriver.
Removing a side panel to gain access to the FEM control unit connectors.
Instructions for removing the specific connector CON3.
Shows the FEM unit with CON3 highlighted and relevant part numbers.
Visual guide on physically plugging the CON 3 connector into its socket.
Procedure for unlocking the bracket at the connector to allow removal.
Steps to physically remove the connector.
Instructions for removing a connector from its housing.
Guide to unpinning wires 20 (KL15) and 24 (KL31) using a 2mm flat screwdriver.
How to install the supplied black connector onto the existing wiring.
Guide for connecting the AWRON harness wires to pins 20 and 24.
Shows the FEM unit with CON8 highlighted and identifies pins 47 (CAN_LOW) and 48 (CAN_HIGH).
Highlights pins 47 and 48 on the connector, designated for CAN_LOW and CAN_HIGH.
Shows the FEM unit with the CON10 connector highlighted.
Procedure for unlocking the bracket at the connector to allow removal.
Steps to physically remove the connector.
Instructions for removing the connector from its housing.
Guide to unpinning pin 3 from the connector using a 2mm flat screwdriver.
How to install the supplied blue connector.
Guide for connecting the ETH_WUP wire (blue/yellow) to the connector.
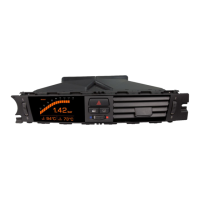
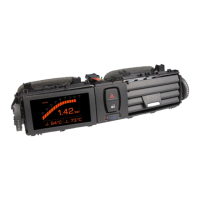
Steps for physically installing the AWRON display unit into the car's dashboard.
Illustrates the final installed position of the AWRON display in the dashboard.
Provides support contact information (email) and website for further assistance.