Technische Änderungen vorbehalten. Subject to technical changes.
WAF-Anleitung, 01/2019, DS, Vorlagen/Anleitungen/WAF-DE-EN.pdf
WAF
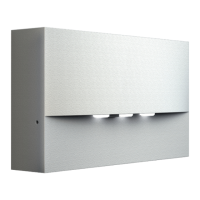
LED Sicherheitsleuchte
LED safety luminaire
Wichtiger Hinweis!
Arbeiten an elektrischen Anlagen und elektrischen Betriebsmitteln dürfen
nur von einer Elektrofachkraft vorgenommen werden. Unbedingt vor
Beginn der Montage elektrische Leitungen spannungsfrei schalten.Vor oder
während der Installation sind die nachstehend aufgeführten
Installationsvorschriften zu beachten bzw. einzuhalten.
Achtung, unbedingt lesen! Bei Schäden, die durch Nichtbeachtung der
Anleitung verursacht werden, erlischt der Garantieanspruch, Für Folge-
schäden, die daraus resultieren übernehmen wir keine Haftung. Diese
Bedienungsanleitung ist vor Inbetriebnahme des Produktes genauestens
durchzulesen.
Metall-Druckguss-Fluchtwegleuchte
Sicherheitsleuchte gem. DIN EN 60598-1, DIN EN 60598-2-22, DIN EN 1838
für Wandaufbaumontage. Geeignet für Dauer- oder Bereitschaftsschaltung.
Für die volle Funktionstüchtigkeit einer Einzelbatterieleuchte muss der
Akku mindestens 24 Std. geladen werden.
Danach kann die Leuchte durch Druck auf den Prüftaster bzw. durch
Netzunterbrechung geprüft werden. NiMH-Akkus müssen bei
erstmaliger Anwendung „geformt“ werden und entfalten ihre
volle Leistungsfähigkeit erst nach ca. 3 vollen Lade-/Entlade-
zyklen. Da die Status-LED ebenfalls in das Hauptleuchtmittel
integriert ist muss der beiliegende Prüftaster nicht zwingend
angeschlossen werden.
Zentralbatterieleuchte bzw. Einzelbatterie in Bereitschaftsschaltung:
Es werden nur die Klemmen L, und N belegt. Achtung! Diese Phase muss
24 Std. am Tag anliegen und darf nicht geschaltet werden!
Dauerschaltung: Alle Klemmen gemäß Anschlussplan belegen. L‘ kann
geschaltet werden. (Zum Belegen der Klemmen nur Schraubendreher Größe 1
verwenden!)
Technische Daten
t
a
: -5° C bis +40° C
Leuchtmittel: 3-ERT-LED
Schutzklasse: II
Schutzart: IP 40
Montagearten: Wandaufbau
Die Elektronikanleitung fi nden Sie als separates Beiblatt.
Wichtig: Die Lichtquelle dieser Leuchte darf nur vom Hersteller oder
einem von ihm beauftragten Servicetechniker oder einer vergleichbar
qualifi zierten Person ersetzt werden.
Zur Reinigung keine lösungsmittelhaltigen Reiniger verwenden!
Wichtig: Wenn die Nennbetriebsdauer nicht mehr erreicht
wird ist der entsprechende RPOWER®-Akku durch eine
sachkundige Person zu erneuern. Bei Batteriewechsel alten
Akku nicht im Hausmüll entsorgen!
Important information
These instructions are intended solely for trained electricians or the
installation company responsible. The installation requirements listed
below must be noted and observed before and during installation.
Caution! Claims for warranty cannot be lodged in the event of damage
caused by non-observance of these instructions. We do not accept any
liability for follow-on damage resulting from this. These operating instruc-
tions must be read very thoroughly before commissioning the product.
Metal-Die-Cast emergency luminary
Emergency luminaire for marking of escape and rescue routes according
to DIN EN 60598-1, DIN EN 60598-2-22, DIN EN 1838 for wall mounting
For full function of the lamp the accumulator (battery) must be charged
for at least 24 hours. After this period the lamp can be ckecked by press-
ing the check button or by a mains failure. NiMH batteries
must be “shaped” upon initial application and develop
their full performance after about 3 full charge-discharge
cycles. Since the status LED is also integrated into the main
illuminant the enclosed test button may not be connected
necessarily.
Non-maintained mode: Connect terminals L and N only. Caution: L
must supply mains voltage for 24 hours per day and must not be
switched.
Maintained mode:
Connect all terminals according to the connection diagram.
L‘ may be switched. (For connection of terminals use screwdriver size 1
only!)
Technical specifi cations
t
a
: -5° C to +40° C
Illuminant: 3-ERT-LED
Insulation class: II
Protection category: IP 40
Type of mounting: wall mounting
The electronic manual can be found as a separate supplement.
Important: The light source contained in this luminaire shall only be
replaced by the manufacturer or his service agent or a similar qual-
fi ed person.
Don‘t clean with acid cleaners!
Important: If the rated operating time is no longer
reached, the appropriate RPOWER® battery must be
replaced by a qualifi ed person. When changing the battery,
do not dispose of the old battery in the domestic waste!