EasyManua.ls Logo

Axess ASWC-1 User Manual

Axess ASWC-1
5 pages
To Next Page IconTo Next Page
Page #1 background imageLoading...
Page #1 background image
ASWC-1 VEHICLE SPECIFIC INSTRUCTIONS
ASWC-1 Connections:
Connect the Black wire of the ASWC-1 and
the wire in Pin 19 of the vehicle’s radio
harness shown, to Chassis Ground.
Connect the Red wire of the ASWC-1 to 12v
accessory power.
Connect the Black/Green wire of the
ASWC-1 to the wire in Pin 9 of the vehicle’s
radio harness shown.
Connect the 3.5mm jack to the SWC input on
the back of the radio. If the radio does not have a
3.5mm built in, please refer to Page 2 for wiring
instructions for the Axxess 2 wire adapter.
ASWC-1 Resistive Wire Used:
Black/Green
Programming Method:
Auto-Detect
(No additional actions required)
Vehicle Connector:
This is the view of the radio connector in the vehicle
Note: Wire colors may vary between vehicles but pin
locations remain the same
Initial Installation:
The first time the ASWC-1 is cycled on, the LED
will begin to “Rapid Flash”.
Programming:
When the ASWC-1 begins to flash rapidly, it is in
auto-detect mode, at this time do not press
any buttons. The rapid flash will go out after
several seconds, then simply wait until the LED
goes solid. If it does not go solid, see the LED
Feedback section for information on how to
proceed.
**NOTE - If you cycle the ignition on and the ASWC
only shows one Green flash, press and hold the
Reset button for 3 seconds. This will force the ASWC-
1 into Rapid flash/Program mode. If the ASWC-1
goes to a slow Green/Red flash you held the reset
button too long, repeat the 3 second press again.
LED Feedback:
Rapid LED flash Red/Green between 3-
5 seconds
Pause for 1-2 seconds
Series of 7 Green LED flashes. (The
ASWC-1 is detecting wires connected to
the vehicle)
Pause for 1-2 seconds
Series of up to 18 Red LED flashes
(The ASWC-1 is detecting the radio. List
of radios on pg. 2)
After this sequence one of two things will happen.
Either the LED will go solid Red, which means
the ASWC-1 has detected the vehicle, or the
ASWC-1 will go back to a slow Red/Green flash.
This means the ASWC-1 did not detect the
vehicle, and connections should be rechecked, or
programming method should be verified.
Additional LED information:
After the ASWC-1 stops rapid flashing, it will pause
then go directly to 7 Green flashes. Short flashes
indicate wires that are not connected, Long flashes
indicate wires that are connected. *NOTE The
ASWC always flashes Green 7 times, this is an
indicator of the ASWC-1 wires. After the green
Question and Answer IconNeed help?

Do you have a question about the Axess ASWC-1 and is the answer not in the manual?

Axess ASWC-1 Specifications

General IconGeneral
BrandAxess
ModelASWC-1
CategoryRecording Equipment
LanguageEnglish

Summary

ASWC-1 Connections

Programming and LED Status

Initial Installation

The ASWC-1 begins to Rapid Flash upon initial power-up, indicating it is ready for programming.

LED Feedback Interpretation

Provides guidance on interpreting LED flashes for vehicle and radio detection status.

Wire Identification and Radio Types

Connected Wires (Long Green LED)

Details the function of each wire in the long green LED harness connection.

Radio Type Identification

Lists radio brands and their corresponding types for programming the ASWC-1.

Radio Connection Methods

Universal Radio Connections

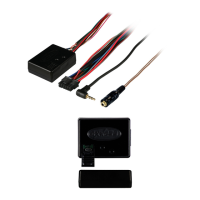
Explains connection procedures for radios with 3.5mm jacks and universal 2/3 wire setups.

Radios with Single SWC Wire

Instructions for connecting to radios that have only one SWC wire.

Operation and Troubleshooting

General Operation

Guidance on setting up and verifying SWC menu functionality in the new radio.

Troubleshooting Common Issues

Addresses power, ground, connection, and aftermarket accessory issues affecting ASWC-1.

Button Configuration

ASWC-1 Button Remapping

Procedure for changing button functions on the ASWC-1 after auto-detection.

ASWC-1 Changing Radio Type

Steps to manually change the ASWC-1's programmed radio type.

Dual Assignment Instructions

Guide for assigning secondary functions to steering wheel buttons via long press.