Do you have a question about the Axium DX8000 and is the answer not in the manual?
Connect the power adaptor to the terminal's USB-C port for charging.
Hold the power button for three seconds to power on the terminal.
Connect to Wi-Fi by swiping down, selecting a network, and entering the password.
Steps to access settings and initiate a software upgrade on the terminal.
Detailed steps for conducting a purchase transaction, including card input.
Instructions for processing a refund, requiring merchant password entry.
Steps to execute a cash-out transaction, including amount confirmation.
Procedure for changing the merchant password to secure sensitive functions.
How to enable/disable navigation functions and the status screen.
Guidance on finding support contact details and required information.
An overview of the terminal's core features and capabilities.
Labeled diagram identifying all major physical components of the terminal.
Explanation of the terminal's physical keys and on-screen virtual keys.
Details on the magnetic stripe, EMV, and contactless card reading capabilities.
Step-by-step instructions for replacing the receipt paper roll.
Guide on how to safely remove and install the battery pack.
Recommendations for cleaning the terminal without causing damage.
Information for contacting the DataMesh Group Help Desk for support.
The DataMesh DX8000 Terminal is a versatile payment device designed to offer a seamless digital experience in retail environments, prioritizing performance, productivity, and security. It operates on Android 10 and is delivered fully configured for immediate use.
The DX8000 Terminal serves as a comprehensive payment solution, enabling various transaction types including purchases, refunds, and cash outs. It integrates a printer for immediate receipt generation and supports multiple card reading methods: magnetic stripe, EMV chip, and contactless. The device is equipped with a touchscreen interface for user interaction and a robust operating system that facilitates software upgrades and network connectivity. It also incorporates security features such as a merchant password to protect sensitive functions like refunds.
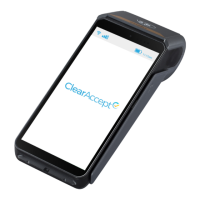
Getting Started: Upon unboxing, the DX8000 comes with the device itself, a pre-installed paper roll, a power adapter, a battery pack, and an instruction manual. To begin, users must first charge the battery by connecting the power adapter to the terminal's USB Type-C connector on the left side, then to a power outlet. The charging status can be monitored on the device's screen. To power on the device, hold down the power button, also on the left side, for three seconds until the screen illuminates. After powering on, the terminal will complete its startup routine, displaying the Satellite Payment Application icon upon readiness.
Connecting to Wi-Fi: To connect to a Wi-Fi network, swipe down from the top of the screen near the camera to reveal available connections. Tap on the Wi-Fi icon, select the desired network, enter the password, and confirm the connection.
Software Upgrade: The device supports software upgrades to ensure optimal performance and access to the latest features. To initiate an upgrade, navigate to the settings screen by tapping the "Gear" icon. From there, enter the merchant password (default is "0000"). Once authenticated, select "Software Upgrade" and confirm by tapping "Yes." The terminal will then proceed with the upgrade routine.
Performing Transactions: The Satellite Payment Application is the central hub for all payment functions. To initiate a transaction, simply touch anywhere on the idle screen of the DataMesh group payment app. This will display various payment options. Features applicable to your specific terminal will be highlighted in white text.
Purchase Transaction: Tap the "Purchase" icon. Use the keypad to enter the transaction amount and confirm with the green tick. The customer will then be prompted to insert, swipe, or tap their card. If required, the customer may need to enter their PIN. The terminal screen will display "Approved/Declined." Depending on the printer settings, the terminal will ask to print a merchant receipt and then a customer receipt.
Refund Transaction: Tap the "Refund" icon. Enter the refund amount using the keypad and confirm with the green tick. Next, enter the merchant password and confirm with the green tick. The customer will then be instructed to insert, swipe, or tap their card. The terminal will display "Approved/Declined" and, based on printer options, prompt to print merchant and customer receipts.
Cash Out Transaction: Tap the "Cash Out" icon. Enter the cash out amount using the keypad and confirm with the green tick. The customer will then be prompted to insert, swipe, or tap their card. The terminal will display "Approved/Declined" and, if configured, prompt to print merchant and customer receipts.
Terminal Navigation: Users can customize navigation functions and the status screen. To do this, go to the "Settings" screen via the "Gear" icon. Here, tick boxes allow enabling or disabling the "Navigation Bar" and "Status Bar."
Merchant Password Management: The merchant password is a critical security feature, particularly for functions like refunds, and should be managed by an onsite manager. To change the password, access the "Settings" screen and select "CHANGE MERCHANT PASSWORD." Enter the existing merchant password (default "0000"), then enter and repeat the new merchant password. The terminal will confirm with "Password changed OK."
Card Readers: The DX8000 features three types of card readers:
Installing the Printer Roll: The DX8000 is compatible with standard 58mm wide and 40mm diameter receipt paper rolls. To install, lift the catch at the top of the device and pull the cover backward. Insert the paper roll according to the diagram, pulling the paper up to the top of the terminal. Close the cover, pressing both upper corners of the paper flap until it clips into position. It is advisable to tear off the first length of a new receipt roll to avoid printing on any adhesive footprint.
Installing the Battery: To install the battery, turn the device over and unclip the battery trapdoor by pushing the clips. Disengage the trapdoor and take the battery pack from the box. Locate the battery pack connector and connect it. Place the battery pack in its compartment and close the battery trapdoor.
Cleaning the Device: Proper cleaning ensures the longevity and functionality of the DX8000. Always unplug all wires from the terminal before cleaning. Use a soft cloth lightly dampened with soapy water to clean the exterior of the terminal. Crucially, do not clean the electrical connections directly. Avoid using solvents, detergents, or abrasive products, as these can damage the plastic or electrical contacts. Do not expose the terminal to direct sunlight, and never insert anything into the smart card reader slot. The device should not be immersed in water or any other liquid.
Support: For any issues with installation or operation, contact the DataMesh Group Help Desk. Support is available 24 hours a day, 7 days a week. When seeking support, be prepared to provide your Merchant ID and Terminal ID, which can be found by tapping the "i" icon on the home page of the Satellite app.
| Memory | 1GB RAM, 8GB Flash |
|---|---|
| Camera | 5MP Rear Camera |
| Operating System | Android |
| Card Readers | Magnetic Stripe |
| Connectivity | 4G LTE, Wi-Fi, Bluetooth |
| Ports | USB Type-C |
| Power Supply | 5V/2A |
| Supported Cards | Visa, Mastercard, Discover |