17
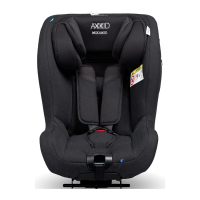
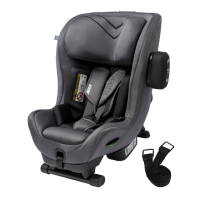
Installing Axkid One car seat in
the vehicle
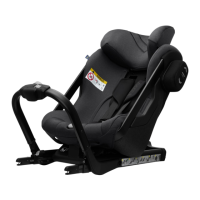
Before installing Axkid One car seat in your vehicle, minimize its size by releasing the legroom
adjustment button (N) and slide the seat towards the front brace (D). Fold down the support-leg (R)
until a click can be heard and the support-leg position indicator (P) turns green.
Release the front brace release button (C) and fold the front brace (D) towards the seat. Keep holding
the front brace (D) with one hand and grab the back handle (O) with the other hand and lift the Axkid
Onecarseatintoyourvehiclewiththefrontbrace(D)rstandthenturnittoarear-facingposition.
Push the ISOFIX connectors (Y) into the ISOFIX connection points in the vehicle until you hear a click
and both ISOFIX locking indicators (V) turn green.
Let go of the front brace (D) which will start tensioning itself against the vehicle seat. When it stops,
turn the front brace knob (K) clockwise until you feel and hear a click, the front brace (D) should now
bermlypressedagainstthevehicleseat.Thefrontbraceknob(K)hasabuilt-intorquelimiterand
the click indicates that the front brace (D) is tightened correctly and cannot be tightened any more.
Push the support-leg button (I) and pull the support-leg (R) downwards until it is in contact with the
vehicleoor.Letgoofthesupport-legbutton(I)andliftthecarseatupwardstofurtherextendthe
support-leg(R)untilyouhearaclick.Thesupport-leg(R)shouldnowbelockedandrmlypressed
againstthevehicleoor.Note:TheAxkidOnecarseatisequippedwithabeepingsoundindicator(S)
thatwillkeepbeepinguntilthesupport-leg(R)isrmlypressedagainsttheoor,indicatingacorrect
installation.
Push the ASIP pad (G) into the slots on the ASIP connector (J) and slide downwards, the ASIP pad
(G) will click into place. If there is a plastic cover on the ASIP connector (J), remove it and place it on
theASIPconnector(J)ontheoppositesideoftheseatbeforettingtheASIPpad(G).Makesurethe
ASIP pad (G) is attached on the side of Axkid One car seat that is closest to the vehicle door.
1
2
3
4
5
6
EN