Axon Body 3 Camera Battery Replacement
Last Updated: September 2019 Page 6 of 7
Torx is a trademark of Acument Intellectual Properties, LLC. AXON, Axon, and Axon Body 3 are trademarks of Axon Enterprise,
Inc., some of which are registered in the US and other countries. For more information, visit www.axon.com/legal.
All rights reserved. © 2019 Axon Enterprise, Inc. Rev A
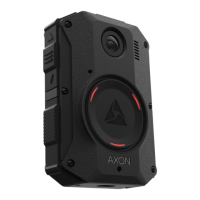
10. Inspect yellow gasket to ensure it is properly seated in the groove around the perimeter of the
camera.
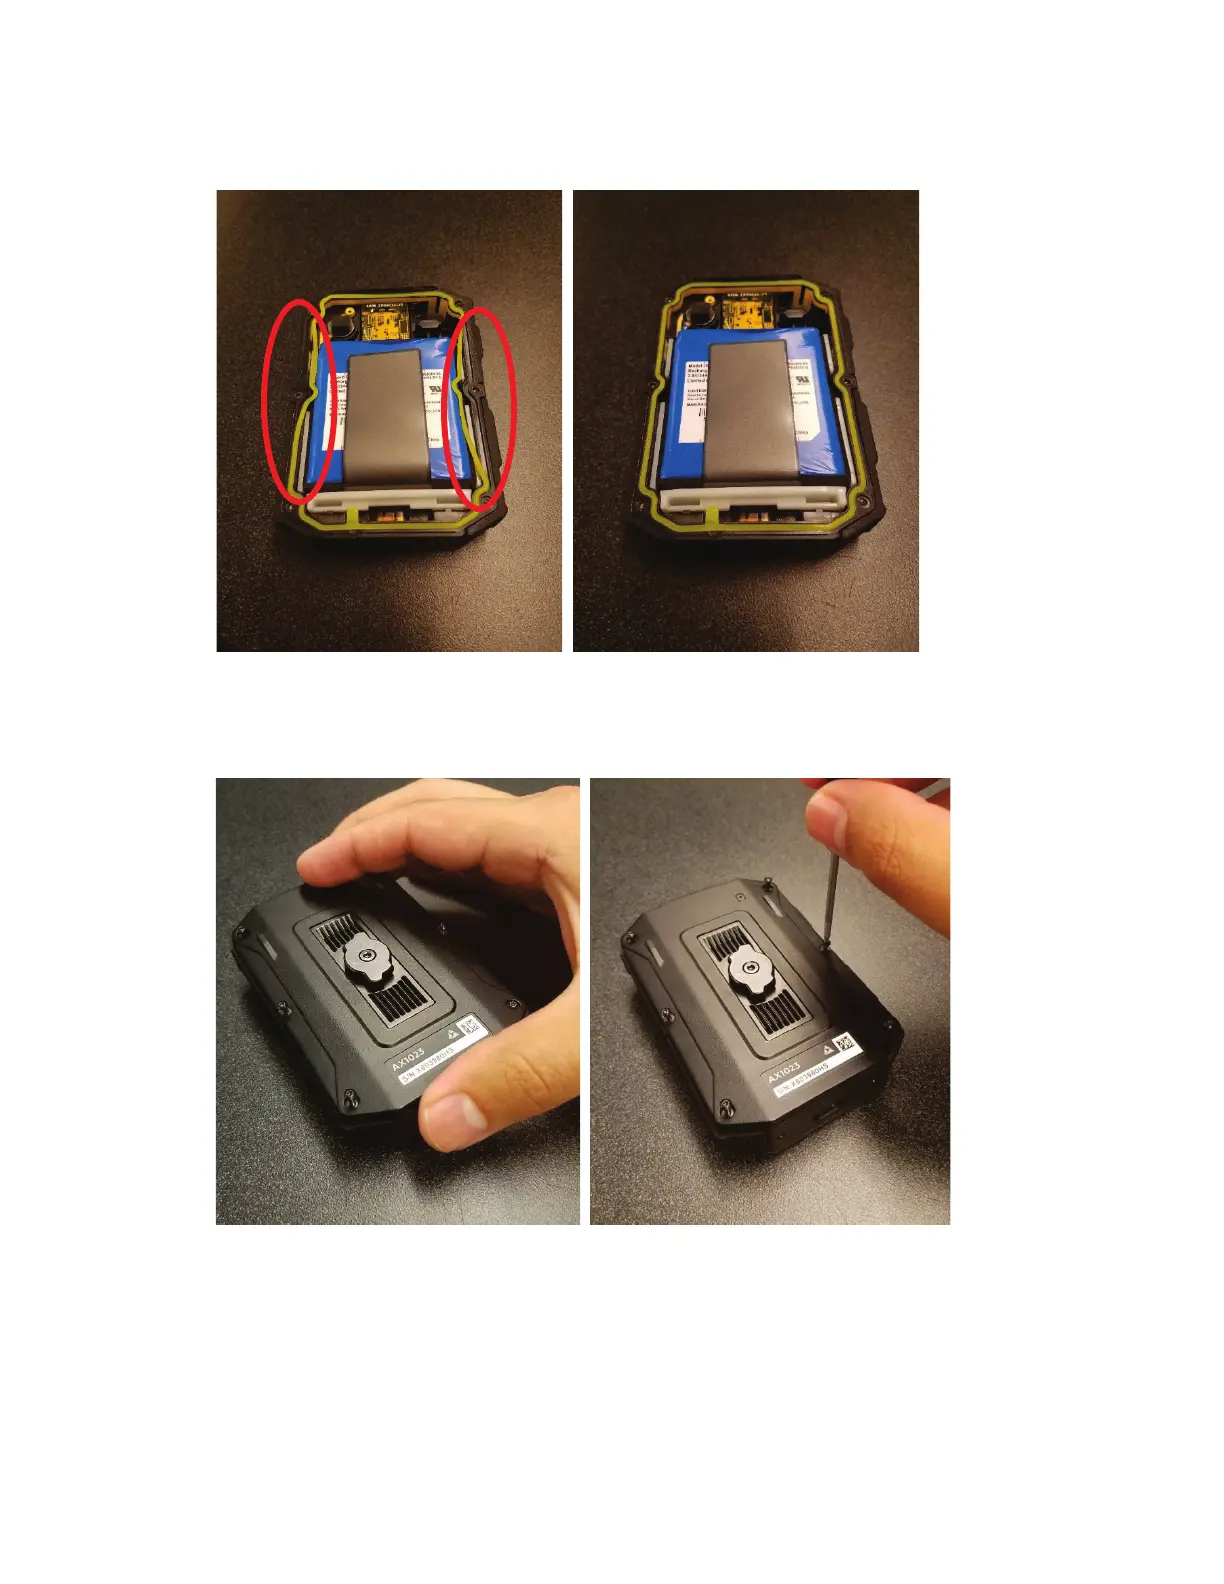
11. Gently replace back cover and tighten all 6 screws starting with the 2 center screws.
Screws should be tightened to 2.5 in-lbs to ensure a water tight seal.
 Loading...