Repeat Steps 4-6
1
1
2
2
3
45
5
5
54
4 4
3
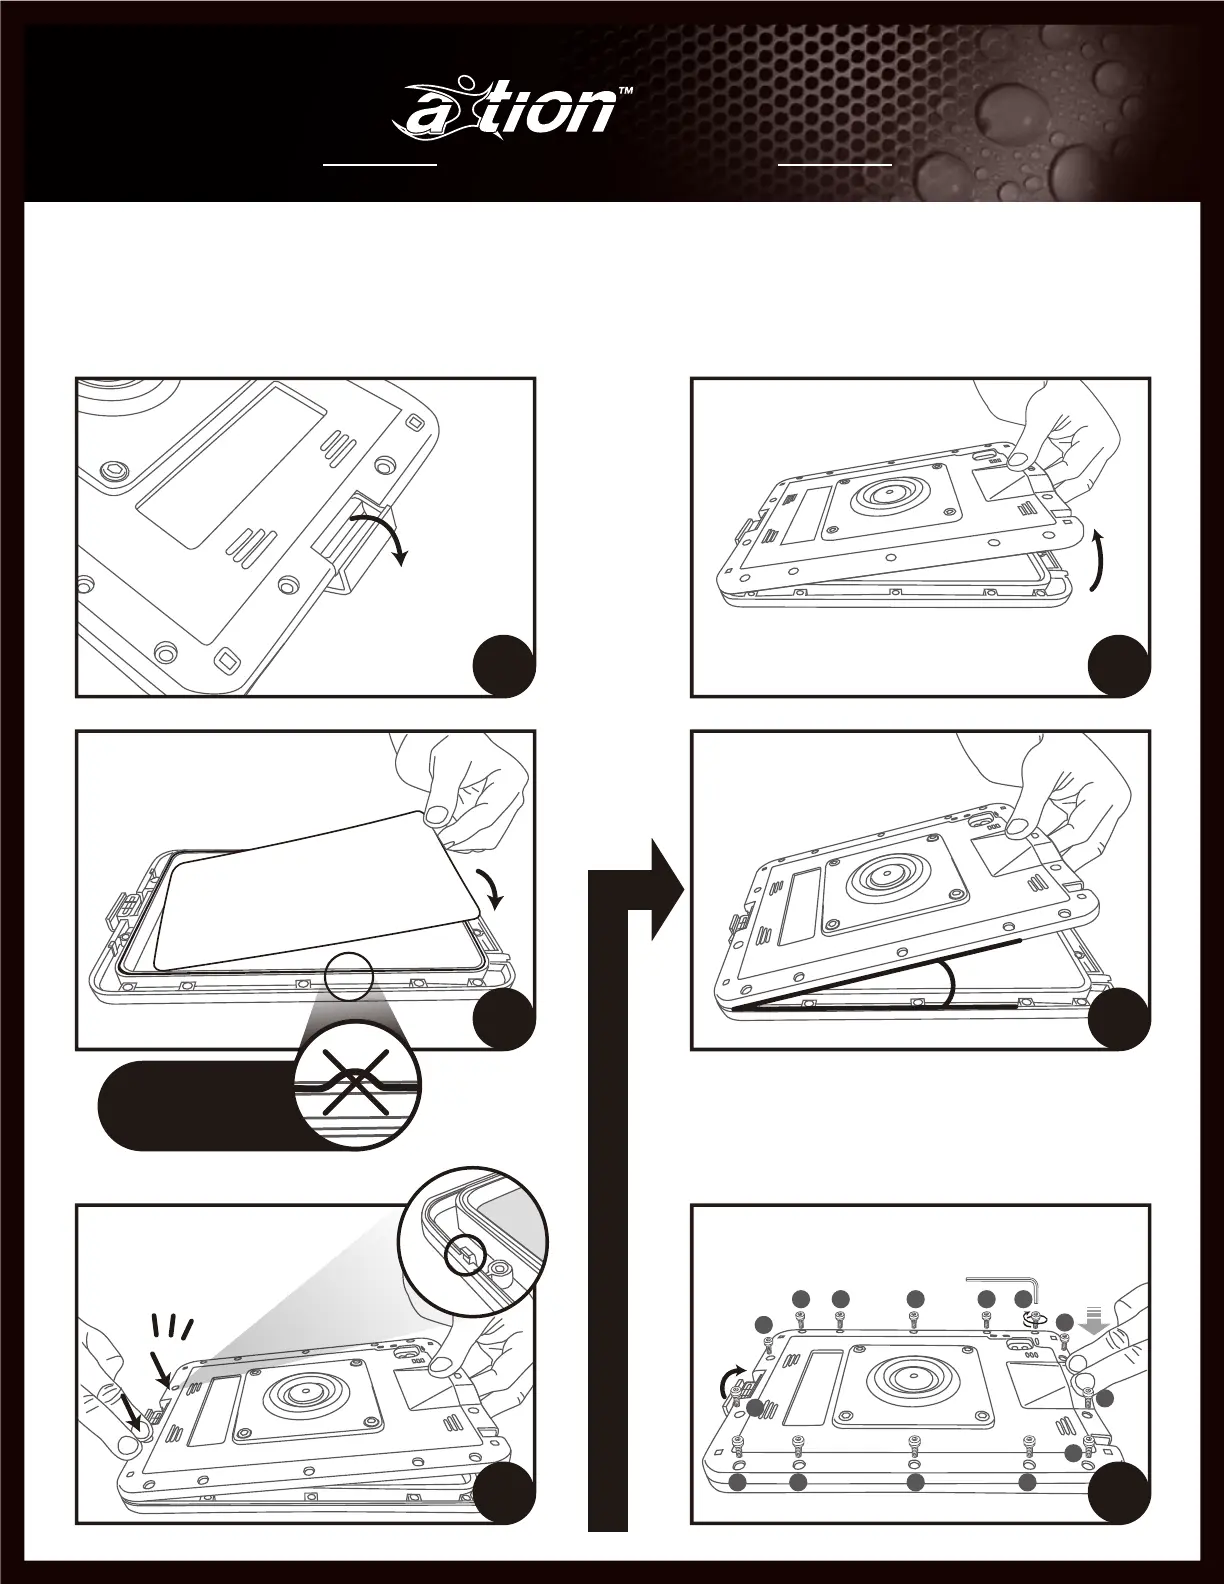
Secure the screws in sequential number order to ensure
the case is evenly tightened, water stopper is inserted well
in the charging cover.
6
Maintaining the 25º - 30º angle,
apply firm pressure to both sides
of the charging port until you hear
two audible click.
5
3
Place water test paper inside, face
down to the front of case/ screen side.
Check the O-ring seated well.
Water test paper face down
Align and adjoin the bottom
sections of the case at a 25º
- 30º angle.
25° - 30°
4
2
Lift the back of the case from the
camera end
O-ring is seated into
the channel around
the case.
Installation Guide ご 利 用 ガイド
pro M