11
Green Orange
Tuning without a workpiece
After light axis adjustment, if target objects cannot be reliably
detected at the factory default sensitivity (maximum sensitivity),
adjust according to the instructions below.
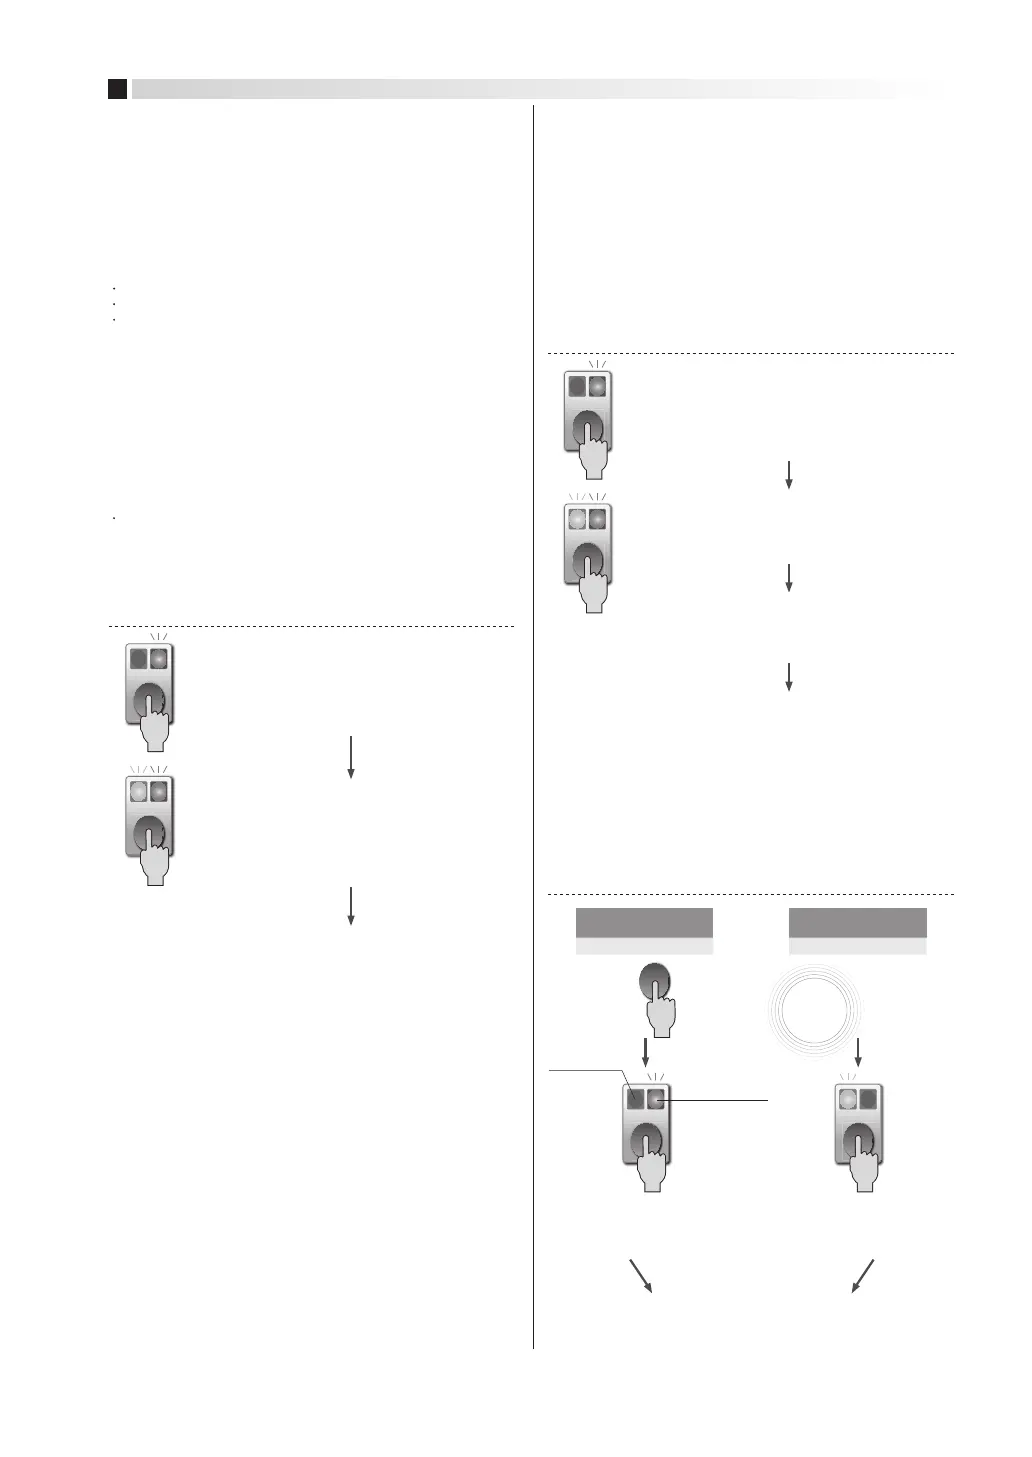
2-point tuning
If target objects cannot be reliably detected even after tuning without
a workpiece, adjust as shown below.
LO/DO Changeover
The operating mode is set to default at the factory, but can be
changed as outlined below. Light-operate changes to Dark-operate,
and Dark-operate changes to Light-operate.
Hold down the button for about 2 seconds until the
orange indicator lamp starts flashing rapidly (at
about 10 Hz), then release.
Without a workpiece, hold down the button until both
*2
LEDs start blinking (about 2 seconds), and release it.
With a workpiece in place, give the button a short press.
*3
*2. It is OK to reverse the order of the two states (target present / target absent).
*3. If the indicator lamp flashes repeatedly, repeat the procedure as described
under Indicator lamp flashes repeatedly
Only Orange LED blinks
qrapidly (about 10 Hz).
As a result of tuning without a workpiece, target objects do not
block enough light.
(1) Thru-scan models and retroreflective models
As a result of tuning without a workpiece, the switch does not
receive enough light from target objects.
The switch will be set automatically so that it operates at a light
intensity that is between the intensity with a target object and
the intensity without a target object.
(2) Diffuse-scan models
Switches to sensitivity adjustment mode.
Set to Light-operate
Measures light intensity without a target object.
Measures light intensity with target
present and sets sensitivity.
From Dark-operate
to Light-operate
From Light-operate
to Dark-operate
Normal operation
Only Green LED blinks
rapidly (about 10 Hz).
Set to Dark-operate
Normal operation
Output indicator
Stability
indicator
Hold down the button for about 2 seconds until the
orange indicator lamp starts flashing rapidly (at
about 10 Hz), then release.
Without a workpiece, give the button a short press.
Both LEDs turn OFF.
*1. If the indicator lamp flashes repeatedly, repeat the procedure as described
under Indicator lamp flashes repeatedly.
Switches to sensitivity adjustment mode.
Measures the light intensity without a target
object and sets sensitivity as required.
Adjust in the following cases. Switch sensitivity will be set
automatically so that it operates at about half the light intensity
as when there is no target object.
The objects are transparent or translucent
The objects have holes or notches
Not enough light is blocked by target objects because light
reaches the switch from the surroundings.
Note: For thru-scan models, if the set scanning distance is shorter than the
following amounts, light intensity may be too strong, causing the switch to
enter the state described in “Indicator lamp flashes repeatedly.”
HP7-T1 and HP7-T2: 1 m. HP7-T5: 0.3 m.
(1) Thru-scan models and retroreflective models
Adjust in the following cases. Switch sensitivity will be set
automatically so that it operates at about twice the light intensity
as when there is no target object.
Because of light from the surroundings, the switch receives
light even when there is no target object.
Before adjusting, allow 3 minutes for warm-up after turning the
power on.
(2) Diffuse-scan models
(3) Retroreflective transparent object detection models
Green Orange
Green Orange
Green Orange
Green Orange
Green Orange
Setup is complete
Normal operation will be restored automatically
(in about 2 seconds).*
3
Setup is complete
Normal operation will be restored automatically.*
1
Setup is complete
Normal operation will be restored automatically
(in about 2 seconds).*
3
Press the button
5 times
consecutively.
×5
 Loading...