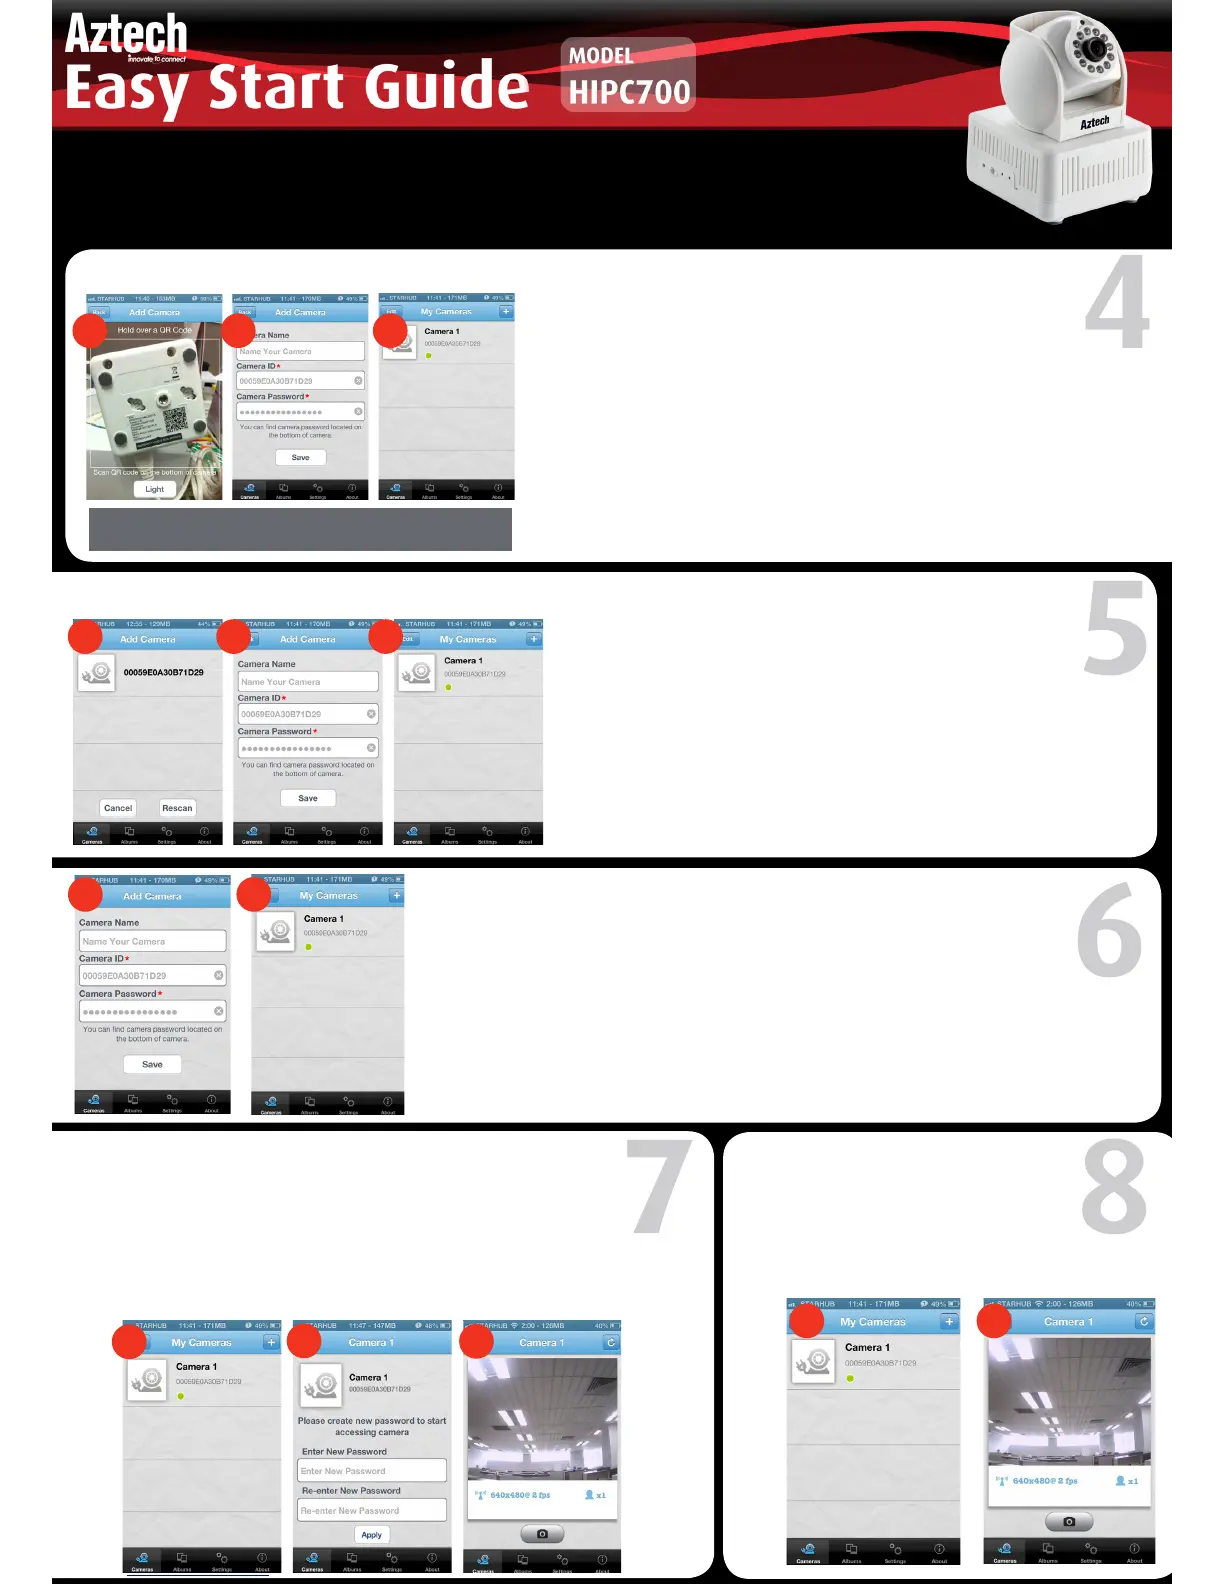
QR Code Scan (Ideal for camera at hand and for first time setups)
Click Add Camera and choose “QR Code” icon on the screen
to scan the QR Code located at the bottom of the camera. The
Camera ID and Camera Password will display on the screen.
Designate a device name for your HPCamera (this is optional,
e.g. Cherry’s Camera).
After saving, click the “Save” icon to apply changes. After
saving, the new camera will be added into “My Cameras”
selection list.
Make sure that your HPCamera and your mobile device
are under the same network. Click “Local Search” to find
the HPCamera. After the HPCamera is found, you may now
select the HPCamera you want to add.
Name your camera (this is optional, e.g. Cherry’s Camera),
enter its password and click “Save”. After saving, the new
camera will be added into “My Cameras” selection list.
Step 1 :
Step 2 :
Step 3 :
WARNING: ‘QR Code Scan’ might not be supported by
some mobile devices.
Step 1 :
Step 2 :
Local Search (The Camera and Mobile Device are under the Same Local Network)
Manual (Manually type in Camera ID and Camera Password).
Click Add Camera and choose “Manual” icon on the screen.
Name your camera (optional), enter HPCamera ID and
Password and click “Save”.
After saving, the new HPCamera will be added into “My
Cameras” selection list.
Step 1 :
Step 2 :
Choose the HPCamera you want to access on
“My Cameras” selection list. Your mobile device
will start connecting to your camera.
1 2
Note: For Initial Setup
Select the camera that you want to access.
You will need to create a new password for security purposes.
Press the “Apply” button to save changes.
You may now view the HPCamera.
Step 1 :
Step 2 :
Step 3 :
1
2
3
The HIPC700 Easy Start Guide is designed to get you up and running with your
HIPC700 device. To download Aztech HPCam PC Software, please visit our official website
(http://www.aztech.com/support/) for further information about this product.
 Loading...