Setup for an Existing Network Connection
D
If in case you have changed the Private Network Name of your
existing network, you may use the Simple Connect Button of your
HL129EP and the other devices as indicated below:
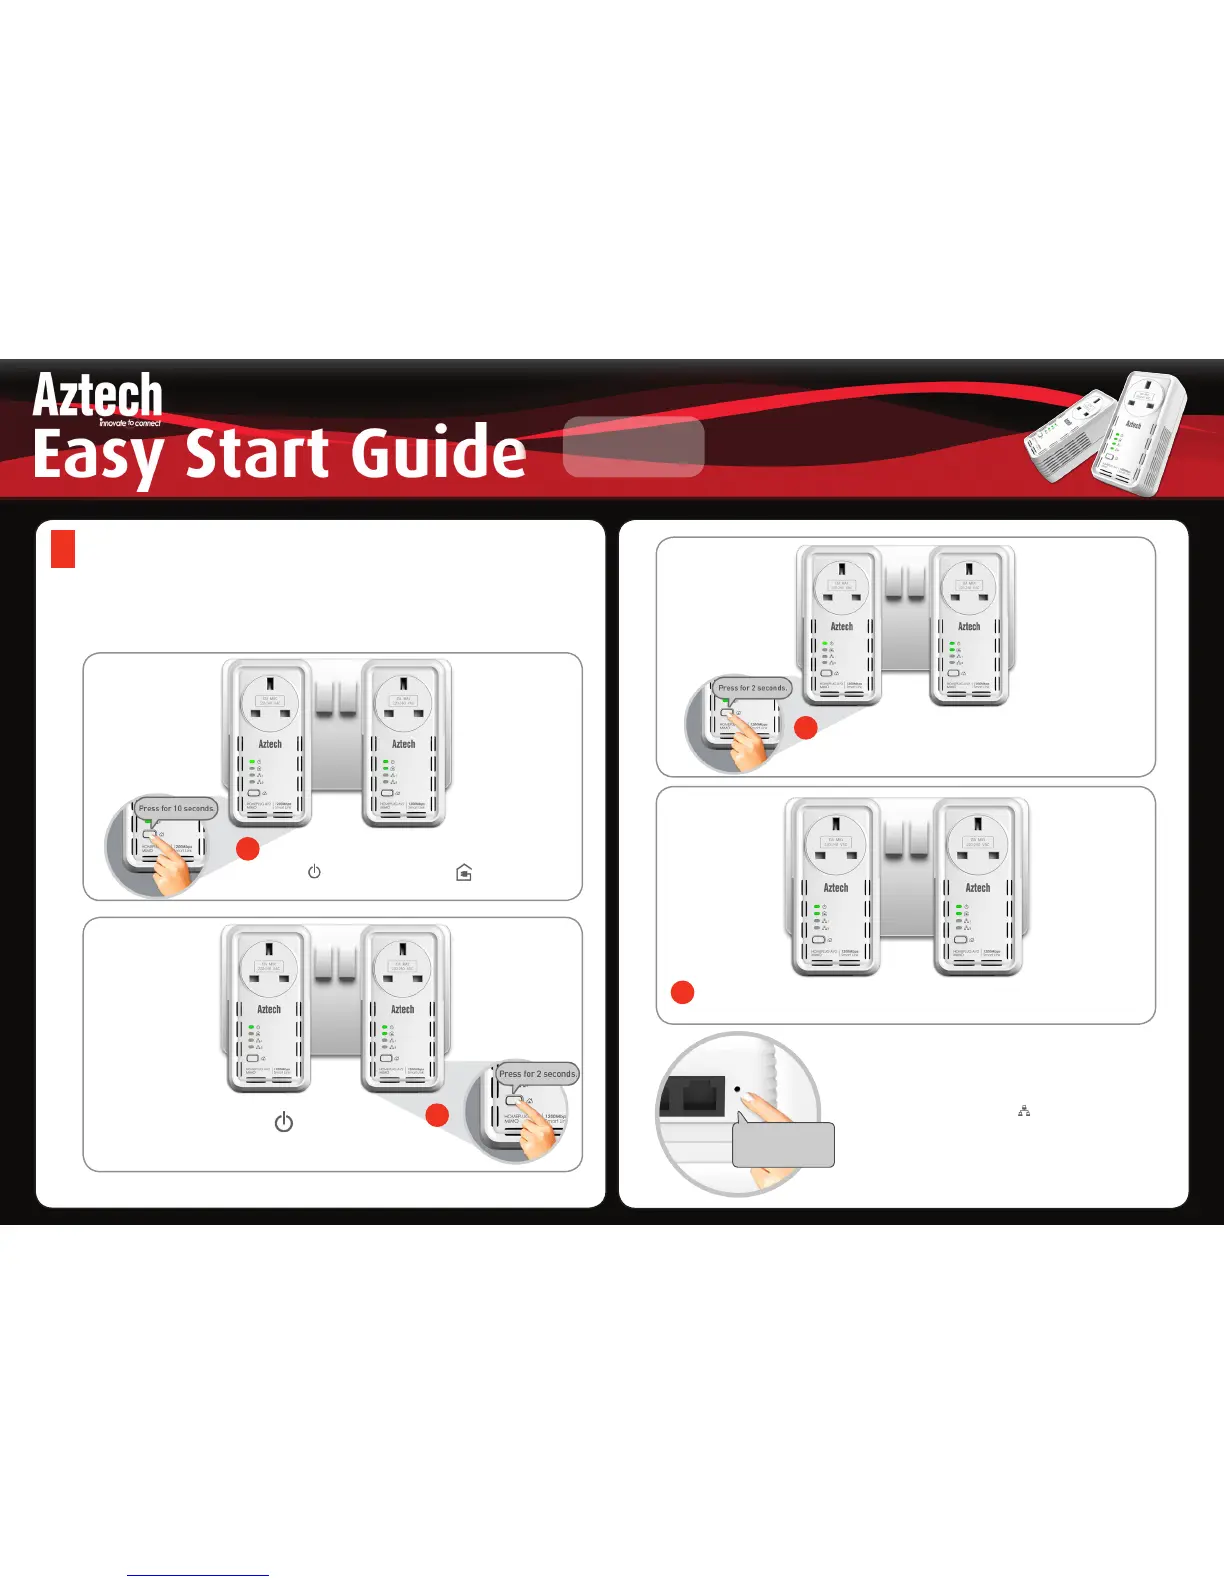
Within two minutes, press the simple connect button of
HomePlug X for TWO SECONDS.
3
Step 3
To confirm if the connection has established, check the LEDs. The Power LEDs
and the Powerline Activity LEDs on all HomePlugs would be ON.
4
Step 4
NOTES:
• When joining an existing network, you only have
to pair it to one HomePlug AV that belongs to the
existing network.
• The Ethernet Activity LED will only be lit if it is
connected to an Ethernet device (e.g. computer,
laptop, etc) through an Ethernet cable.
• To perform RESET to factory defaults, press the reset
button for 3 SECONDS.
Press the Simple Connect button of your HomePlug
X for 10 SECONDS. After you release the button, the
Power and the Ethernet LED will turn OFF and
turn ON.
1
Step 1
Press the Simple Connect Button of HomePlug AV Y for
TWO SECONDS. The Power LED will continuously blink.
If the Power LED did not blink, press the Simple Connect
button again for two seconds.
2
Step 2
Press for 3 SECONDS
to perform factory
defaul reset.
HomePlug X
(Your new HomePlug AV2)
HomePlug Y
(A HomePlug that
belongs to the existing
network)
HomePlug X
(Your new HomePlug AV2)
HomePlug Y
(A HomePlug that
belongs to the existing
network)
HomePlug X
(Your new HomePlug AV2)
HomePlug Y
(A HomePlug that
belongs to the existing
network)
HomePlug X
(Your new HomePlug AV2)
HomePlug Y
(A HomePlug that
belongs to the existing
network)
 Loading...