EasyManua.ls Logo

Aztech HL129EW

Aztech HL129EW
12 pages
To Next Page IconTo Next Page
Loading...
Reset
Button
In Room A, plug in your HomePlug AV device into a
power outlet and connect it to your router’s ethernet
port using an Ethernet cable.
Make sure that your router’s internet connection is
up to allow you to access the internet.
Connect an ethernet cable from the PC to any of the
available Ethernet Ports of your HL129EW.
On your computer, turn OFF any Wireless Adapter (if
applicable).
Open and Launch a web browser. Type in 10.0.10.254
on the web browser’s url link then hit enter key.
1.
2.
3.
Confirm that the connection was established on
both HomePlug AVs. Successful connection is
indicated by Green light on both Power and Power
Line Activity LEDs. Your HomePlug AV is now ready
to use and may now access the internet.
In Room B, plug in your HL129EW device into a
power outlet. You may connect any device (e.g.
computer / notebook) to its available ethernet
ports and you may also connect any of your
wireless devices to your HL129EW’s WiFi (SSID and
Password is printed at the label sticker located at
the top surface of your device).
2.
Enter admin for Username and admin for
Password.
Click the Network menu and select the Wireless
Setting (2.4GHz / 5.0GHz) that you want to configure.
After changing the preferred settings, click Apply to
save and apply settings.
4.
5.
6.
1.
B Device Overview
A Package Contents
Power
LED
Gigabit
Ethernet
Ports 1
& 2
WPS
Button /
LED
HL129EW
HL129EW Ethernet
Cable
Easy Start
Guide
Warranty
Policy
C Setup for New Network Connection
Ensure to follow the connection set up below.
HomePlug A
HL129EW
Router Desktop / PC
Wireless Devices
WALL
ROOM A ROOM B
Powerline Network
Ethernet Cable
1 2
2
3
D Configuring Wireless Settings (Optional)
Ensure to follow the connection set up below.
HL129EW
Router Desktop / PC
WALL
ROOM A ROOM B
Powerline Network
Ethernet Cable
1
2
3
HomePlug A
Powerline Activity
LED / Simple
Connect Button
3.
HL129EW
1200Mbps SmartLink HomePlugAV2
Dual Band Wireless-AC Extender
2.4GHz /
5.0GHz
Wireless
LEDs
Question and Answer IconNeed help?

Do you have a question about the Aztech HL129EW and is the answer not in the manual?

Aztech HL129EW Specifications

General IconGeneral
ModelHL129EW
Frequency Bands2.4GHz
Maximum Speed300Mbps
WPS SupportYes
TypeExtender
Wireless StandardsIEEE 802.11n
Ports1 x 10/100Mbps Ethernet
SecurityWPA/WPA2
Antenna2 x Antennas
Operating ModeRange Extender
ButtonWPS Button

Summary

Aztech HL129 EW Package Contents

Aztech HL129 EW Device Overview

WPS Button and LED

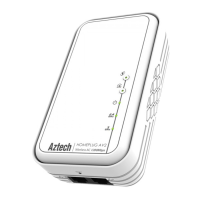
Indicator and control for Wi-Fi Protected Setup.

Power LED Indicator

Shows the device's power status.

Wireless Band LEDs

Indicate the status of 2.4GHz and 5.0GHz wireless bands.

Powerline Activity LED and Simple Connect Button

Displays powerline connection status and facilitates pairing.

Device Reset Button

Used to restore the device to factory default settings.

Gigabit Ethernet Ports

Provide wired network connectivity for devices.

Setting Up a New Network Connection

Connect HomePlug to Router

Plug in the first HomePlug AV device and connect it to the router via Ethernet.

Connect HL129 EW and Devices

Plug in the HL129EW in another room and connect wired/wireless devices.

Confirm Connection Status

Verify successful connection through LED indicators on HomePlug devices.

Configuring Wireless Settings

Accessing Configuration Interface

Connect a PC and use the IP address 10.0.10.254 to access the device's web interface.

Changing Wireless Parameters

Log in, navigate to wireless settings, modify parameters like SSID, security, and apply changes.

Setting Up for Existing Network Connection

Automatic Pairing with Existing Network

Plug the device into a socket to automatically pair with existing HomePlug AV devices.

Manual Pairing with Simple Connect

Use the Simple Connect button on both devices to re-establish pairing if network name was changed.

Enabling WPS Function

Enabling WPS via Web Interface

Access the device's web interface and enable the WPS feature in the security settings.

Initiating WPS Connection

Press the WPS button on the HL129EW and the target device within two minutes to establish a WPS connection.

Determining Connection Rate

Understanding Powerline Activity LEDs

Interpreting the LED colors (Green, Amber, Red) to gauge the powerline connection speed.

Device Reset Procedure

Performing Factory Reset

Pressing the reset button for 2-4 seconds restores the device to its factory default settings.

Related product manuals