If you want to add your HL129EW device to your
existing network, simply plug in the device to any wall
socket; by default it will pair up with your HomePlug
AV devices. Once paired, your device is now ready to
use.
1.
2.
A.
However, just in case you have changed the Private
Network Name of your existing network, you may use
the Simple Connect button of your HL129EW and the
old devices as indicated below:
Press the Simple Connect Button of your HL129EW
for 10 seconds until the Power and Power Line
Activity LED turn OFF and turn ON.
Press the Simple Connect Button of your old device
for two seconds. The Power LED will start blinking.
On your HL129EW, press the Simple Connect button
for two seconds. The Power LED will start blinking
and the Power Line Activity LED will be on steady
green, indicating a succesful pairing with the old
devices.
B.
C.
Ensure that you have the proper set up as indicated
in Section D (Configuring Wireless Settings). Follow
steps 3, 4, and 5 respectively of Section D.
Go to the Wireless > Security section, then on the WPS
section, tick Enable then click Apply.
F Enabling the WPS Function (Optional)
1.
2.
3.
4.
G Determining Connection Rate
Each LED color of the Powerline Activity LED represents
a connection rating. The connection rating can only
be calculated when the device is part of an existing
network. The exact connection rate value can also be
viewed using the HomePlug AV Web User Interface.
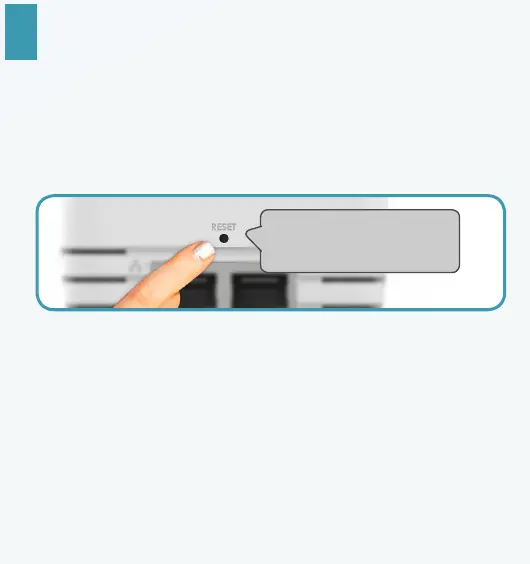
H Device Reset
To perform RESET to factory defaults, press the Reset
button for 2 to 4 SECONDS. The LEDs will turn OFF and
turn ON to indicate device reset.
E Setup for an Existing Network Connection
Press for 2 to 4 SECONDS to
perform factory default reset.
* The Easy Start Guide is designed to get you up and
running with your Aztech HL129EW HomePlug. This
Easy Start Guide including the User Manual which
provides a more advanced guide to this product, can
be from the Aztech Support Website
(www.aztech.com/support).
Powerline Activity LED
On your HL129EW, press the WPS button for 2
seconds. The Wireless LED will start to blink slowly.
Enable/Press the WPS button on the device that
you wish to connect to HL129EW. Complete the
steps 3 and 4 of this section within two minutes to
ensure a succesful connection .
Press for 2 seconds
to initiate the Wi-Fi
Protected Setup (WPS).
Press for 10 seconds.
Press for 2 seconds.
GREEN
Connection rate
is more than
120 Mbps
AMBER
Connection rate is
between 30 to
120 Mbps
RED
Connection rate
is less than
30 Mbps
Note to Red LED: It is recommended to plug the device
to main wall-socket plug or a plug with the least electrical
interference.
 Loading...