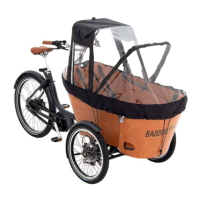
EN | Babboe Mini rain tent - Installation instructions
Congratulations on the purchase of a rain tent for your Babboe Mini cargo bike!
Below you will find instructions on how to install the rain tent. To remove the rain
tent, please follow the steps in reverse order.
Step 1
Attaching the bracket to the box
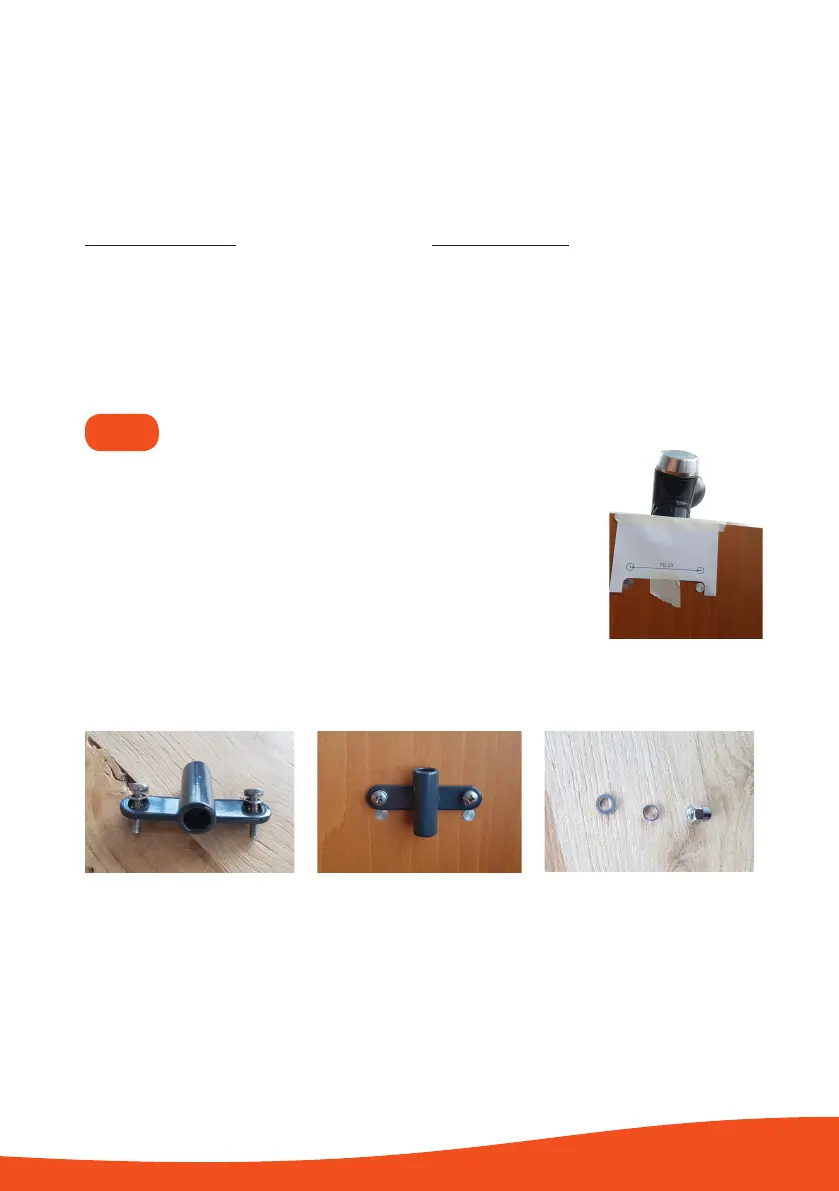
1. Cut out the template and tape the template to the inside of the
box.Tip: Ensure that the round cut-outs are positioned in the same
spot as the two silver bolts at the front. See picture 1.
2. Drill two holes in the panel in the spots indicated by crosses on
the template. Tip: You could pre-drill a hole with a smaller drill
bit, e.g. size 3.
3. Remove the drilling template.
4. Follow these steps to attach the bracket to the box: Insert the
screw into a washer and insert them through the bracket and through
the inside of the box. See picture 2 + 3. Secure the screw to the box by
mounting a washer, spring washer and cap nut to the inside of the box (see picture 4).
5. Securely tighten the set using a Philips screwdriver and spanner (size 10).
Contents of the box:
• Tent
• Frame
• Bracket
• Sachet (4 screws, 2 cap nuts, 4 spring
washers, 4 washers)
• Template
You will also need:
• Phillips screwdriver
• Spanner (size 10)
• Drill
• Drill bit size 7
• Scissors
• Adhesive tape
Picture 2 Picture 3 Picture 4
Picture 1
 Loading...