EasyManua.ls Logo

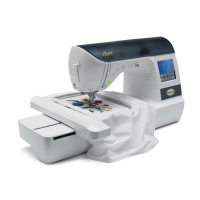
Baby Lock Destiny II User Manual

Baby Lock Destiny II
198 pages
To Next Page IconTo Next Page
Page #1 background imageLoading...
Page #1 background image
XF9969-101
1
Cover1-4
C M Y K

Questions and Answers:

Baby Lock Destiny II Specifications

General IconGeneral
Sewing Speed1, 050 stitches per minute
Embroidery Speed1, 000 stitches per minute
Needle ThreadingAutomatic
ConnectivityUSB
LightingLED
TypeSewing and Embroidery Machine
USB PortYes
Built-in MemoryYes
Bobbin SystemTop-loading bobbin system
Embroidery Designs (Optional)Available
Needle PositionsAdjustable
Maximum Speed1, 050 stitches per minute
LCD Screen Size10.1" built-in high-definition LCD touch screen

Summary

Introduction

Important Safety Instructions

Critical safety guidelines and warnings for machine operation to prevent injury and damage.

Outstanding Features

IQ Designer

Feature for drawing original embroidery patterns and specifying colors.

Line Scan / Fill Scan

Scan drawings or import JPEGs to create embroidery patterns.

Spool Stand LED Lighting

Shows the next thread color for embroidery.

Couching Dual Feed Foot with Dual Feed

Adds decorative couching embellishments securely to materials.

Improved Laser Guideline Marker

Specifies stitch position easily and accurately using a laser marker.

What You Can Do With This Machine

Getting Ready

Learn operation of principal parts and screens.

Sewing Basics

Learn preparation and basic sewing operations.

Utility Stitches

Pre-programmed with over 100 frequently used stitches.

Character/Decorative Stitches

Variety of stitches to widen creativity.

Basic Embroidery

For large embroidery designs (36x24 cm).

Advanced Embroidery

For large embroidery designs (36x24 cm).

How to Create Bobbin Work

Learn how to create bobbin work.

IQ Designer

Create original embroidery patterns.

Appendix

Caring for machine, errors, and malfunctions.

How to Use This Manual

Names of Machine Parts and Their Functions

Machine: Front View

Identifies and describes parts of the machine's front view.

Machine: Right-side/Rear View

Identifies and describes parts of the machine's right and rear views.

Needle and Presser Foot Section

Details parts related to needle and presser foot.

Embroidery Unit

Components of the embroidery unit and their functions.

Operation Buttons

Explains the functions of various operation buttons on the machine.

Using the Flat Bed Attachment

Instructions for opening the accessory compartment.

Using the Accessory Case

Steps for opening and closing the accessory case.

Using the Accessory Trays

Details storage trays for presser feet in the accessory case.

Included Accessories

Lists and illustrates all included accessories with part codes.

Options

Lists available optional accessories for purchase.

Using the Multi-purpose Screwdriver

Explains how to use the multi-purpose screwdriver in different positions.

Using the Spool Stand

Instructions on how to assemble and use the spool stand.

Using the Multi-function Foot Controller

Guide to assembling and using the multi-function foot controller.

Chapter 1 Getting Ready

Turning the Machine On/Off

Steps for turning the sewing machine on and off.

Setting Your Machine for the First Time

Initial setup for language and time/date.

LCD Screen Overview

Overview of the LCD screen and its functions.

Using the Machine Setting Mode Key

How to access and use the machine's setting modes.

Connecting Accessories to the Machine

Instructions for connecting various accessories via USB.

Using the Sensor Pen

Features and usage of the sensor pen for sewing.

Lower Threading

Steps for winding and setting the bobbin.

Upper Threading

Instructions for threading the upper thread.

Changing the Presser Foot

Detailed steps for removing and attaching presser feet.

Changing the Needle

Procedures for safely changing the sewing machine needle.

Needle Calibration Using the Built-in Camera

Calibrating the camera for precise needle positioning for embroidery.

Chapter 2 Sewing Basics

Sewing a Stitch

Step-by-step guide to sewing a basic stitch.

Stitch Settings

How to adjust stitch width, length, and thread tension.

Useful Functions

Explores automatic thread cutting, needle drop position, and pivoting.

Using Sensor Functions with Sewing Stitch

Utilizing sensor pen features for sewing stitch adjustments.

Chapter 3 Utility Stitches

Selecting Utility Stitches

How to navigate and select utility stitches from the LCD screen.

Sewing the Stitches

Detailed instructions for sewing various utility stitches.

Chapter 4 Character/Decorative Stitches

Selecting Stitch Patterns

Navigating and selecting character and decorative stitch patterns.

Sewing Stitch Patterns

Instructions for sewing character and decorative stitches attractively.

Editing Stitch Patterns

Functions for modifying stitch patterns like size, mirror image, and density.

Combining Stitch Patterns

Techniques for combining multiple stitch patterns.

Using the Memory Function

Saving and retrieving stitch patterns from memory or USB.

Chapter 5 Basic Embroidery

Before Embroidering

Preparatory steps before starting embroidery.

Selecting Patterns

How to select embroidery patterns from various sources.

Editing Patterns

Functions for modifying embroidery patterns.

Combining Patterns

Combining multiple embroidery patterns.

Preparing the Fabric

Steps for preparing fabric for embroidery, including hooping.

Attaching the Embroidery Frame

Procedures for attaching and removing the embroidery frame.

Confirming the Pattern Position

Verifying and adjusting pattern placement using camera and sensors.

Embroidering a Pattern

The core process of embroidering a pattern.

Adjustments During the Embroidery Process

Handling issues like bobbin changes or thread breaks during embroidery.

Related product manuals