Do you have a question about the Baby Lock Valiant BMV10 and is the answer not in the manual?
Crucial safety guidelines to prevent injury and damage during machine operation and handling.
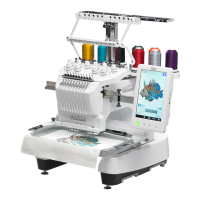
Identifies and explains the function of each machine part.
Step-by-step guide for initial machine setup and preparation.
Essential safety rules and operational guidelines for correct use.
Important guidelines for selecting and using needles correctly.
Important guidelines for selecting and using bobbins correctly.
Step-by-step instructions for correctly installing the bobbin.
Procedure for powering on the machine and initial startup.
Instructions for modifying selected embroidery designs.
Detailed instructions for properly securing fabric in the embroidery frame.
Steps to securely attach the hooped frame to the embroidery machine.
Setting parameters and options before starting embroidery.
Verifying the pattern placement within the embroidery frame.
Detailed instructions for threading the upper thread through the machine.
Step-by-step guide for threading the needle using the automatic mechanism.
The primary procedure for starting and executing an embroidery design.
Steps to safely detach the frame and remove the finished work.
Step-by-step guide for replacing the embroidery needle.
Guidelines for proper use and selection of embroidery frames.
Crucial steps for correctly securing fabric in the embroidery frame.
Information on how to position and move the embroidery frame.
Using visual aids to precisely align the pattern on the fabric.
Troubleshooting steps for thread breaks or bobbin issues during sewing.
Procedures for restarting embroidery from any point in the pattern.
How to continue embroidery after the machine was powered down.
Guide to adjusting thread tension for optimal stitch quality.
Advanced method for manually assigning thread colors to needle bars.
Setting precise start and end points for embroidery patterns.
Step-by-step guide to finding and selecting embroidery designs.
Instructions for transferring patterns from a PC using the Link function.
Detailed instructions for modifying patterns using the editing screen.
Scaling patterns up or down to a desired size.
Advanced resizing that preserves thread density.
Adjusting the orientation of patterns to a specific angle.
Modifying the colors of an embroidery pattern.
Building a personalized list of thread colors for easier selection.
Modifying pattern parameters within the settings screen.
Rotating the complete combined pattern.
Combining and editing multiple designs into one.
Utilizing the camera for precise connection of multiple patterns.
Accessing and navigating the machine's main settings menu.
Routine cleaning and oiling procedures for the machine.
Guide to diagnosing and resolving common machine problems.