Be careful when dealing with the blades, as
they are very sharp. Risk of injury!
When cleaning, do not apply any detergents
or scouring agents and do not use any
abrasive or sharp objects. They can cause
irreparable damage to the shaver.
NOTE: When cleaning your shaver, make
sure the unit is turned off.
CAUTION:
• DO NOT run shaver or cutters under
water. Use only the small brush (included)
to clean.
• To clean the external surfaces of the
shaver, use a damp cloth. Do not use
strong detergents or other chemicals.
• To dry, wipe the surface of the shaver
with a dry towel. Do not use a hair dryer
or heater to dry the shaver.
• The shaver should not be used until it has
completely dried.
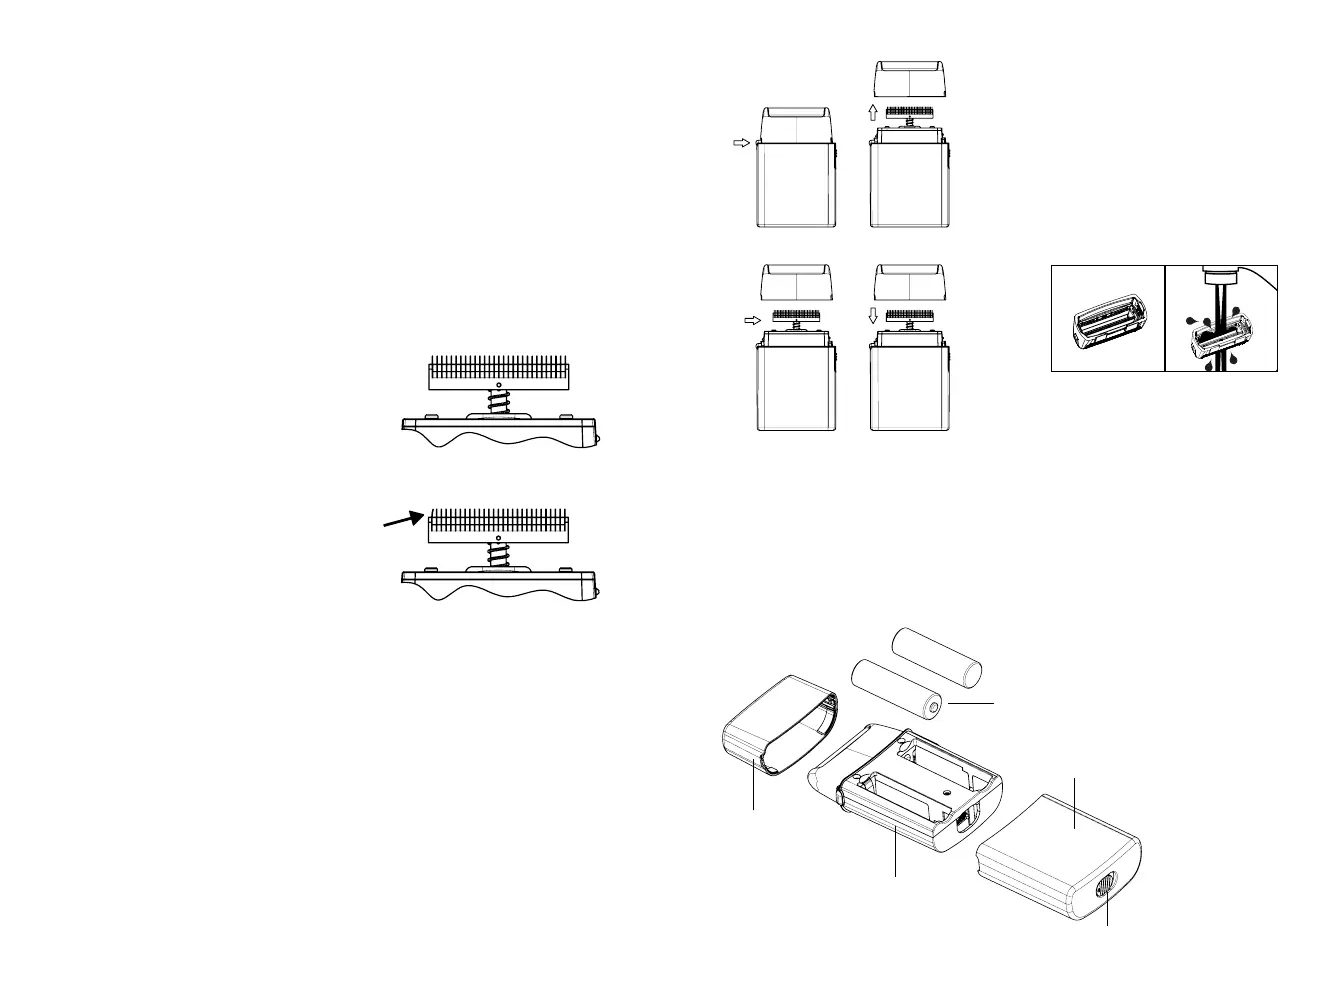
TO REPLACE FOIL HEAD ASSEMBLY
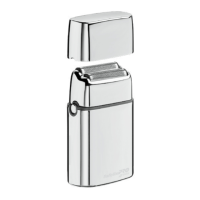
1. Remove the foil head assembly by
pressing the round release button
located on the side of the shaver. Hold
the foil head assembly on both sides and
lightly pull away from shaver unit.
2. Take the replacement foil head
assembly (FXRF1) out of package. Align
the replacement foil head assembly
over the cutters. Carefully move the
replacement foil head assembly down
towards the shaver unit until it firmly
snaps into place. BE CAREFUL NOT TO
DAMAGE THE FOIL OR CUTTER WHILE
INSTALLING.
TO REPLACE CUTTER
NOTE: Always replace the cutter and foil
head assembly at the same time.
1. To remove cutter, place your fingers on
each side and gently pull up and away
from drive shaft.
2. To replace cutter, remove the new cutters
from their packaging. Align cutter about
the drive shaft and lightly push down
until it snaps into place.
3. Replace the foil head assembly, turn
shaver on to ensure it is working
properly.
DAILY MAINTENANCE:
1. Press the release button on the sides of
shaver and remove the head assembly
(see Fig. 1 & 2).
2. Use cleaning brush to whisk away any
debris on and around cutter (See Fig. 3).
3. Snap the head assembly closed (see
Fig. 4).
BATTERY REMOVAL
1. Remove the metal housing by sliding
the release button over and pulling the
bottom cover off.
2. Remove batteries by pulling them out
and away from battery contacts.
3. Dispose used batteries.
WEEKLY MAINTENANCE:
1. Repeat steps 1 – 3 from the Daily
Maintenance cleaning steps.
2. Rinse the head of the shaver under
running water (see Fig. 5). NEVER
submerge the shaver in water.
3. Leave head open for drying.
4. Press the shaver head back into place
(see Fig. 4).
Fig. 5
Washable
4 5
GOOD
BAD
BENT
Fig. 1 Fig. 2
Fig. 3 Fig. 4
Protective Cover
Internal Housing
Bottom Cover
Release Button
AA Batteries


 To Next Page