EasyManua.ls Logo

Backyard Discovery 12 x 10 BROOKDALE User Manual

Backyard Discovery 12 x 10 BROOKDALE
45 pages
To Next Page IconTo Next Page
Page #1 background imageLoading...
Page #1 background image
Made in China INS-2006522-A-BROOKDALE-ENG 12/03/2019
For the most up to date assembly manual,
to register your set, or to order replacement parts please visit
www.backyarddiscovery.com
SAVE THIS ASSEMBLY MANUAL FOR FUTURE REFERENCE IN THE EVENT THAT
YOU NEED TO ORDER REPLACEMENT PARTS.
Model # 2006522
12 x 10 BROOKDALE
Owner's Manual & Assembly Instructions
MANUFACTURED BY:
Backyard Discovery
3305 Airport Drive
Pittsburg, KS 66762
800-856-4445
average 2 person assembly time
assembly time may vary based on skill level
GAZEBO WITH ELECTRIC
Question and Answer IconNeed help?

Do you have a question about the Backyard Discovery 12 x 10 BROOKDALE and is the answer not in the manual?

Backyard Discovery 12 x 10 BROOKDALE Specifications

General IconGeneral
Product NameBackyard Discovery 12 x 10 BROOKDALE
CategoryOutdoor Furnishing
Product TypeGazebo
ShapeRectangular
MaterialWood
Frame MaterialCedar Wood
Roof MaterialSteel
Roof TypeHardtop
ColorBrown
Assembly RequiredYes
Dimensions12 x 10 ft

Summary

Pre-Assembly and Safety Information

Missing Part Support

Contact details and required information for missing or damaged parts.

Limited Warranty and Product Details

Warranty Terms and Coverage

Details the 1-year product warranty and 5-year pro-rated wood warranty.

Safety Warnings and Maintenance

General Safety Precautions

Essential safety guidelines for assembly and use, including structural integrity.

Assembly Tips and Hardware Guide

Setup Dimensions and Roof Notes

Hardware Component Identification (Bolts, Nuts, Screws)

Phase 1: Structure Assembly - Part 1

Step 1: Post and Foot Assembly

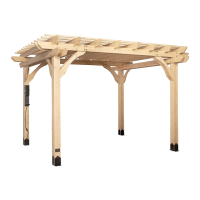
Instructions for attaching post feet to the main posts.

Step 2: Beam and Bracket Installation

Attaching beams to posts using brackets and hardware.

Phase 1: Structure Assembly - Part 2

Step 3: Installing Angle Braces

Securing angle braces to the structure's frame.

Step 4: Attaching Upper Beams

Installing upper beams to connect structural elements.

Phase 1: Structure Assembly - Part 3

Step 5: Installing D1 and D3 Beams

Connecting D1 and D3 beams using mounting plates and hardware.

Step 6: Securing AB1 Angle Braces

Attaching AB1 angle braces for structural support.

Phase 1: Structure Assembly - Part 4

Step 7: Installing End Rafters and Braces

Attaching end rafters and angle braces to the main structure.

Step 8: Attaching Rafters and Fascia

Installing outside rafters, regular rafters, and fascia boards.

Phase 1: Roof Sheathing Installation

Step 9: Installing Roof Sheathing Boards

Securing sheathing boards to the roof frame for stability.

Phase 2: Roof Panel Preparation

Roof Panel Handling and Safety

Important safety precautions and preparation for handling metal roof panels.

Phase 2: Steel Sheeting Installation - Part 1

Step 1: Attaching First Steel Sheeting

Securing the first set of steel sheeting panels to the frame.

Step 2: Securing More Steel Sheeting

Continuing the installation of steel sheeting panels.

Phase 2: Steel Sheeting Installation - Part 2

Phase 2: Steel Sheeting Fastening

Phase 2: Roof Edge Finishing

Phase 2: Roof Panel Installation

Step 8: Attaching Roof Panels

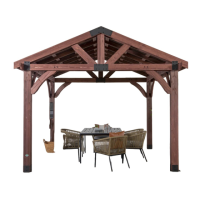
Installing the assembled roof panels onto the structure.

Step 9: Securing Roof Panels

Fastening the installed roof panels with bolts, nuts, and washers.

Phase 2: Final Roof Structure Assembly

Phase 2: Final Ridge Cap Installation

Step 14: Installing Ridge Cap Assembly

Sliding and securing the assembled ridge cap onto the roof.
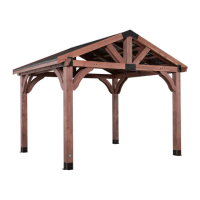
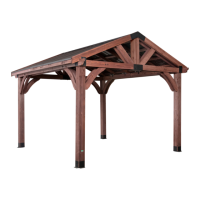
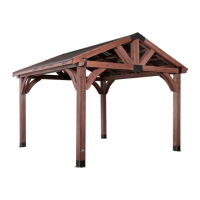
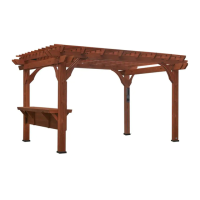
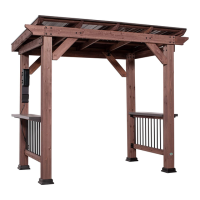
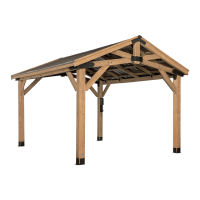
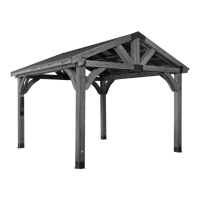
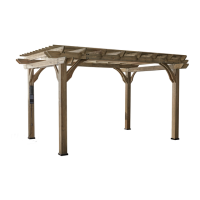
Phase 3: Electrical Kit Installation

Phase 3: Post Anchoring

Phase 3: Concrete Surface Installation

Related product manuals