Fig. C
DOOR
151-1/2"
(385 cm)
151-1/2"
(385 cm)
16
PARTS REQUIRED:
92-5/8"
(235 cm)
10' x 8' FLOOR PANELS
(Not Included)
x55
2" (5 cm)
(2) Nails
Flush
Fig. A
Flush
at top
corner
edge.
Fig. B
(2) Nails
DOOR
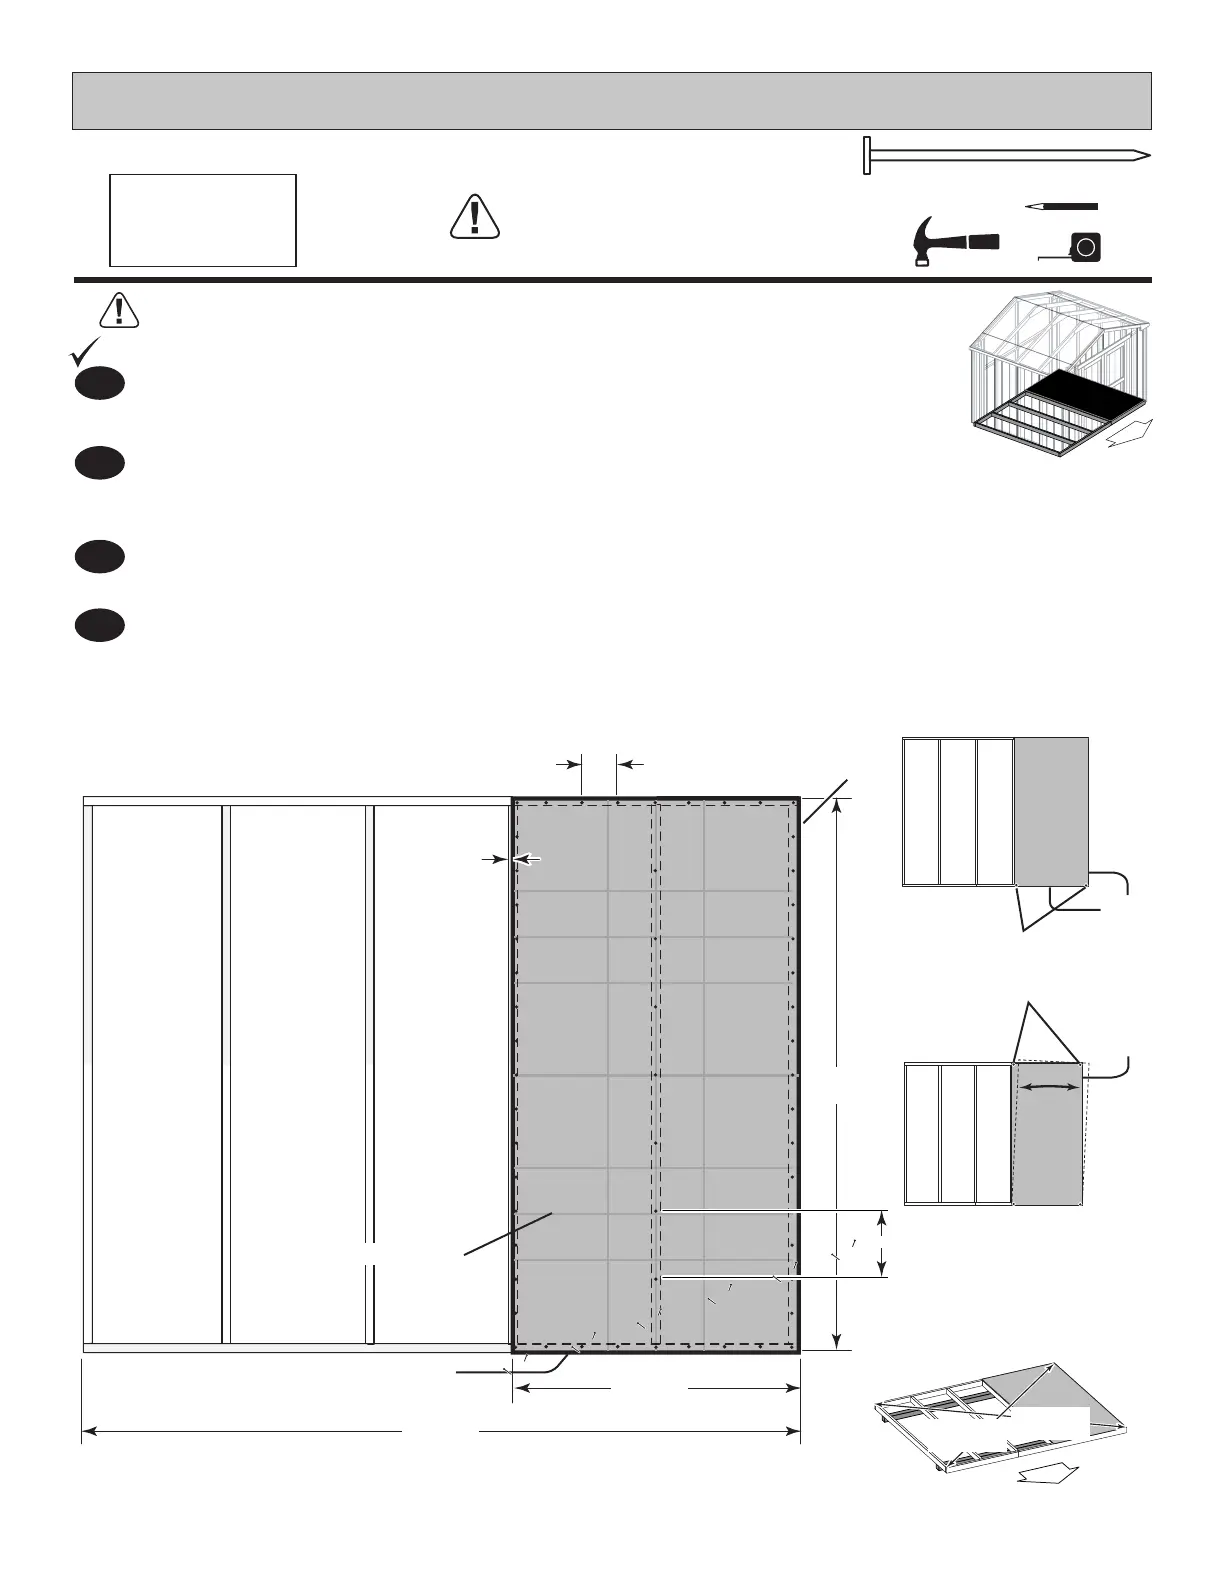
Install (1) 48 x 92-5/8" panel with the rough side up (painted-grid lines side)
with the 48" edge and corner ush to the oor frame (Fig A).
Secure panel with (2) 2" nails in the corners.
Move to the opposite end. Using the long edge of the panel as a lever move the
panel side-to-side until the top corner is ush to the oor frame (Fig. B).
Secure panel with 2" nails in the corners.
2
1
3
4
Continue securing the panel using 2" nails spaced 6" apart on edges and 12" apart inside panel.
Use a chalk line or use pre-painted grid lines to nail into joists under panel.
Check the oor frame is square by measuring diagonally across the frame corners. If the measurements are the
same your oor frame is square. The measurement will be approximately 151-1/2" (385 cm) (Fig. C).
48" x 92-5/8"
(122 x 235,3 cm)
x1
Flush
6" (15 cm) edges of panel.
12" (30,5 cm) inside panel.
Grid lines UP
3/4"
(19 mm)
Approximately
120"
(305 cm)
48"
(122 cm)
Flush
FLOOR PANELS NOT INCLUDED.
SEE PAGE 8 FOR PANEL SIZES
AND QUANTITIES.