3/8 x 48 x 96"
(1 x 121,9 x 243,8 cm)
3/8 x 48 x 96"
(1 x 121,9 x 243,8 cm)
3/8 x 42 x 83"
(1 x 106,7 x 210,9 cm)
3/8 x 42 x 83"
(1 x 106,7 x 210,9 cm)
x1 x1 x1 x1
Fig.E
Primed
sideup
28
PARTSREQUIRED:
SIDE WALL PANELS
x12
1-1/2" (3,2 cm)
DOOR
x3
2" (5,1 cm)
Repeat steps 1, 2 and 3 to attach the opposite side panels.
4
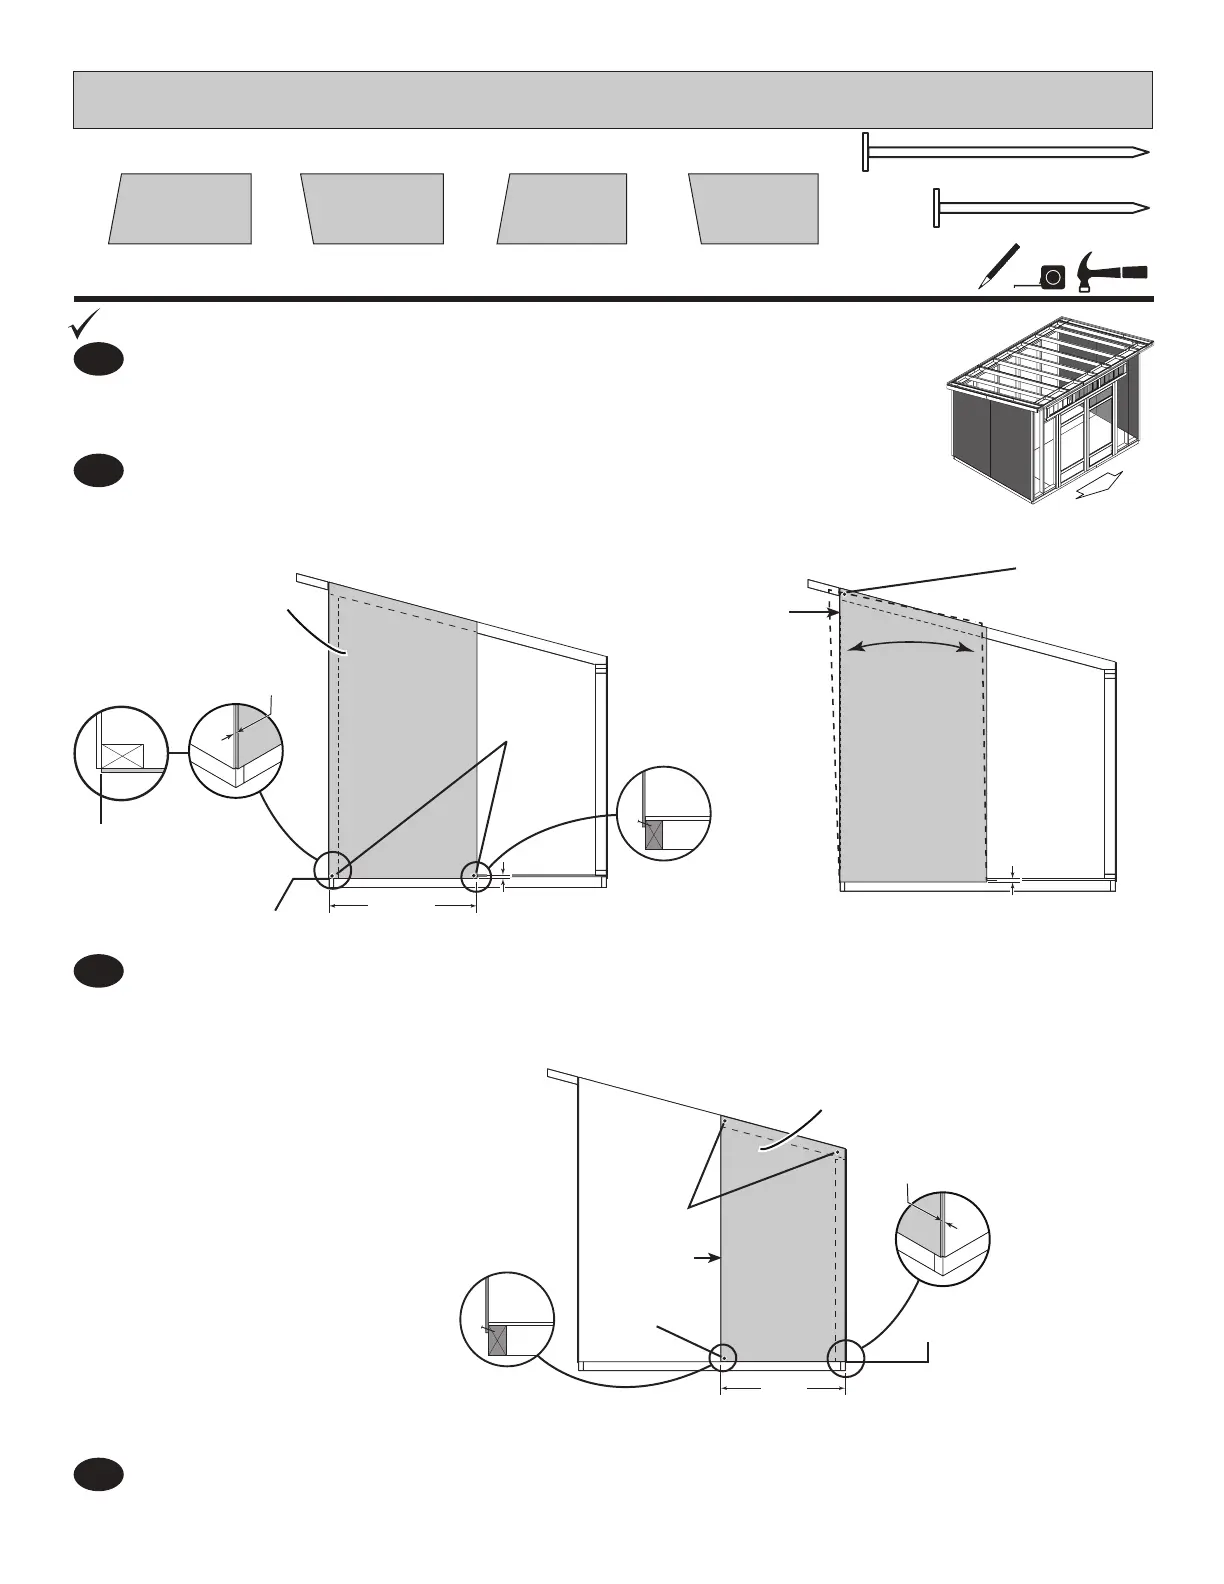
Place 48x96" panel onto side wall ush with front wall stud and ush to bottom front
wall sheathing, with 1" overhang and with primed side up as shown. Secure panel with
two 2" nails in the corners (Fig.A). Ensure the measurement between the panel edges
are the same along the entire length (Fig.B). Angle nails to hit oor frame (Fig.C).
Place 42x83" panel onto side wall ush with bottom of 48 x 96" panel with primed side up, as shown. Secure
panel with 2" nails in three corners (Fig.E). Ensure the measurement between the panel edges are the same
along the entire length (Fig.B). Angle nails to hit oor frame (Fig.C).
Move to the top of panel. Using the long edge of the panel as a lever move the panel
side-to-side until top of panel is ush with front wall stud. Secure upper corner with (1)
1-1/2" nail into rafter (Fig.D). Ensure 1" panel overhang at bottom of panel (Fig.D).
2
1
3
Fig.A
Fig.C
Fig.B
Fig.C
Fig.B
Fig.D
2"Nails
1-1/2"Nails
1-1/2"Nail
2"Nail
Flush
Flush
Flush
48"
(121,9 cm)
1"
(2,5 cm)
1"
(2,5 cm)
42"
(106,7 cm)
Primed
sideup
Flush
Flush
Same
Measurement
Same
Measurement
 Loading...