27
x2
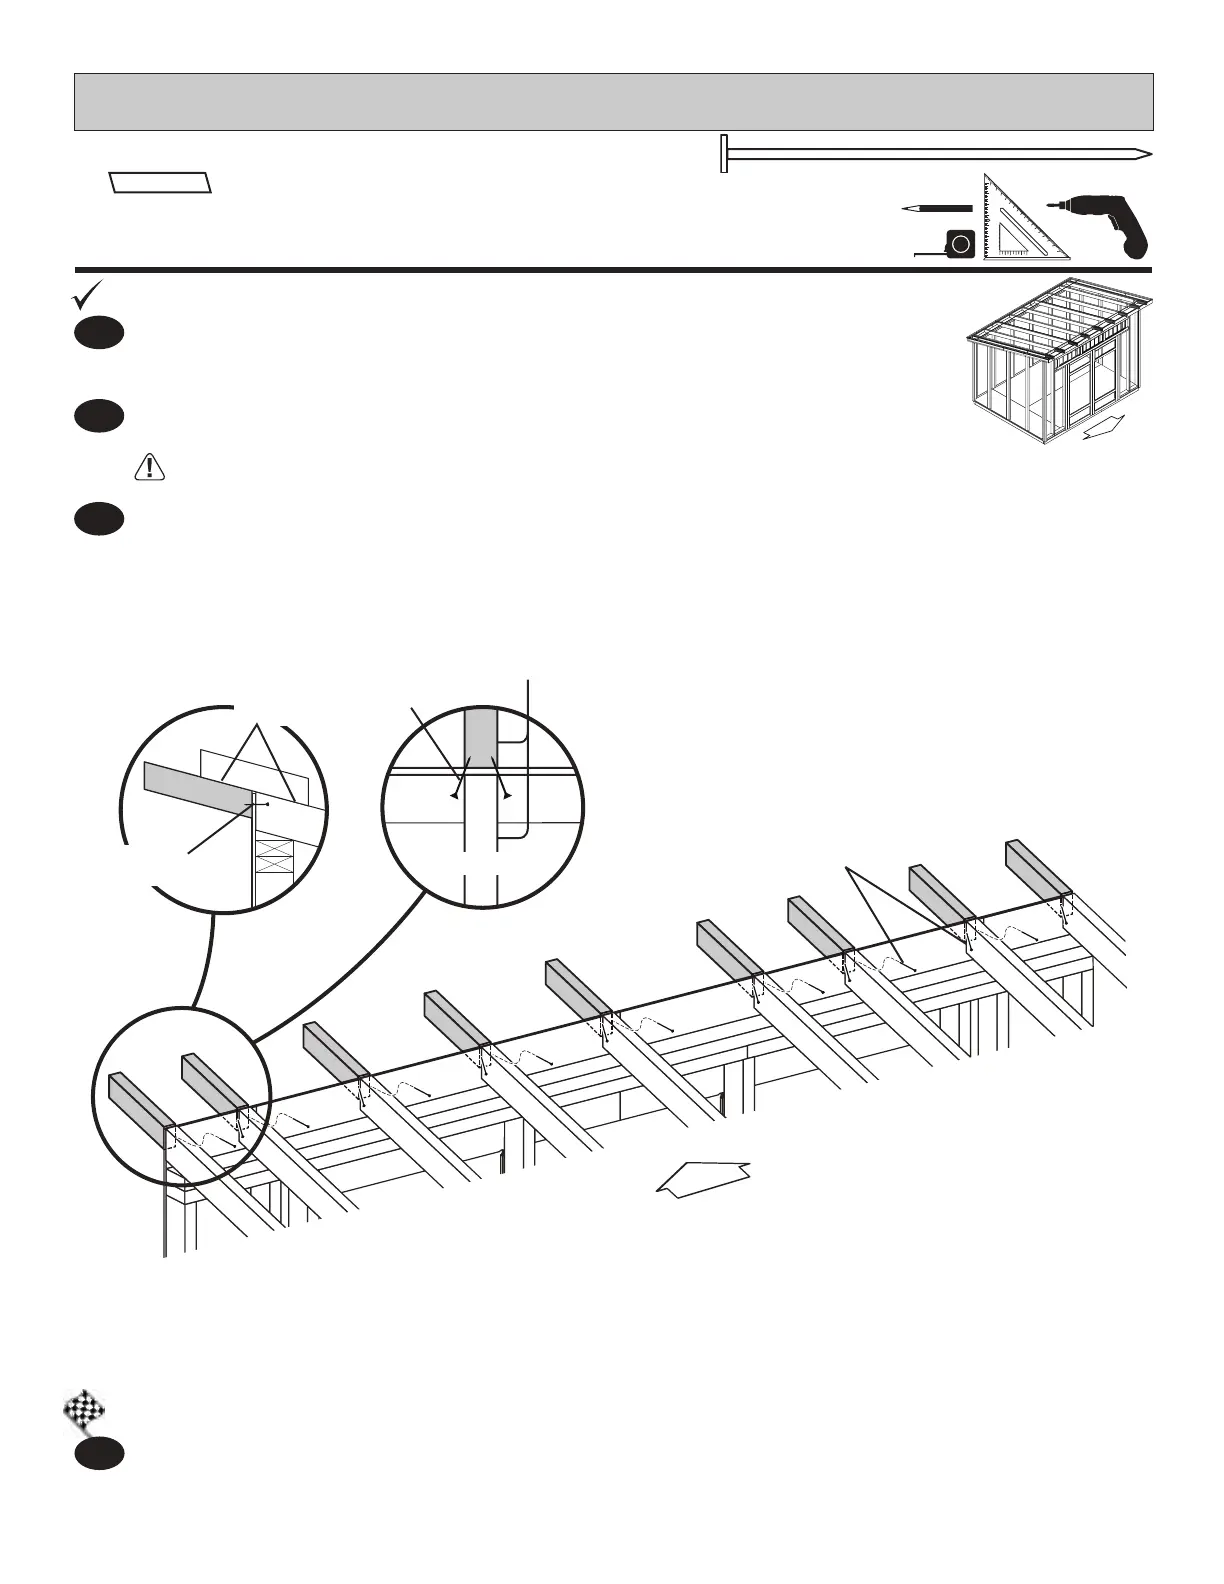
RAFTER EXTENSIONS
PARTSREQUIRED:
DOOR
2 x 3 x 10-1/2" (5,1 x 7,6 x 26,7 cm)
x9
BRA
3" (7,6 cm)
DONOTOVER-DRIVESCREWTHROUGHPANEL.
You have nished installing your RAFTER EXTENSIONS.
FINISH
4
Locate rafter extension above top of front wall panels (FigB). Use another rafter extension
(BRA)as a guide to line-up rafter extension with top of main rafter (FigA).
Repeat steps 1 and 2 to install remaining (8) rafter extensions.
Secure rafter extension using (2) 3" screws toenailed through front wall panel
into BRA (Fig.B).
1
2
3
DOOR
Fig.B
Flush
3"(7,6cm)
Screws
toenailed
TOPVIEW
3"(7,6cm)
Screws
Fig.A
Flush
3"(7,6cm)
Screw