x1
19/32 x 3-1/2 x 35-1/4" (1,5 x 8,8 x 89,5 cm)
BYA
x1
FS
2 x 3 x 35-1/4" (5,1 x 7,6 x 89,5 cm)
19/32 x 3-1/2 x 96" (1,5 x 8,8 x 243,8 cm)
x1
ZX
2 x 3 x 96" (5,1 x 7,6 x 243,8 cm)
x1
PT
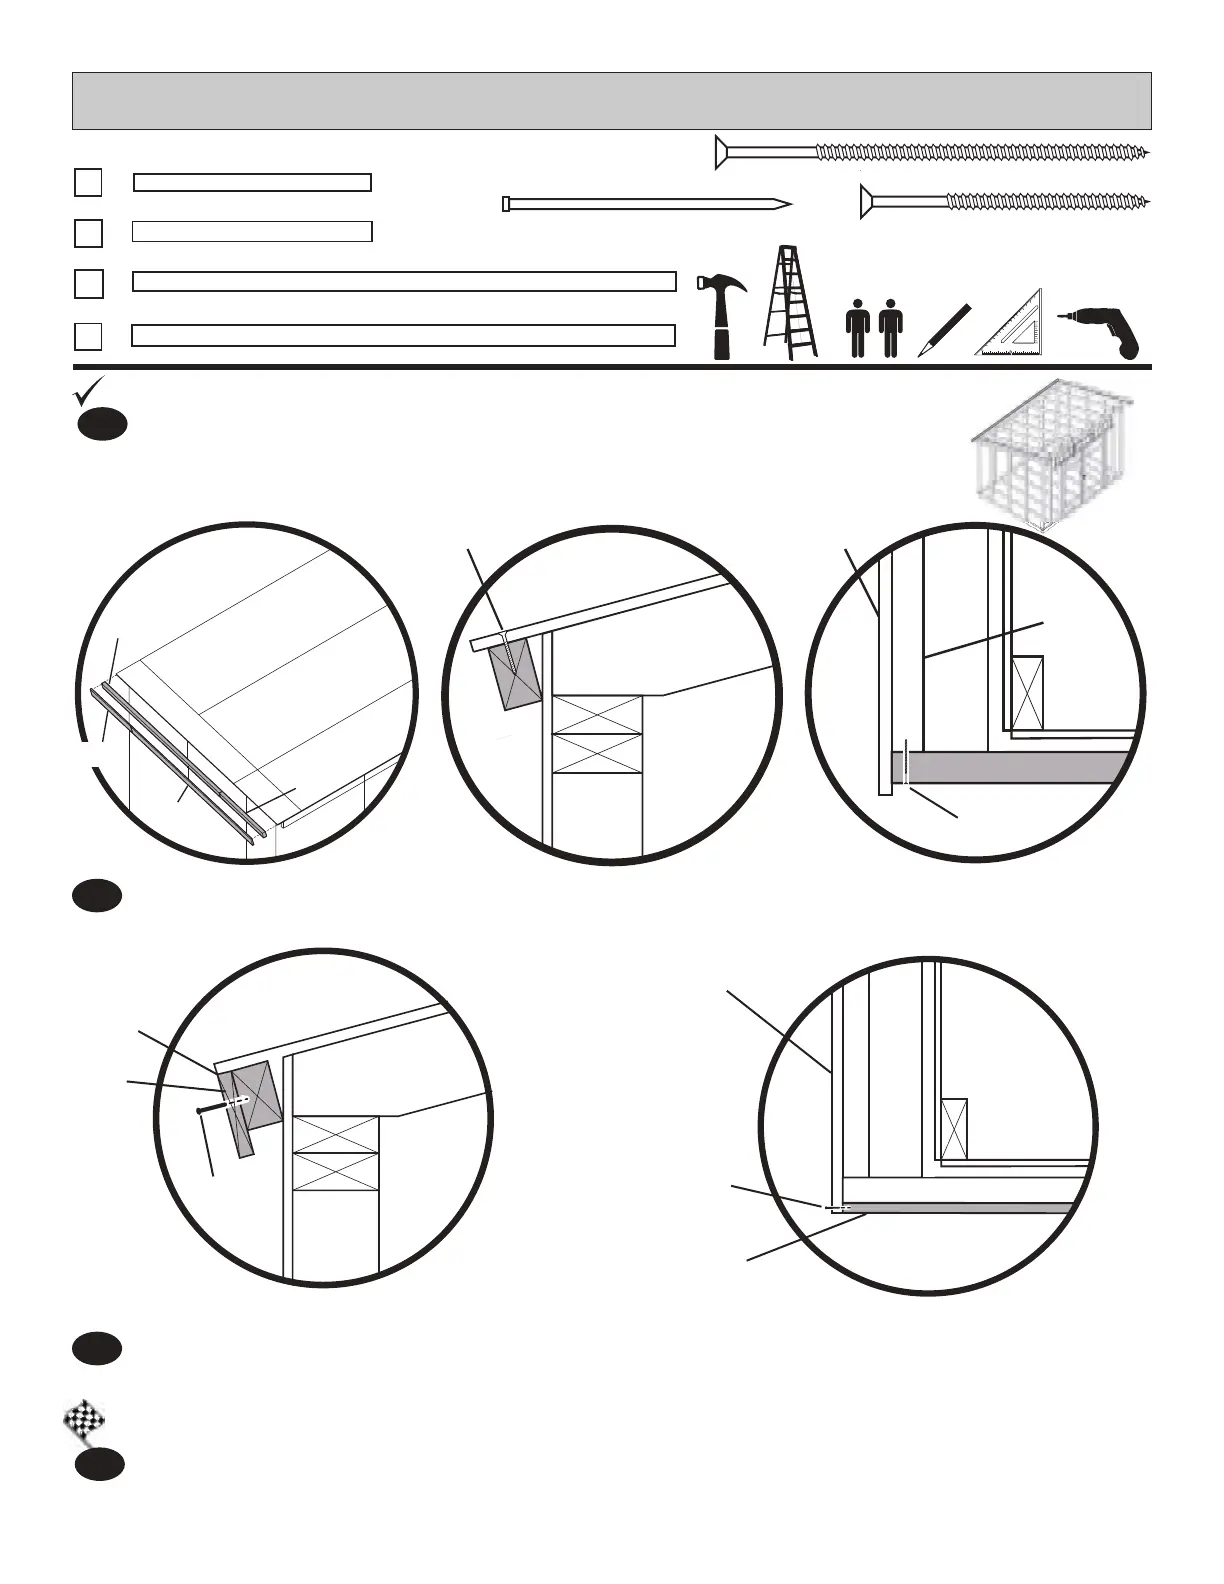
REAR FASCIA TRIM
PARTSREQUIRED:
39
x2
x10
x12
2" (5,1 cm)
2" (5,1 cm)
3" (7,6 cm)
BYAorZX
2"Nails
ZT
Place PTandFSush to roof sheathing and to ZT. (Fig.B,C)
1
Attach PTand FS with 2" wood screws through roof sheathing and (1) 3" screw at OYon both ends
(Fig.B,C).
2
PT
FS
ZX
BYA
ZT
OY
3"Screw
2"Screw
2"Nail
Nail BYA and ZXto PT and FS and to ZTusing 2" nails (Fig.A,D,E).
3
FINISH
4
You are nished installing your rear fascia trim.
Fig.E
ZX
Fig.A
Fig.D
Fig.B Fig.C
Flush