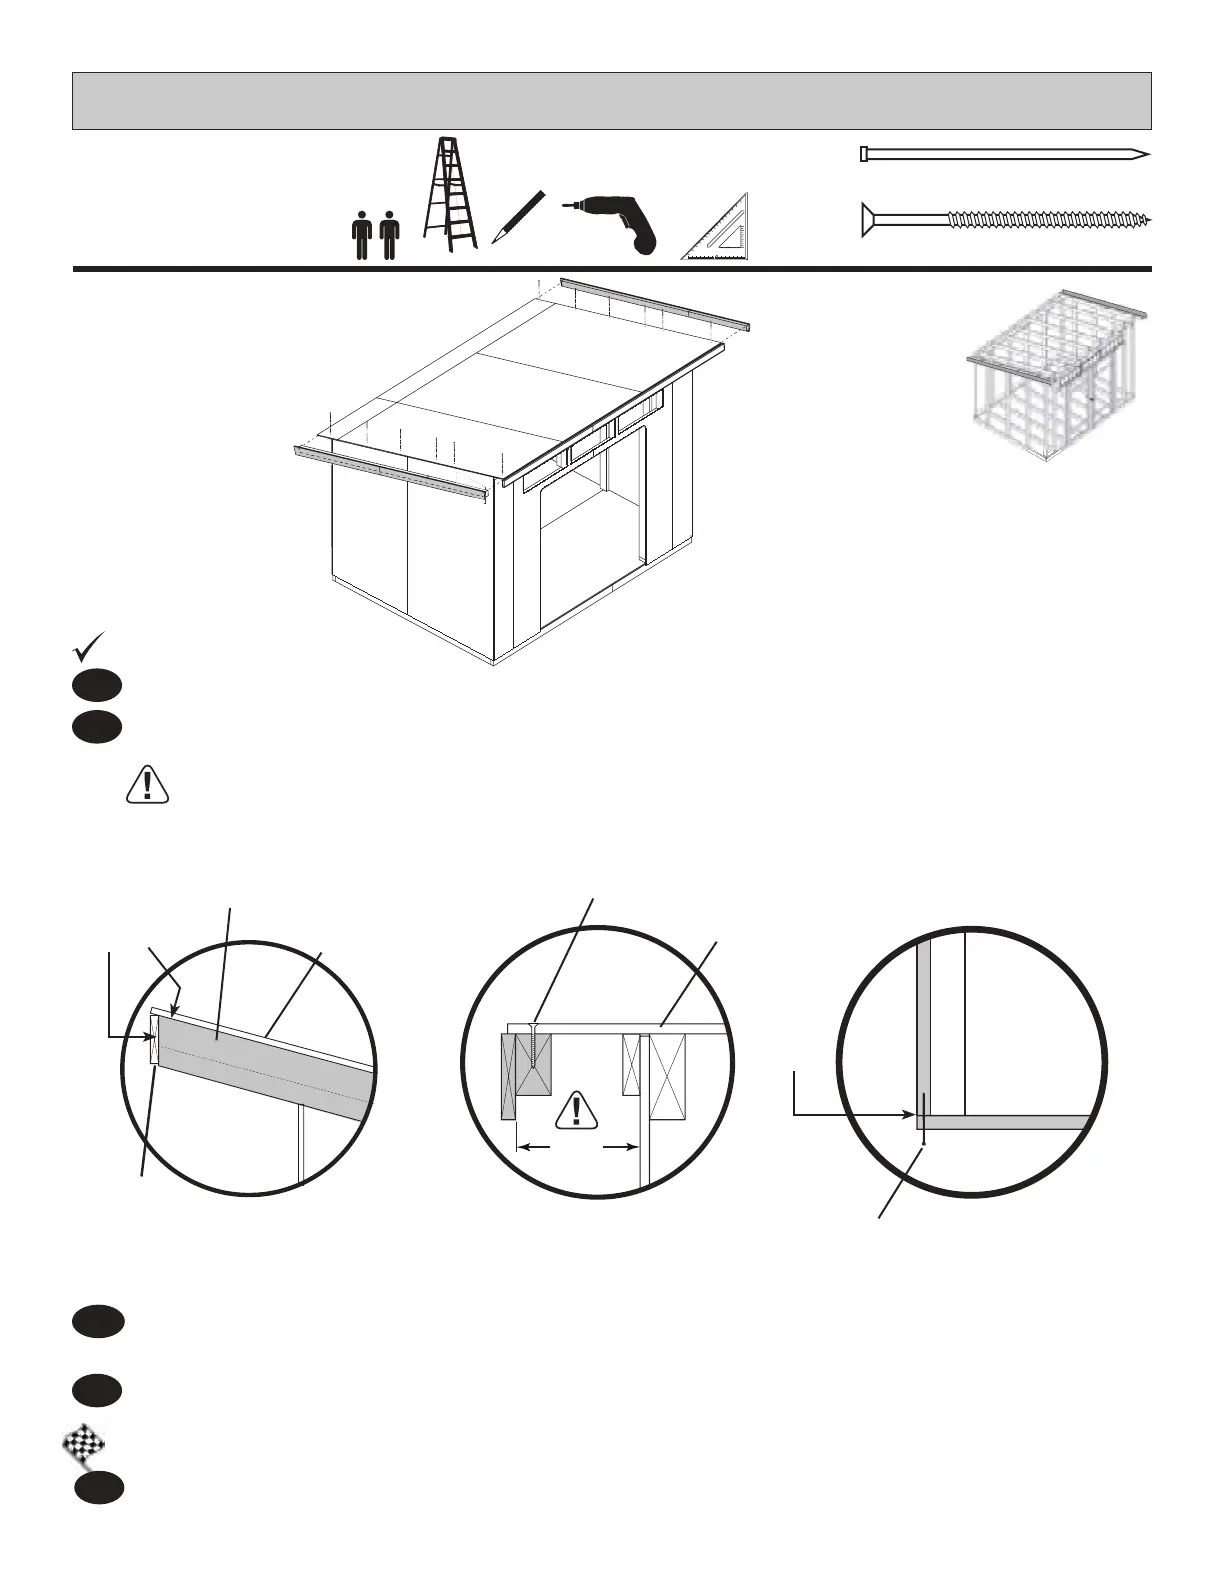
SIDE FASCIA TRIM
38
PARTSREQUIRED:
x4
x12
2" (5,1 cm)
2" (5,1 cm)
1
Hold the side fascia assembly ush with roof sheathing and front fascia trim (Fig.B).
Fig.A
Fig.D
You are nished installing your side fascia trim.
FINISH
5
Makesurethereisa5-1/4"spaceasshown.(Fig.C)
4
Repeat steps 1-3 on opposite side.
3
Nail front fascia to side fascia with (2) 2" nished nails (Fig.D).
5-1/4"
(13,3 cm)
Fig.C
2"Screws
Attach assembly underneath roof panels ush with front fascia board using 2" screws through roof
sheathing (Fig.C).
2
Fig.B
ASSEMBLEDSIDE
FASCIA
FRONT
FASCIA
ROOF
SHEATHING
ROOF
SHEATHING
2"Finish
Nails
Flush
Flush