Do you have a question about the B&G Zeus3S and is the answer not in the manual?
Outlines Navico's right to make changes and user responsibility for safe operation and product use.
States that the English language version of the documentation is the official version in case of translation conflicts.
Lists registered trademarks of Navico Holding AS and other companies.
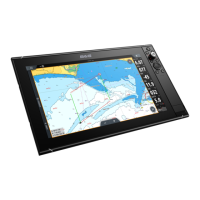
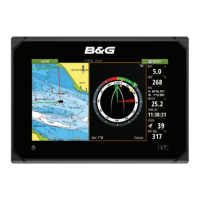
Lists Navico products referred to in the manual.
States the copyright holder and year for the manual.
Informs the user that the warranty card is a separate document.
States that the relevant declaration of conformity is available on the website.
Declares product conformity with CE requirements under RED 2014/53/EU.
Declares product conformity with FCC Rules Part 15.
Declares product compliance with ISED Canada's license-exempt RSSs.
Declares product conformity with Australian and New Zealand EMC standards.
Describes the manual as a reference guide for operating the unit.
States the manual is for software version 19.3 and is updated for new releases.
Informs where translated versions of the manual can be found.
Explains how to view manuals using the unit's PDF viewer.
Guides the user on how to register their device during startup or via system settings.
Details the function of each physical button and control on the unit's front panel.
Explains the use of a memory card for chart data, software updates, and user data.
Accesses application and feature settings dialogs for configuration.
Provides access to options and tools not specific to any panel.
Shows the system status and definitions of status bar icons.
Allows opening of applications and predefined split pages.
Opens the System Controls dialog for quick access to basic system settings.
Lists preconfigured and user-made favorite pages for quick access.
Explains how to power the unit on/off using the Power key or System Controls.
Refers to the Appendix for details on operating the unit via touchscreen, keyboard, or mouse.
Details connecting remote controllers and smart devices for remote operation.
Provides quick access to basic system settings and activating functions.
Covers brightness adjustment, night mode, and touchscreen locking.
Explains how to take a screen capture by pressing the pages and power keys.
Allows users to select or use their own pictures as the Home page wallpaper.
Explains how to configure the function of the WheelKey on the unit's front.
Specifies whether a long press opens the menu or displays the cursor assist feature.
Details adjusting panel sizes and managing active panels in a multi-panel page.
Guides on adding and editing favorite pages based on unit display size.
Explains how to set the appearance and turn the instrument bar ON or OFF.
Identifies elements on the chart panel: North indicator, vessel symbol, range scale, etc.
Explains chart delivery, supported charts, and shared chart data over Ethernet.
Details how to select available chart sources and automatic selection logic.
Explains how to display two different chart sources simultaneously on a page.
Describes the vessel symbol's appearance and orientation based on GPS and heading data.
Explains how to change the chart scale by zooming in or out.
Details how to move the chart in any direction by dragging or using arrow keys.
Explains how to rotate the chart using the orientation button or menu.
Moves the vessel icon to maximize the view ahead of the vessel.
Shows how to display basic and detailed information for chart items.
Explains how to activate and use the cursor for navigation and selection.
Details how to measure distance between points on the chart panel.
Guides on creating a new route by positioning waypoints on the chart panel.
Allows searching for other vessels or chart items from the cursor or vessel position.
Provides a 3D graphical view of land and sea contours.
Opens the Tracks dialog to manage tracks.
Explains coloring tracks based on source data and user-defined high/low limits.
Details how to add overlays on the chart panel and their menu options.
Shows history of water temperature coloring on the chart.
Covers C-MAP chart options, including tides, currents, and photo overlays.
Explains how to display and interpret C-MAP tides and currents data.
Details C-MAP specific features like photo overlay and transparency.
Enables viewing satellite photo images as an overlay on the chart.
Sets the opaqueness of the photo overlay.
Changes the view to that of a traditional paper chart.
Enables higher concentration of contour lines for detailed bathymetry.
Allows selection of chart detail level: Full, Medium, or Low.
Allows turning on/off various chart categories and sub-categories.
Shades seabed terrain to provide a 3D visual representation.
Controls the Depth palette used on the map for depth area shading.
Information on Navionics features, data requirements, and activation.
Details Navionics specific options like photo overlay, shading, and fishing range.
Highlights specific depth ranges with different colors for fishing purposes.
Highlights areas of shallow water between 0 and a selected depth.
Uses shades of blue to distinguish shallow and deep water, with safety depth drawn without shading.
Supports Navionics SonarChart for high-resolution contour detail.
Creates real-time depth contour overlays from live sonar soundings.
Adjusts the transparency of the SonarChart Live overlay.
Used for selecting the image's color palette for SonarChart Live.
Shows tides and currents with gauges and arrows indicating evolution over time.
Contains options for chart settings, dependent on the selected chart source.
Sets the length of course over ground and heading extension lines for own and other vessels.
Configures options for laylines on the chart and SailSteer panels.
Defines targets for True Wind Speed (TWS) using various input methods.
Used to enter PredictWind credentials for downloading weather files and routes.
Turns on/off displaying waypoints, routes, and tracks on chart panels.
Opens the Plot dialog to add new or manage existing waypoints, routes, or tracks.
Explains what a waypoint is and how to save them.
Details how to save a waypoint at the cursor or vessel position.
Describes routes as a series of routepoints and how to create new ones.
Step-by-step guide to creating a new route on the chart panel.
Explains tracks as graphical presentations of historical vessel paths.
Details how to color tracks based on source data and user-defined limits.
Describes managing waypoints, routes, and tracks via C-MAP Embark.
Explains how to synchronize the MFD with C-MAP Embark.
Introduces navigation functions: to cursor, waypoint, or route.
Guides on how to start navigation to a cursor position on any panel.
Explains navigation to a waypoint from a chart or the waypoint dialog.
Details starting navigation along a route from the chart or route dialog.
Describes setting the autopilot to navigation mode when starting navigation.
Covers navigation methods for calculating distance and bearing.
Explains the use of WGS datum format and how to change it.
Used to set the geographic coordinate system used on the system.
Enables use of Phantom Loran positioning system and defines Loran chains.
Guides on selecting and changing instrument fields in the SailSteer panel.
Explains system calculations for time and distance to a waypoint.
Details how to overlay the SailSteer image on the chart.
Allows selection of displayed elements: Race Timer, What if?, Start Line Data.
Shows a race start line overlaid on the Chart panel.
Displays start line data, including distance, tide direction, and bias advantage.
Explains setting up a start line with visual aids and GPS bow offset.
Details the race timer's functions: countdown, count up, reset, sync, and start value.
Provides access to race timer controls for starting, stopping, resetting, and syncing.
Shows data history in plots with two predefined layouts, allowing data and time range selection.
Designed to understand recent changes in wind speed and direction, in dual or combined view.
Shows current tack, sail status, and race start line on the tack bar.
Sets display options for True Wind Direction (TWD) plots and average line.
Sets display options for True Wind Speed (TWS) plots and average line.
Explains displaying GRIB weather overlay on charts with a PredictWind subscription.
Details how to turn on the GRIB weather overlay feature from the chart menu.
Explains how to enter PredictWind login credentials for downloading weather files.
Sets up automatic download of High resolution or Offshore GRIB data.
Guides on manually downloading PredictWind weather files via the Chart menu.
Covers model selection (PWE, GFS, CMCF) and wind/pressure data options.
Explains how to select and import GRIB files from storage or file manager.
Lists requirements for PredictWind routing: internet, subscription, credentials, and boat polars.
Guides on connecting to the internet and entering PredictWind credentials.
Details how to request a new route to the cursor position from PredictWind.
Explains requesting a route to a specified destination coordinate.
Guides on requesting a route to a specific waypoint.
Details requesting a new route based on an existing route.
Covers options like Start Time, Start Routing At, and Light Wind Motoring.
Allows adjustment of polar speed by a percentage for performance optimization.
Selects routing mode: Routing, Departure Planning, or Destination Forecast.
Allows viewing detailed routing information, including wind, current, and swell.
Provides warnings and guidelines for safe autopilot operation.
Recommends turning on all autopilot alarms for safety.
Explains how to select one active autopilot when multiple are configured.
Describes the Autopilot controller interface and its options.
Details how to engage the autopilot using the engage button or mode selection.
Explains that the status bar shows autopilot information.
Lists various steering modes like Non-Follow Up (NFU).
Describes Follow-Up mode where the rudder maintains a set angle.
Explains Heading Hold mode for steering the vessel on a set heading.
Steers the vessel along a calculated track line.
Allows automatic steering to a waypoint or along a predefined route.
Details options within NAV mode: Restart, Skip, and Cancel.
Captures current wind angle as steering reference, available for Sail boats.
Explains user and installation settings for the autopilot computer.
Covers common user settings like Chart compass and Performance.
Controls autopilot steering response, with five levels of performance modes.
Allows manual parameter changes for sailing, like tack time and angle.
Allows manual parameter changes for steering, like auto response and recovery.
Allows manual parameter changes for limits like TWA, rudder, and off course.
Details steering parameters specific to NAC-2/NAC-3 autopilots.
Introduces radar sensors and features dependent on the connected antenna.
Identifies elements of the radar panel: information window, heading line, compass, etc.
Explains connecting and viewing images from two supported radars simultaneously.
Details how to specify the radar source for each radar panel.
Allows overlaying the radar image on the chart for target correlation.
Covers modes like Power off, Standby, and Transmit for radar control.
Explains how to adjust radar range using zoom icons.
Details running the radar in Dual Range mode with independent controls.
Allows defining sectors to blank out interference on the PPI.
Explains how to improve radar image by adjusting sensitivity and filtering echoes.
Provides preset control settings for different environments.
Automatically works to help see smaller vessels in sea clutter.
Controls radar receiver sensitivity, with manual and automatic modes.
Explains how to activate and use the cursor on the radar panel.
Covers advanced options like Noise Rejection, Radar threshold, and Target expansion.
Sets the amount of noise filtering applied by the radar.
Sets required signal strength for lowest radar signals, filtering returns below limit.
Increases the length of targets in range for easier visibility.
Reduces interference from other radar units operating on the same frequency band.
Controls target discrimination, making separation between objects more prominent.
Sets the speed of the radar antenna rotation for faster target updates.
Sets the Sea State control according to conditions for best sea clutter rejection.
Increases pulse length or reduces bandwidth to make targets appear larger.
Details view menu options, including VelocityTrack.
Assists collision avoidance by indicating approaching/diverging targets.
Allows setting speed thresholds for coloring targets in VelocityTrack.
Defines radar symbology that can be turned on/off collectively.
Sets how long trails remain and allows turning target trails OFF.
Explains how to temporarily clear target trails from the radar panel.
Details how different colors (palettes) represent detail on the radar panel.
Indicates radar orientation: HU (Heading UP), NU (North Up), CU (Course up).
Orientation mode where the PPI is oriented on the 0° bearing scale towards the top.
Orientation mode where the 0° indication represents north.
Orientation mode where bearing scale indicates true course from north.
Indicates radar motion: TM (True motion) or RM (Relative motion).
Vessel remains fixed on PPI, other objects move relative to position.
Vessel and targets move across the PPI as you travel.
Allows setting the antenna position origin to a different location on the radar PPI.
Allows measurement of range and bearing to targets using EBL/VRM markers.
Details how to activate and position EBL/VRM markers on the radar image.
Explains how to place EBL/VRM markers by positioning the cursor.
Defines areas (circular or sector) to trigger alarms when targets enter or exit.
Guides on defining guard zones, selecting shape and adjusting settings.
Activates alarms when a radar target breaches guard zone limits.
Adjusts guard zone sensitivity to eliminate alarms for small targets.
Explains MARPA function for tracking radar targets and setting collision alarms.
Illustrates and defines the various MARPA target symbols used by the system.
Guides on how to acquire and track MARPA targets.
Explains how to cancel individual MARPA target tracking.
Details how to display MARPA target information via pop-ups or data bar.
Allows defining MARPA alarms for lost targets or unavailable data.
Explains how to record radar data internally or to a storage device.
Covers settings for Radar symbology, Bearings, Data bar, and MARPA settings.
Selects optional radar items to be turned on/off collectively.
Selects radar bearing measurement relative to True/Magnetic North or relative heading.
Turns the radar data bar on/off, showing up to 3 targets.
Covers settings for MARPA history length and safe ring.
Defines the time presentation of a tracked target's trail.
Adds a ring around the vessel to present the danger zone.
Introduces AIS targets, messages, and its importance for collision avoidance.
Explains how selecting an AIS icon changes it to the selected target symbol.
Guides on searching for AIS targets around cursor or vessel position.
Details the vessels dialog for listing and sorting targets and messages.
Explains how to display detailed information about an AIS target.
Describes AIS target information shown on radar data bar and color coding.
Details initiating DSC calls to other vessels from the unit.
Explains DSC for requesting/receiving position data and handling messages.
Describes AIS SART activation, data reception, and icon display.
Details alarm messages received from an AIS SART.
Explains options for handling AIS SART alarms: ignore, save waypoint, activate MOB.
Allows defining alarms for targets within range limits or lost targets.
Illustrates and defines various AIS target symbols and their meanings.
Covers MMSI entry, Icon filters, Extension lines, and defining dangerous vessels.
Used for entering own MMSI number for addressed messages and target avoidance.
Filters AIS icons based on settings, distance, and vessel speed.
Defines length of course over ground and heading extension lines for vessels.
Uses CPA and TCPA values to define dangerous targets and change symbols.
Sets AIS icon orientation based on heading or COG information.
Introduces the echosounder function for viewing underwater environment.
States that a compatible echosounder transducer is required.
Identifies elements of the echosounder image: surface, bottom, fish arches, scale.
Allows specifying sources and displaying different sources simultaneously.
Explains how to zoom the echosounder image, showing zoom level.
Shows how the history bar relates current view to total image history.
Details how to start and stop recording echosounder log data.
Explains how to review stored sounder records.
Guides on uploading sonar logs to C-MAP Genesis via services or storage.
Covers customizing the image via range, frequency, color, and source settings.
Determines water depth visible on screen; includes preset, auto, and custom ranges.
Explains transducer frequencies and their impact on image quality.
Controls image sensitivity; higher gain shows more detail but may add clutter.
Indicates signal strengths with colors based on selected palette.
Specifies the source for the image in the active panel.
Details measuring distance between two observations on the image.
Covers advanced options like Noise rejection, TVG, and Scroll speed.
Filters signal interference and reduces on-screen clutter.
Reduces surface clutter by decreasing receiver sensitivity near the surface.
Selects image scrolling speed; high speed updates fast, low speed shows longer history.
Presents a magnified view of the sounder image with zoom level and bars.
Useful for viewing targets near the bottom, with a flattened bottom image.
Used for selecting the image's color palette.
Shows a line on the bottom surface to distinguish bottom from fish and structures.
Displays echo sounding strength indicated by width and color intensity.
Allows overlaying DownScan images on the regular Echosounder image.
Pauses the image for detailed examination, stopping echosounder pinging.
Selects how fish targets appear and if a notification beep is desired.
Accesses settings for internal and network echosounder channels.
Selects the internal echosounder channel for the echosounder panel menu.
Shares transducers with other units on the Ethernet network.
Selects whether one or multiple echosounder sources can be selected simultaneously.
Used to view recordings, controlling scrolling and display from the menu.
Adjusts depth readings to account for transducer distance to vessel or water surface.
Introduces ForwardScan sonar as a navigational aid for monitoring underwater environment.
Identifies elements of the ForwardScan image: depth/range scales, point data, history.
Covers image setup via source, depth, forward range, noise rejection, and show zones.
Specifies the source for the ForwardScan image in the active panel.
Controls depth range, set to auto mode by default.
Controls the forward looking search range, maximum 91 meters.
Filters signal interference and reduces on-screen clutter.
Displays warning (yellow) and critical (red) zones forward of the vessel.
Details options like Pause, Palettes, History ratio, Point data, and Depth lines.
Pauses the image for detailed examination, stopping pinging.
Specifies whether to view no data points, all data points, or only objects.
Displays the record dialog for saving ForwardScan log data.
Monitors ForwardScan on the chart panel using heading extension colors.
Selects ForwardScan in chart settings to view heading extension.
Specifies the setup in the ForwardScan installation dialog.
User-selected thresholds defining a critical zone forward of the vessel.
Sets thresholds defining warning zone lines shown on the ForwardScan image.
Fine tunes transducer angle if not installed parallel to the waterline.
Adjusts depth readings for transducer distance to vessel or water surface.
Describes panels with gauges (analog, digital, bar) customizable for data display.
Details predefined dashboard styles for vessel, navigation, angler, and instrument info.
Allows changing gauge data, dashboard layout, and adding new dashboards.
Guides on editing a dashboard by changing gauge data and information sources.
Allows viewing forecast data overlaid on chart for understanding weather conditions.
Explains how wind barbs indicate wind direction and speed.
Details how to display weather observation identity and detailed information.
A GRIB file contains forecast info; weather systems can be animated.
Explains importing GRIB data from storage or forecast menu for chart overlay.
Shows how to display GRIB weather options like wind barbs and pressure contours.
Shows how to animate weather data to display predicted forecast for specific time/date.
Refers to the PredictWind section for weather and routing information.
Details SiriusXM weather availability, subscription, and service coverage.
Notes that SiriusXM weather is available for North America only.
Shows signal strength, antenna status, service level, and serial number.
Displays Sirius weather as an overlay on the chart panel.
Shows current weather and forecast for your current location.
Covers view options for precipitation, sea surface temperature, and wave indication.
Uses shades of color to show precipitation type and intensity.
Shows sea surface temperature as color shading or text.
Uses colors to indicate forecast wave height.
Turns surface features like fronts, isobars, and pressure points on/off.
Indicates cloud top height; only available for certain SiriusXM subscriptions.
Indicates storm tops; only available for certain SiriusXM subscriptions.
Shows current or predicted weather conditions using various icons.
Provides access to weather reports for US/Canadian marine zones.
Allows reading tropical statements including information about tropical weather conditions.
Defines sea surface temperature and wave height color coding.
Animates past or future weather conditions using available data.
Adjusts the transparency of the overlay.
Allows setup of lightning or storm alarms within a certain range of the vessel.
Allows viewing video or camera sources on the system.
Scales video image proportionally to fit panel, with black areas for uncovered image.
Covers video source selection and additional options.
Selects one channel source or cycles through available video sources.
Provides source-dependent options for adjusting video settings.
Allows control and customization of the audio system on the vessel.
Details the control buttons, tools, and options for audio sources.
Covers selecting the audio server and setting up speakers.
Explains selecting a device as the audio server when multiple sources are connected.
Allows control of different audio zones with individual settings.
Adjusts volume for all speaker zones, with options for individual zone control.
Displays the list of audio sources available on the active audio server.
Enables Bluetooth functionality and pairing with enabled devices.
Guides on selecting the tuner region and tuning radio channels.
Details SiriusXM receiver control and service coverage in North America.
Provides options for displaying Sirius channels, including favorite channels.
Explains how to select a Sirius channel and page through favorite channels.
Allows locking selected Sirius channels with a user-selected 4-digit code.
Controls the DVD player from the audio controller when audio source is set to DVD.
Explains using internet connection for data downloads/uploads and potential charges.
Automatic connection to the internet via an Ethernet network.
Details using WiFi to connect to the internet and wireless devices.
Provides configuration and setup options for wireless functionality.
Used for connecting to a hotspot with internet access.
Used for connecting a phone or tablet to the MFD.
Enables the built-in Bluetooth functionality.
Displays the Bluetooth device dialog for pairing or removing devices.
Enables or disables the internal WiFi to reduce power consumption.
Shows WiFi network connection status and hotspot name (SSID).
Displays the MFD's hotspot network name (SSID) and key.
Lists hotspots the unit has been connected to in the past.
Lists wireless devices and allows managing connections.
Shows available wireless devices and allows displaying additional details.
Tools for fault-finding and setting up the wireless network.
Allocates IP addresses and helps find DHCP servers on a network.
Network performance tool for testing wireless network performance.
Lists options for remote control: smartphone/tablet, remote control unit.
Details using smartphones and tablets for remote view and control.
Must be used to connect a phone or tablet to the MFD for remote control.
Connects phone/tablet and MFD to the same hotspot for control.
Connects phone/tablet directly to the MFD if no WiFi network is available.
Starts the Link app to display MFDs available for remote control.
Allows changing access level and removing WiFi connected remote controllers.
Lists functions: read/send text messages, view caller ID.
Notes limitations for iPhones: only incoming calls/messages, no sending.
Guides on connecting and pairing a phone via Bluetooth.
Displays list of messages and call history after phone is paired and connected.
Explains how to create a new text message (not available for iPhones).
Details how to answer or reject calls, or respond via text message.
Defines message templates and alert appearance.
Provides steps for troubleshooting iPhone connection issues.
Lists potential errors and troubleshooting steps for iPhone connection.
Troubleshooting delayed or absent notifications by changing connection profile.
Advises checking if the text app is open and active on the iPhone.
Shows Bluetooth devices dialog and refers to managing devices.
Explains the simulation feature for seeing unit operation without connections.
Shows a retail demonstration for the selected region; pauses if unit is operated.
Allows selection of data files used by the simulator.
Allows manual control of the simulator settings.
Describes tools and settings accessible from the Home page toolbar.
Includes dialogs for managing waypoints, routes, and trails.
Displays tide information for the nearest tide station.
Provides dialogs for active/historical alarms and alarm settings.
Displays status and information for AIS and DSC vessel types.
Shows voyage/engine info, reset options, and Race Timer controls.
Panel options for enabling/disabling logging, adjusting speed thresholds, and resetting.
Provides controls for the Race Timer.
Displays sunrise, sunset, moonrise, and moonset for a position.
Accesses file management system for browsing and managing unit contents.
Search function for chart items like waypoints, routes, and tracks.
Used for connecting a phone to the MFD.
Connects to Navico internet store for browsing, purchasing, and downloading.
Covers settings for language, boat attributes, text size, and key beeps.
Controls the language used on the unit.
Used to specify the physical attributes of the boat.
Used for setting the text size in menus and dialogs.
Controls the loudness of the beep sound during physical interaction.
Configure time settings, including time and date formats.
Displays graphical view and values for available satellites.
Sets a PIN code to prevent unauthorized access to system settings.
Restores selected settings to default factory values.
Determines unit's response to signal applied to the power control wire.
Configuration of advanced settings and user interface display.
Guides the user on how to register their device.
Displays copyright, software version, and technical information.
Used for accessing web sites that provide feature services.
Explains that the system continuously checks for dangerous situations and faults.
Classifies messages by color codes: Red (Critical), Orange (Important), Yellow (Standard), Blue (Warning), Green (Lite).
Describes alarm indication: pop-up message, status bar icon, and audible alarm.
Details alarm dialog options: Close (acknowledge), Disable (turn off setting).
Enables or disables the siren.
Activated from Alarm settings or toolbar button; shows active alarms and history.
Lists all active alarms with details until acknowledged or reason is removed.
Lists alarm history with timestamps until manually cleared.
List of available alarm options, allowing activation, deactivation, and limit changes.
Unit has limited field serviceable components; operator performs limited maintenance.
Recommended to fit the sun cover when the unit is not in use.
Instructions for cleaning the screen and housing using soft cloths and water.
Ensures connector plugs are pushed in correctly, noting locks or keys.
Uses system setting option to calibrate the touchscreen.
Advises backing up user data before initiating a software update.
Shows current software version and available updates if connected to the internet.
System automatically checks for updates when connected to the internet.
Guides on downloading and transferring update files from www.bandg.com.
Creates a report about the unit for technical support enquiries.
Recommended to regularly copy user data and system settings database.
The waypoints option in storage dialog manages user data.
Lists available formats for exporting data: User Data File versions, GPX.
Option to export all waypoints, routes, tracks, and trips.
Allows selecting the area from which to export data.
Deletes stored user data to potentially improve system performance.
Uses storage dialog option to export user settings.
Imports system settings, warning that it overwrites existing settings.
Displays video and controls compatible FLIR M-series cameras over Ethernet.
Explains automatic recognition and connection to compatible FLIR cameras.
Details using arrow buttons on the video panel to control camera pan and tilt.
Explains zooming the video image using panel buttons (digital or optical zoom).
Covers daylight and infrared sources, including toggle color scheme and polarity.
Allows control of compatible FUSION-Link devices via the system.
Integrates with BEP's CZone system for controlling a distributed power system.
Adds a CZone dashboard to instrument panels when CZone is installed.
Customizes a CZone dashboard by changing gauge data.
Allows operating a Naviop Loop system if device is on the same NMEA 2000 network.
Details basic touchscreen operations like tap, press and hold, scroll, flick, pan, pinch, spread.
Explains keyboard operation, including shortcuts for common functions.
Details mouse connection and operation, including pointer visibility and actions.
Defines icons that may appear on the status bar, such as alarms, GPS signal, and connected devices.
| Processor | iMX 8 |
|---|---|
| Waterproof Rating | IPX6 and IPX7 |
| RAM | 4 GB |
| Display Type | TFT LCD |
| Connectivity | Ethernet, NMEA 2000, Wi-Fi |
| GPS Receiver | 10Hz |
| Cartography | C-MAP, Navionics |
| Operating Voltage | 12V DC |