Do you have a question about the Barco Event Master EC-50 Series and is the answer not in the manual?
Outlines the sequential steps for controller setup, including connections, power, calibration, and driver installation.
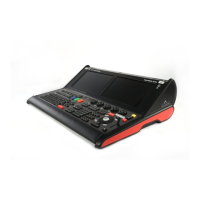
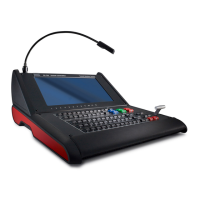
Details the necessary physical connections for the EC-50 controller, such as DVI, USB, and AC power inputs.
Explains the meaning of various LED indicators, including blue LEDs for communication status and indicator lights.
Describes the back light, scriptlight, and front light functions and their use on the EC-50 controller.
Explains how to select destinations and layers using dedicated buttons, noting LED feedback for selected states.
Details the assignment of resources such as Presets, UserKeys, Sources, and Background Sources to controller buttons.
Covers page navigation, contextual display buttons, T-Bar functionality, and layer function buttons for operation.
Describes the execution of transitions using the Cut & All Trans buttons based on the GUI setup.
Explains the meaning of LED colors: blue for selected/active, green for preview, and red for program or transitioning.
Details how the button backlight color changes based on assigned resources like Presets, UserKeys, and Sources.
| Power Supply | 100-240 VAC, 50/60 Hz |
|---|---|
| Control Interface | Ethernet, USB |
| Network Protocols | TCP/IP |
| Operating Temperature | 0°C to 40°C |
| Storage Temperature | -20°C to 60°C |
| Rack Units | 1U |