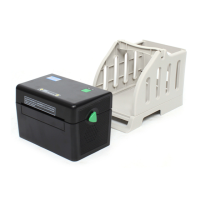
The XP-DT108B is a direct thermal barcode printer designed for desktop use, offering safe, reliable, and efficient print quality for a reasonable price. It is suitable for printing a wide range of label formats, including text and graphics. The printer is characterized by its strong functionality and ease of operation, making it a suitable choice for thermal barcode printing needs.
Function Description:
The XP-DT108B is a direct thermal barcode printer. It supports various printing materials, including paper, paper labels, and folding sections. The printer is commonly used for both one-dimensional and two-dimensional barcodes. It features a TTF font and eight groups of different sizes of English fonts, supporting four different angle printing directions. An enlarged function allows for font size adjustments, which can significantly improve label printing efficiency.
The printer is equipped with two sets of gear drive motors and includes a button and a light indicator that displays three colors. These indicators and buttons, in conjunction with the power switch, enable various printer functions such as paper feeding, pausing print jobs, sensor calibration, label printing, printer initialization, and self-testing.
Important Technical Specifications:
- Print Mode: Direct thermal printing.
- Printing Speed: Adjustable in increments of 2, 3, 4, and 5 inches per second.
- Fonts: Supports TTF font and eight groups of different sizes of English fonts.
- Printing Direction: Supports four different angle printing directions.
- Enlarged Function: Allows for font size adjustments.
- Default Print Speed (203DPI): 101.6 mm/sec (4 ips).
- Default Print Speed (300DPI): 76 mm/sec (3 ips).
- Concentration: Default value 8.
- Label Width: Default 4" (100 mm).
- Label Height: Default 7.9" (180 mm).
- Sensor Type: Default Gap sensor.
- Gap Setting: Default 0.16" (4.0 mm).
- Print Direction: Default 0.
- Reference Point: Default 0,0 (upper left corner).
- Offset: Default 0.
- Tear-off Mode: Default On.
- Character: Default 850.
- Country Code: Default 001.
- Clear Flash: Default No.
- IP Address: Default DHCP.
Usage Features:
- Installation: The printer should be placed on a clean, steady, level desktop. To install, ensure the power is off, then connect the power cord to the power outlet of the printer and the AC socket. Turn on the power switch.
- Mounting Sheet: To load paper, push forward on the button with both hands to open the printer cover. Place the paper on the Media box surface, pass it through the paper guiding device, and pull it over the rubber roller. Close the printer cover to avoid affecting print quality.
- Built-in Power: The power adapter is integrated into the printer. Users only need to connect the power cord and turn on the switch.
- Single Print Function: If there is a lack of paper in the printer feeder, the printer will automatically continue printing paper suction. In standby mode, the paper printer automatically feeds to the print position.
- LED Indicator and Key Functions:
- Blue (fixed): Power start, printer on standby to print.
- Blue (flashing): Printer is downloading data or printer is paused.
- Purple: Printer is clearing data.
- Red (fixed): Upper cover open.
- Red (flashing): Print error (e.g., paper, cardboard, or memory errors).
- Feed Button: When the printer is ready (blue LED fixed), clicking the button feeds label paper into the front end.
- Print Job Timeout: During printing, clicking the button pauses the print job (power indicator flashes blue). Clicking again resumes printing.
- Internal Adapter Boot Functions: The printer has four boot functions for setting or testing hardware. These are activated by pressing and holding the button while powering on, then releasing it at specific indicator light sequences.
- Gap Sensor Detection: This function determines the sensitivity of the label paper sensor. It is used when replacing different paper specifications or after restoring factory settings to recalibrate the gap sensor. The process involves powering off, pressing the key while powering on, and releasing it during a specific light sequence (purple, blue, purple, flashing, then red flashing 5 times, blue and purple flashing 5 times, blue flashing 5 times, blue fixed). The sensor will then correct the label paper and print measured values.
- Print Debugging Mode and Self-Testing: Similar to gap sensor detection, this mode allows for fine-tuning sensor sensitivity. It involves a specific light sequence and prints out numerical values for debugging.
- Printer Initialization: This function clears DRAM download files and restores print parameters to factory settings. It is activated by powering off, pressing the paper key while powering on, and releasing it when the power indicator flashes blue.
- Skip AUTO.BAS Program: This allows users to bypass the automatic execution of the AUTO.BAS file loaded in flash memory. It is activated by powering off, pressing the paper key while powering on, and releasing it when the indicator light is fixed.
- Printer Diagnostic Tool (Diagnostic Tool): This Windows-based utility allows users to view the printer's current status, set values, download graphics/procedures/font files, update firmware, and troubleshoot problems.
- Enabling the Tool: Double-click the "Diagnostic Tool.exe" icon.
- Interface Selection: The default communication interface is USB. If using USB, no changes are needed.
- Printer Settings: The tool provides various settings:
- Calibrate Sensor: Calibrates the media sensor.
- Ethernet Setup: Configures IP address, subnet mask, and gateway for Ethernet.
- RTC Time: Synchronizes the printer's Real Time Clock with the PC.
- Factory Default: Initializes the printer and restores factory settings.
- Reset Printer: Reboots the printer.
- Print Test Page: Prints a test page.
- Configuration Page: Prints printer configuration.
- Dump Text: Activates printer dump mode.
- Ignore AUTO.BAS: Ignores the downloaded AUTO.BAS program.
- Password Setup: Sets a printer password.
- Auto Calibration with Diagnostic Tool: Ensures paper is installed correctly and the print head is closed. Power on the printer, open the Diagnostic Tool, set the transmission interface to USB (default), press "Calibrate key," select paper type, and press "Calibrate" to initiate automatic sensor calibration.
Maintenance Features:
Regular maintenance ensures print quality and extends printer life.
- Recommended Tools: Cotton swab, cotton, vacuum cleaner or air cleaner, medical alcohol.
- Cleaning Steps:
- Print Head: Turn off the printer, allow the print head to cool for at least one minute, then wipe the surface with a cotton swab. Recommended frequency: When replacing new label paper.
- Rubber Roller: Turn off the printer. While rotating the rubber roller, carefully wipe it with a cotton cloth or cotton swab dipped in medical alcohol. Recommended frequency: When replacing new label paper.
- Torn Paper: Wipe with a cotton cloth dipped in medical alcohol. Recommended frequency: When needed.
- Sensor: Remove dust from the sensor using an air cleaner or a vacuum cleaner. Recommended frequency: Monthly.
- External Machine: Wipe with a wet cotton cloth. Recommended frequency: When needed.
- Internal Machine: Remove dust from the machine using an air cleaner or a vacuum cleaner. Recommended frequency: When needed.
- Cautions: Do not touch the print head directly. If touched, use a cotton swab dipped in medical alcohol. Use medical alcohol only; industrial alcohol may damage the print head. If the printer frequently shows error messages, always clean the printer's sensor.
Troubleshooting (Common Problems and Solutions):
- Power indicator light is not bright:
- Possible factors: AC socket plug and power supply plug not properly connected, power switch not open.
- Resolvent: Check power connectors, ensure proper connection, turn on power switch.
- Diagnostic Tool shows "printer on":
- Possible factors: Printing head seat not closed.
- Resolvent: Close the print head seat.
- Diagnostic Tool shows "paper exhaustion":
- Possible factors: Label paper exhausted, incorrect label installation path, incorrect gap sensor detection.
- Resolvent: Install new label paper, refer to installation steps, recalibrate label sensor.
- Diagnostic Tool displays "paper jam":
- Possible factors: Incorrect gap sensor detection, incorrect label paper size setting, label paper stuck in the internal printer.
- Resolvent: Recalibrate label sensor, set correct label size, internal cleaning.
- Memory space is full (FLASH / DRAM):
- Possible factors: FLASH/DRAM memory space is full.
- Resolvent: Remove unnecessary files from FLASH/DRAM. DRAM can store up to 256 files (max 256KB). FLASH can store up to 256 files (max 2560KB).
- MicroSD memory card cannot be used:
- Possible factors: MicroSD memory card damage, incorrectly inserted, unauthorized manufacturer.
- Resolvent: Use supported capacity and verified microSD cards, reinstall.
- Poor print quality:
- Possible factors: Dust/adhesive packing on print head, improper print density setting, print head damage, inappropriate print head pressure setting.
- Resolvent: Reinstall supplies, clean print head, clean rubber roller, adjust print density and speed. Perform self-test to check for print head damage. Adjust print head pressure knob: if too light, increase numerical pressure on the left side (e.g., from "5" to "1" for lighter prints), then adjust Z-axis for best setting. If the label is too light on the right, adjust pressure on the right side. If label thickness exceeds 0.22 mm, print quality may be poor. Confirm print head holder is completely closed.
- Jump occurs when printing:
- Possible factors: Incorrect/incomplete label size, label replaced without recalibration, sensor covered with dust.
- Resolvent: Ensure correct label size, recalibrate sensor, use air cleaner to remove dust.
- Small print volume when print position is not correct:
- Possible factors: Label sensor not set correctly, label size not set correctly, printer driver in the style, vertical displacement (vertical offset) not set correctly.
- Resolvent: Recalibrate label sensor, set label size and gap correctly, if using BarTender software, set vertical offset in printer driver.
- Left and right sides want to print content lost:
- Possible factors: Label size not set correctly.
- Resolvent: Set the correct label size.
- RTC time is incorrect when the printer is restarted:
- Possible factors: The battery is dead.
- Resolvent: Confirm the battery on the motherboard.
- Fold problem:
- Possible factors: Print head uneven pressure, label paper not installed correctly, incorrect print density, label paper feed is not correct.
- Resolvent: See pressure adjustment of print head, set appropriate label printing density, adjust label width adjuster to fit label width.
- Black label paper appears gray line:
- Possible factors: Print dirty head, rubber roller dirty.
- Resolvent: Clean print head, clean rubber roller.
- Print instability:
- Possible factors: Printer in Hex Dump mode.
- Resolvent: Turn the printer back on and off the dump mode.