Manual 2100-538A
Page 19 of 23
TROUBLESHOOTING
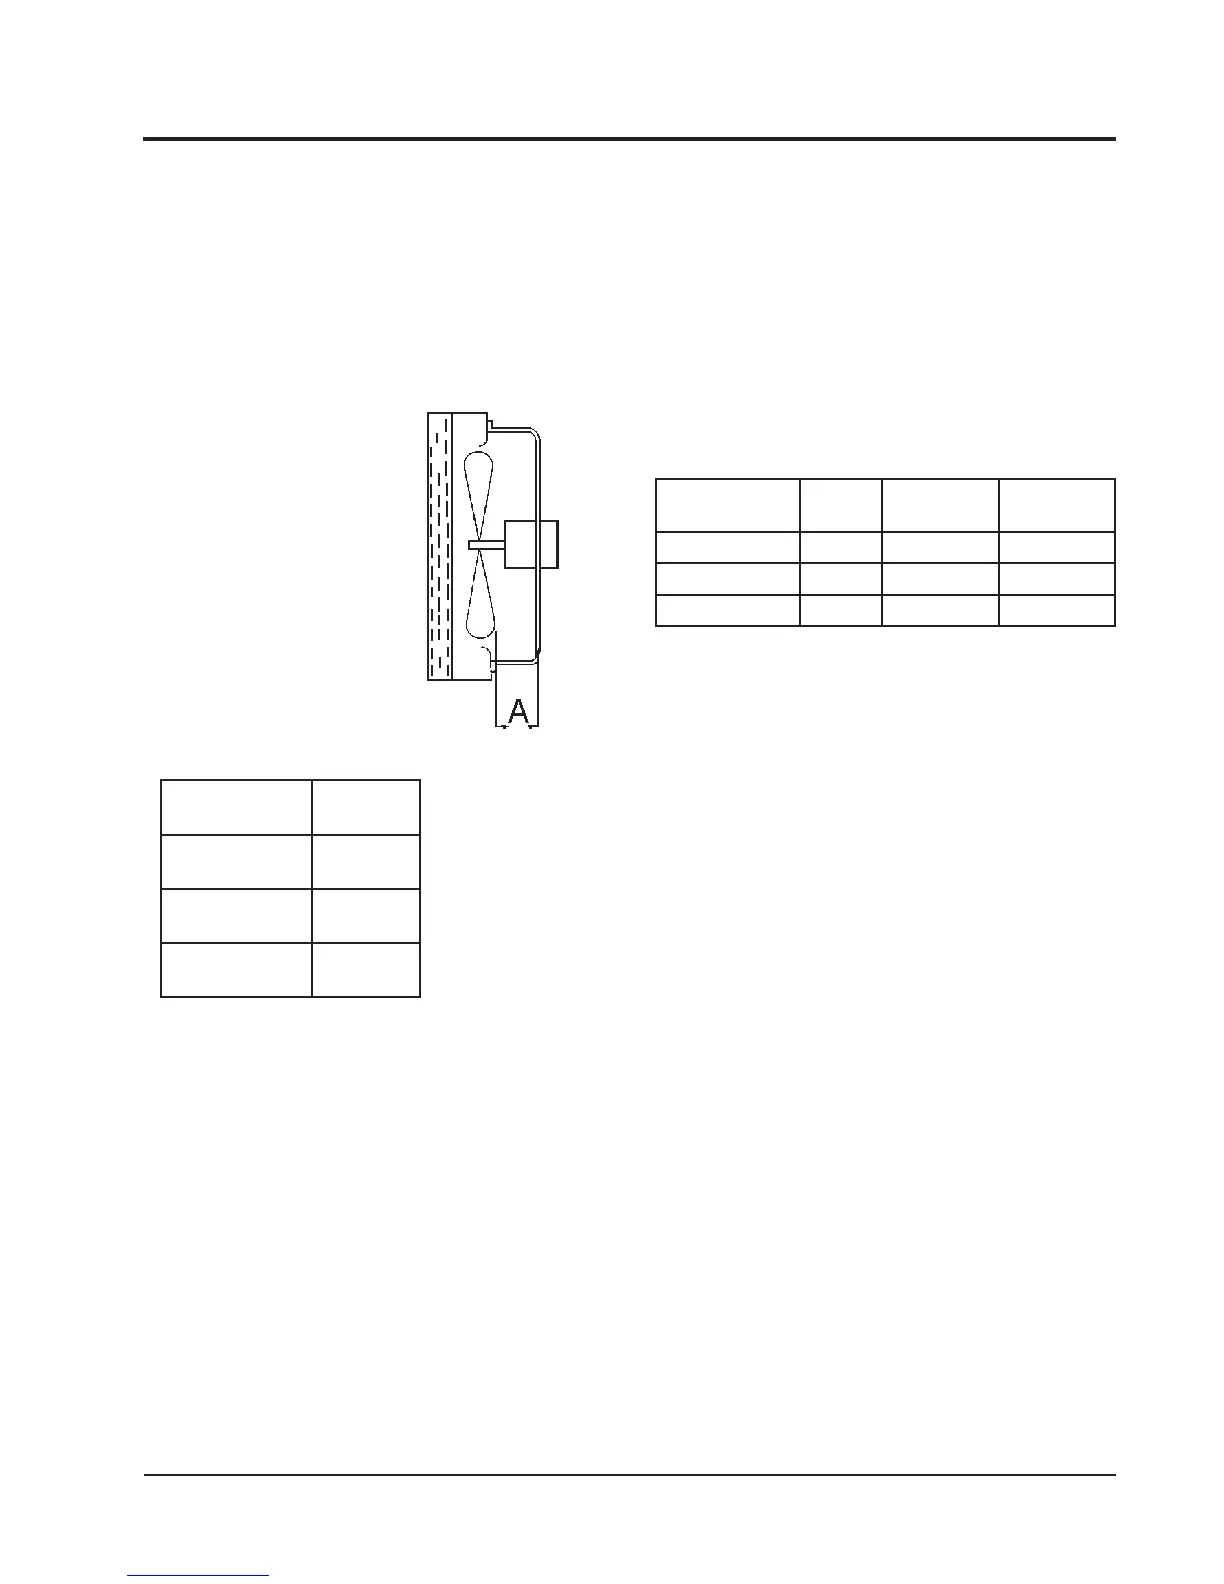
FIGURE 8
FAN BLADE SETTING
MIS-1724
TABLE 1
FAN BLADE DIMENSION
REMOVAL OF FAN SHROUD
1. Disconnect all power to the unit.
2. Remove the screws holding both grilles, one on each
side of unit, and remove grilles.
3. Remove screws holding fan shroud to condenser and
bottom. Nine (9) screws.
4. Unwire condenser fan motor.
5. Slide complete motor, fan blade, and shroud
assembly out the left side of the unit.
6. Service motor/fan as needed.
7. Reverse steps to reinstall.
REFRIGERANT CHARGE
The correct system R-410A charge is shown on the unit
nameplate. Optimum unit performance will occur with
a refrigerant charge resulting in a liquid subcooling as
shown in Table 2. If charge is in doubt, reclaim and
recharge to factory nameplate charge. Values are at
100% capacity.
TABLE 2
REFRIGERANT CHARGE
ledoM
detaR
wolfriA
F°59
gniloocbuS
F°28
gniloocbuS
1VL/R3W0011°91-61°41-21
1VL/R5W0071°8-5°7-4
1VL/R6W0071°51-21°31-9
ledoM
noisnemiD
A
1VR3W
1VL3W
"52.1
1VR5W
1VL5W
"57.1
1VR6W
1VL6W
"57.1
FAN BLADE SETTING DIMENSIONS
Shown in Figure 8 is the correct fan blade setting for
proper air delivery across the outdoor coil. Refer to
Table 1 for unit specific dimension.
Any service work requiring removal or adjustment in
the fan and/or motor area will require that the
dimensions below be checked and blade adjusted in or
out on the motor shaft accordingly.


 To Next Page